Layouts Overview
You can construct geo-specific banner notices that appear on your website to data subjects using the Layouts feature.
A layout is a uniquely configured banner notice that is assigned to a policy. Each policy can have one layout assigned at a time, but the layouts themselves can have multiple layers with any combination of assets to data subjects when they visit your website(s).
If you want to customize the layout to match your brand's design patterns, including using custom fonts and colors, you can follow our CSS customization guide. And if you need to localize the banner, you can check out our localization guide.
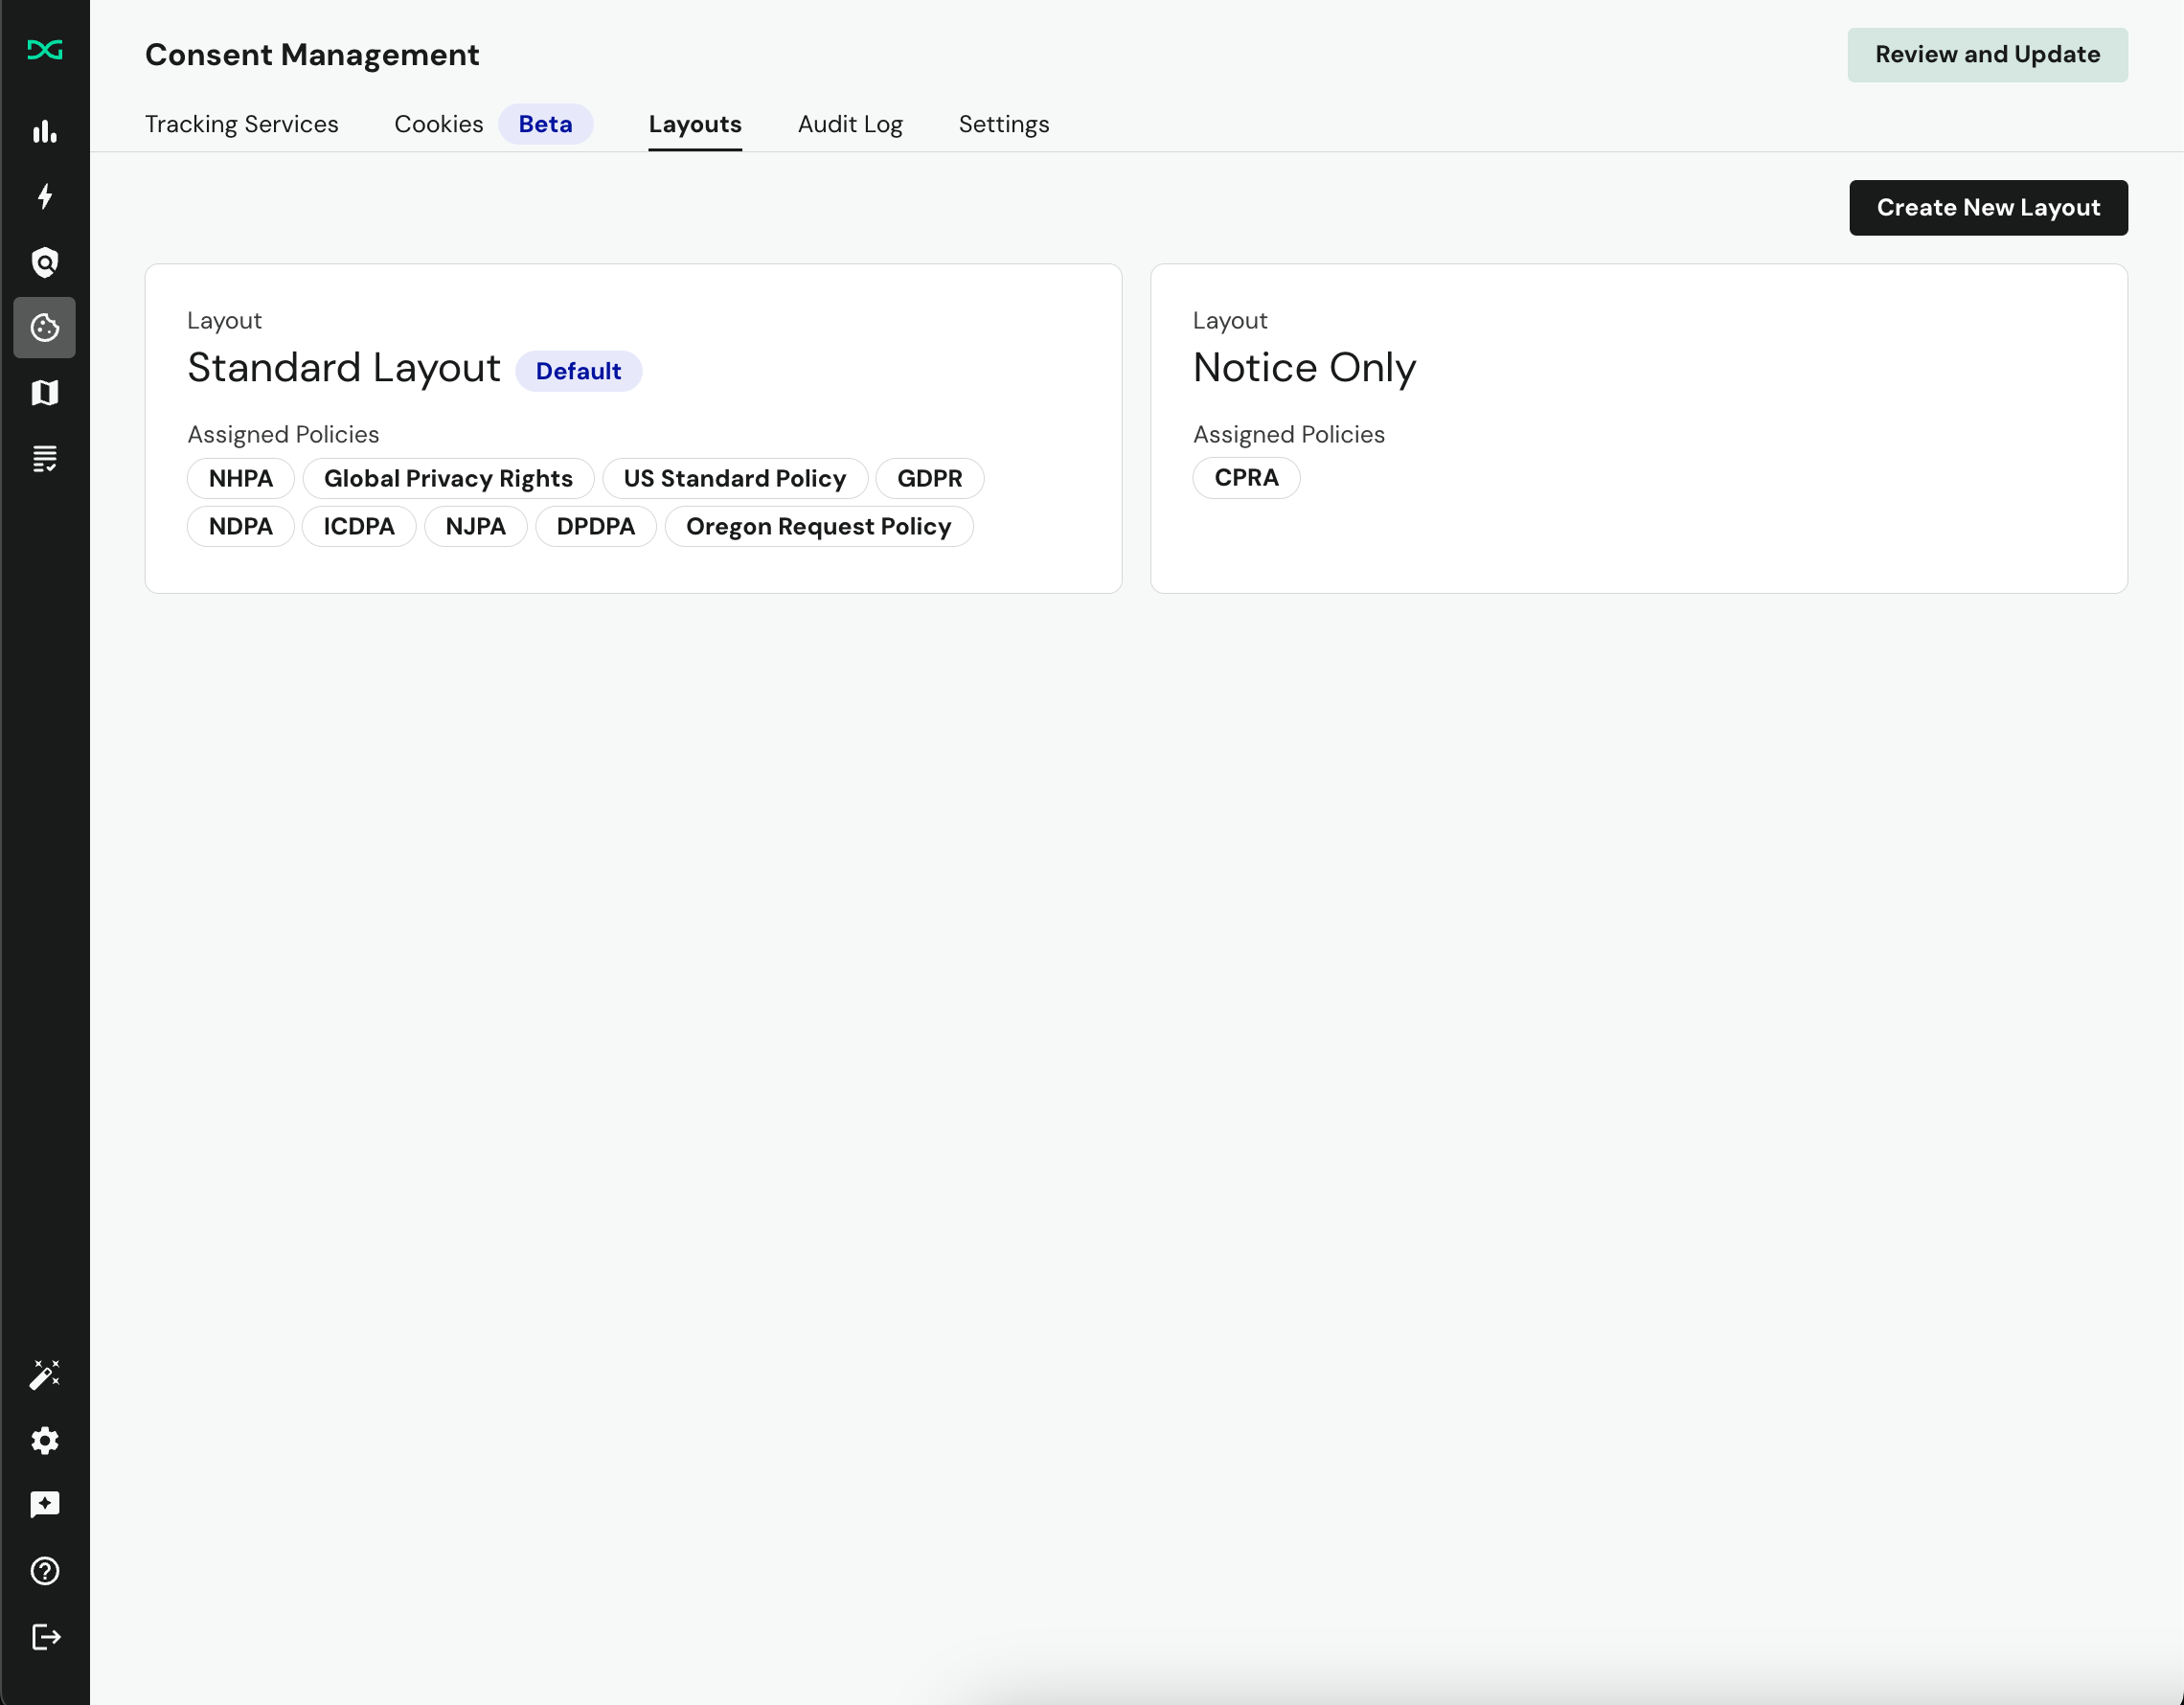
DataGrail Consent has two layouts available for editing and assignment to your policies, but you can create additional ones to provide more granular choices by policy:
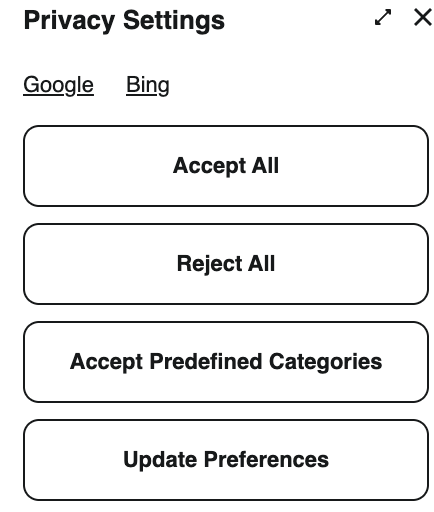
- The standard layout was designed to be a traditional consent banner that covers most aspects of the global requirements, providing three button actions and a categories layer for granular consent choices.
- The notice only layout showcases the ability to define a layer that provides a notice for tracking, with no action to open the second layer to make granular consent choices. Instead, you can link to the categories layer by referencing it's layer ID.
The standard layout is assigned as the default layout, which means it will render for any policies that do not have an explicitly assigned layout. You can change this mapping by policies in the Settings page.
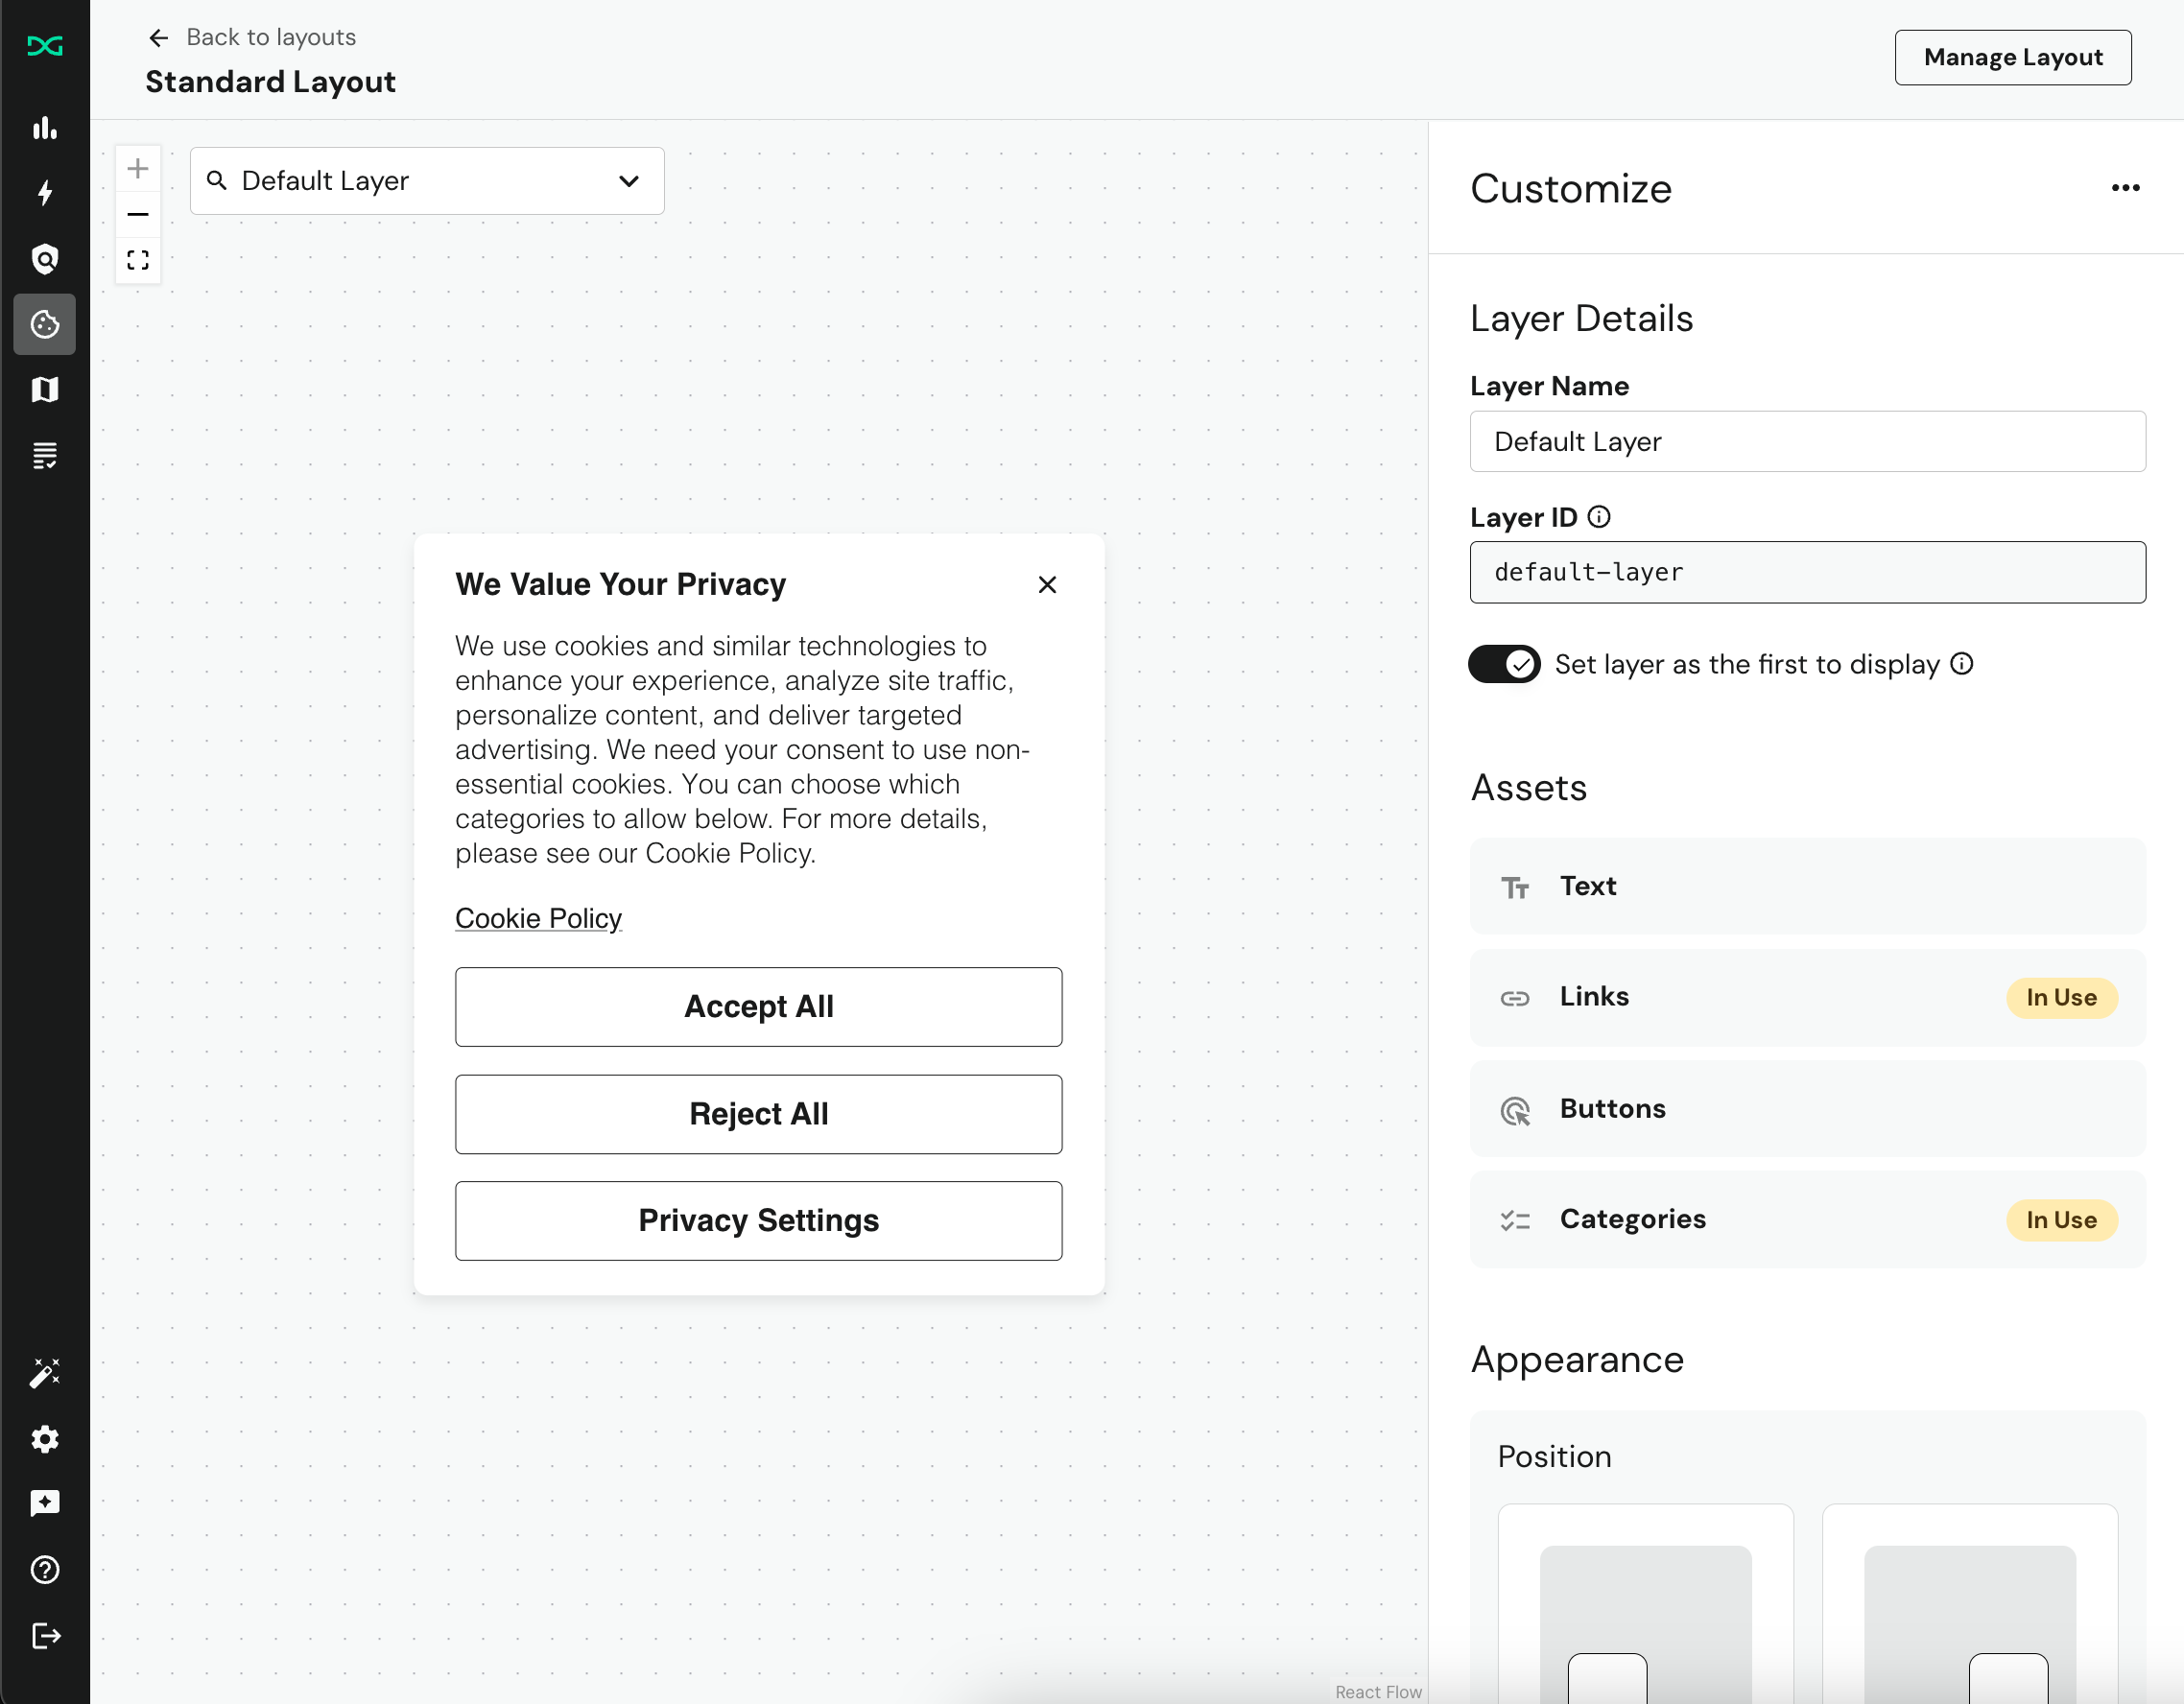
Layout Management
Use the Manage Layout button to name your layout and assign it to specific policies.
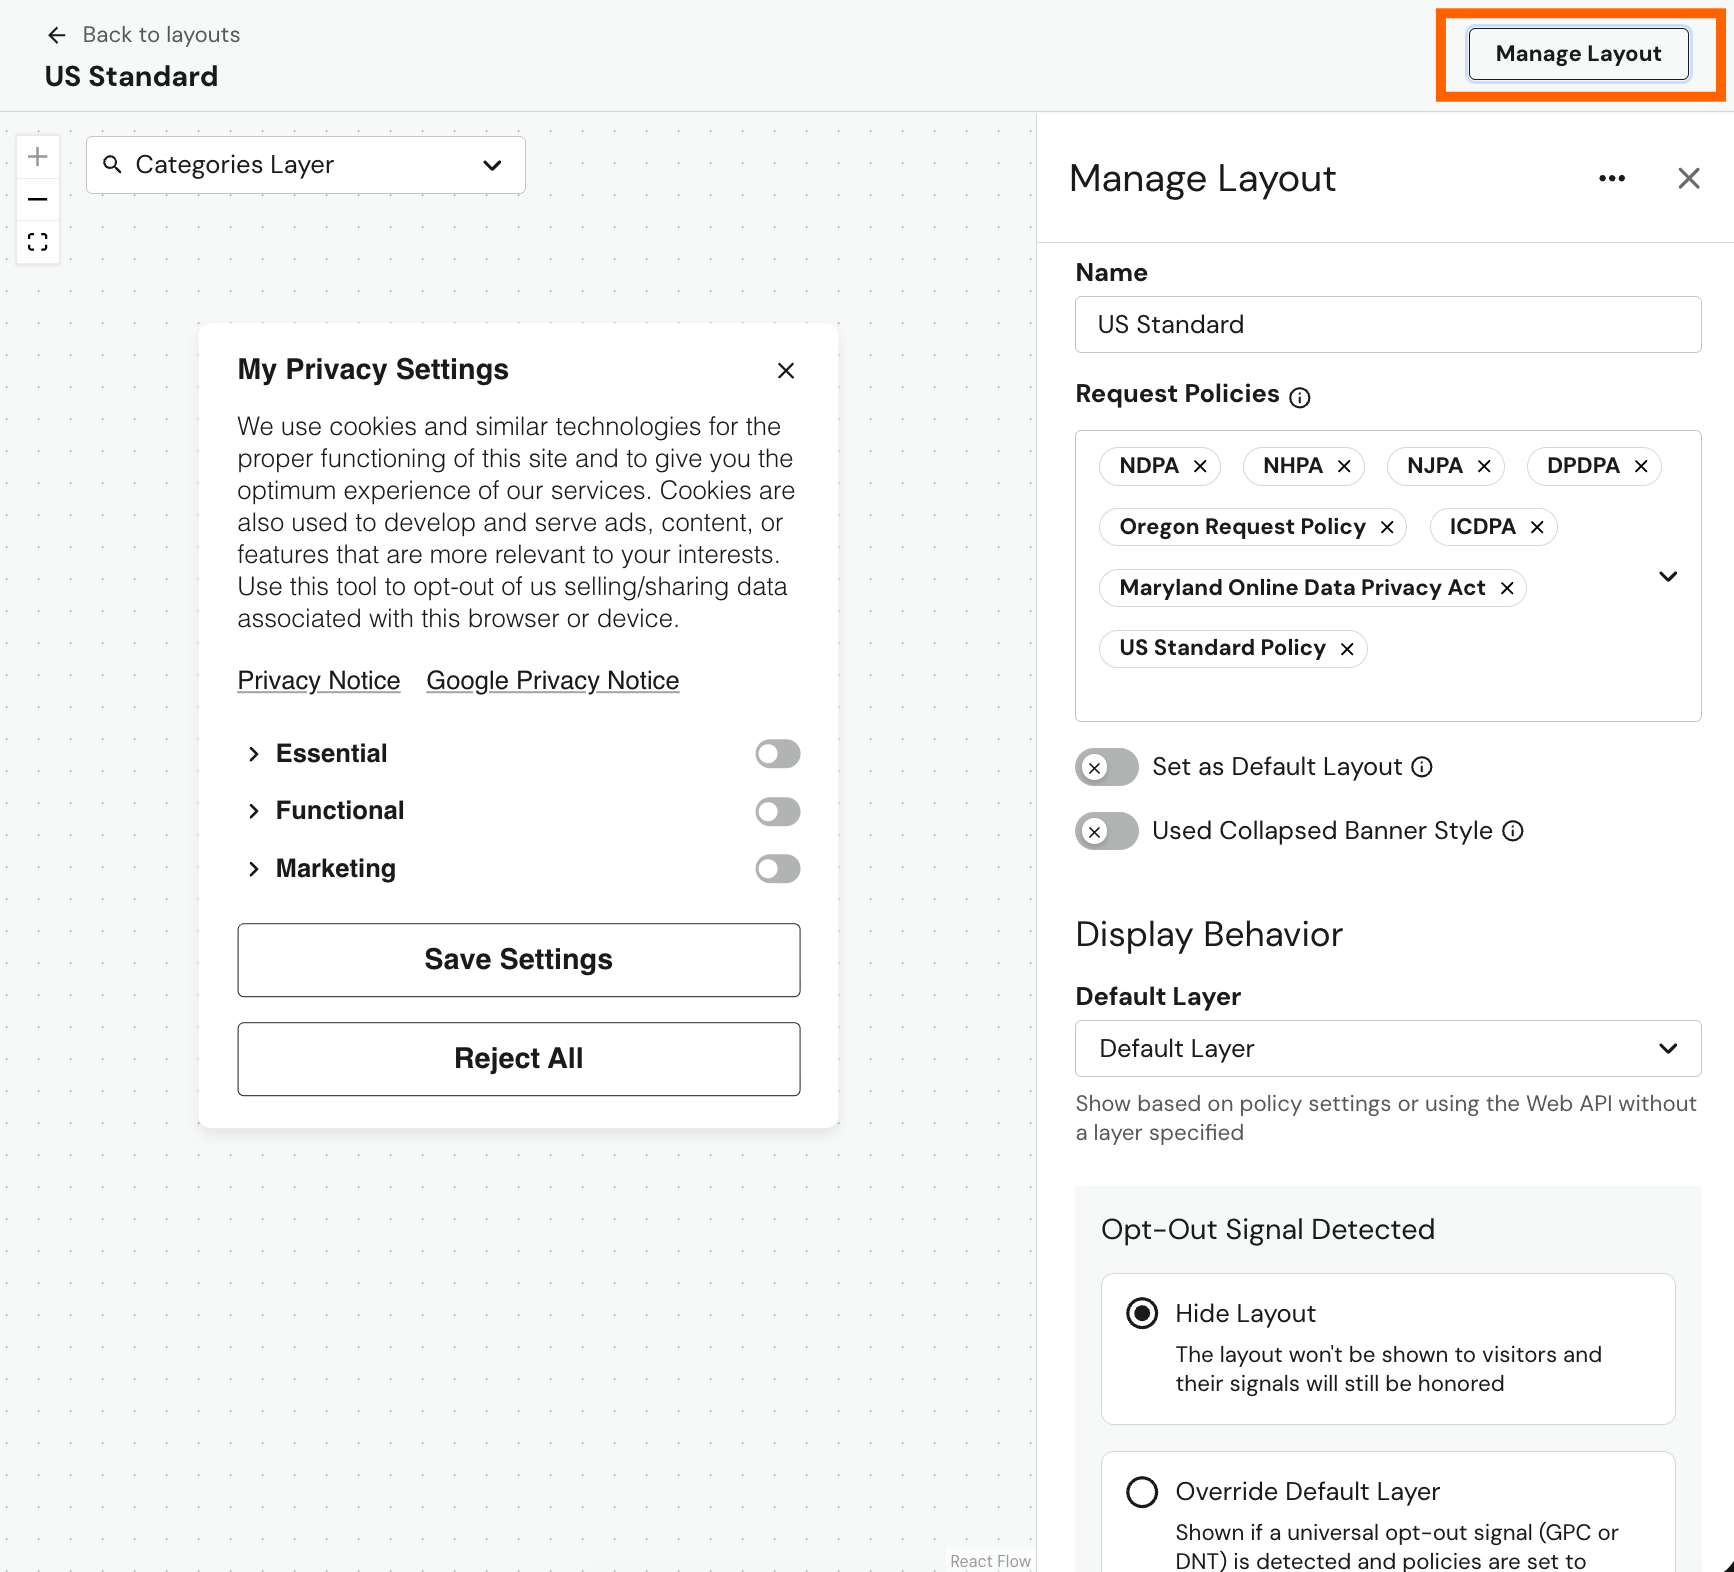
Display Behavior
You can set which layer is visible by default. This is the first layer that appears based on your policy settings, or when you call the showConsentBanner method without specifying a layer ID.
You can also control the layout behavior when a universal opt-out signal (such as GPC or DNT) is detected and honored. By default, the banner does not appear when an opt-out signal is detected.
Alternatively, you can specify a different default layer to display, such as a lightweight notice informing your data subjects that their opt-out signal is being honored.
Layers
A layout can have one or more layers which you can use to progressively disclose more privacy controls to data subjects, such as setting individual category preferences to disable specific sets of trackers and cookies.
When you first open the layout editor, you'll be able to review the default layout that we've defined for you. This default layout is based on past customer implementations and verified by our own legal teams. It features two layers:
- First Layer: This provides data subjects a notice of intent to track them and provide a personalized browsing experience. They are given three options to proceed on your website. This is the first layer that will be visible to data subjects if the banner is set to show on load (or what will appear as default if you set an anchor link to trigger the banner notice).
- Categories Layer: This layer reveals the specific categories of trackers/services they will consent to, along with the ability to enable/disable specific categories to customize their consent choices.
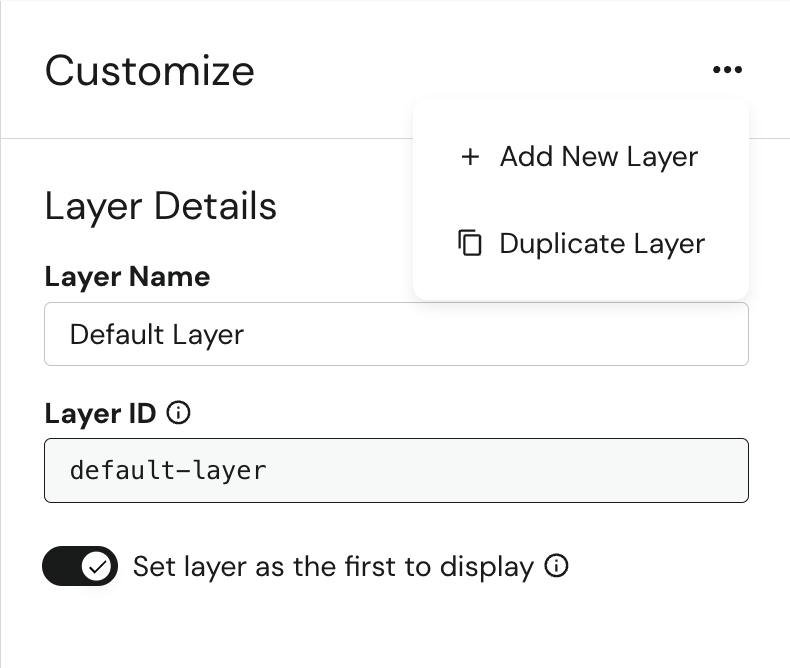
You can create, delete, and duplicate layers from the layout using the contextual menu on the right hand side:
Assets
Each layer is constructed with a specific set of assets which have their own customization capabilities to make the layout unique to your brand's needs.
You can add assets to a layer by dragging and dropping the asset onto the visible layer:
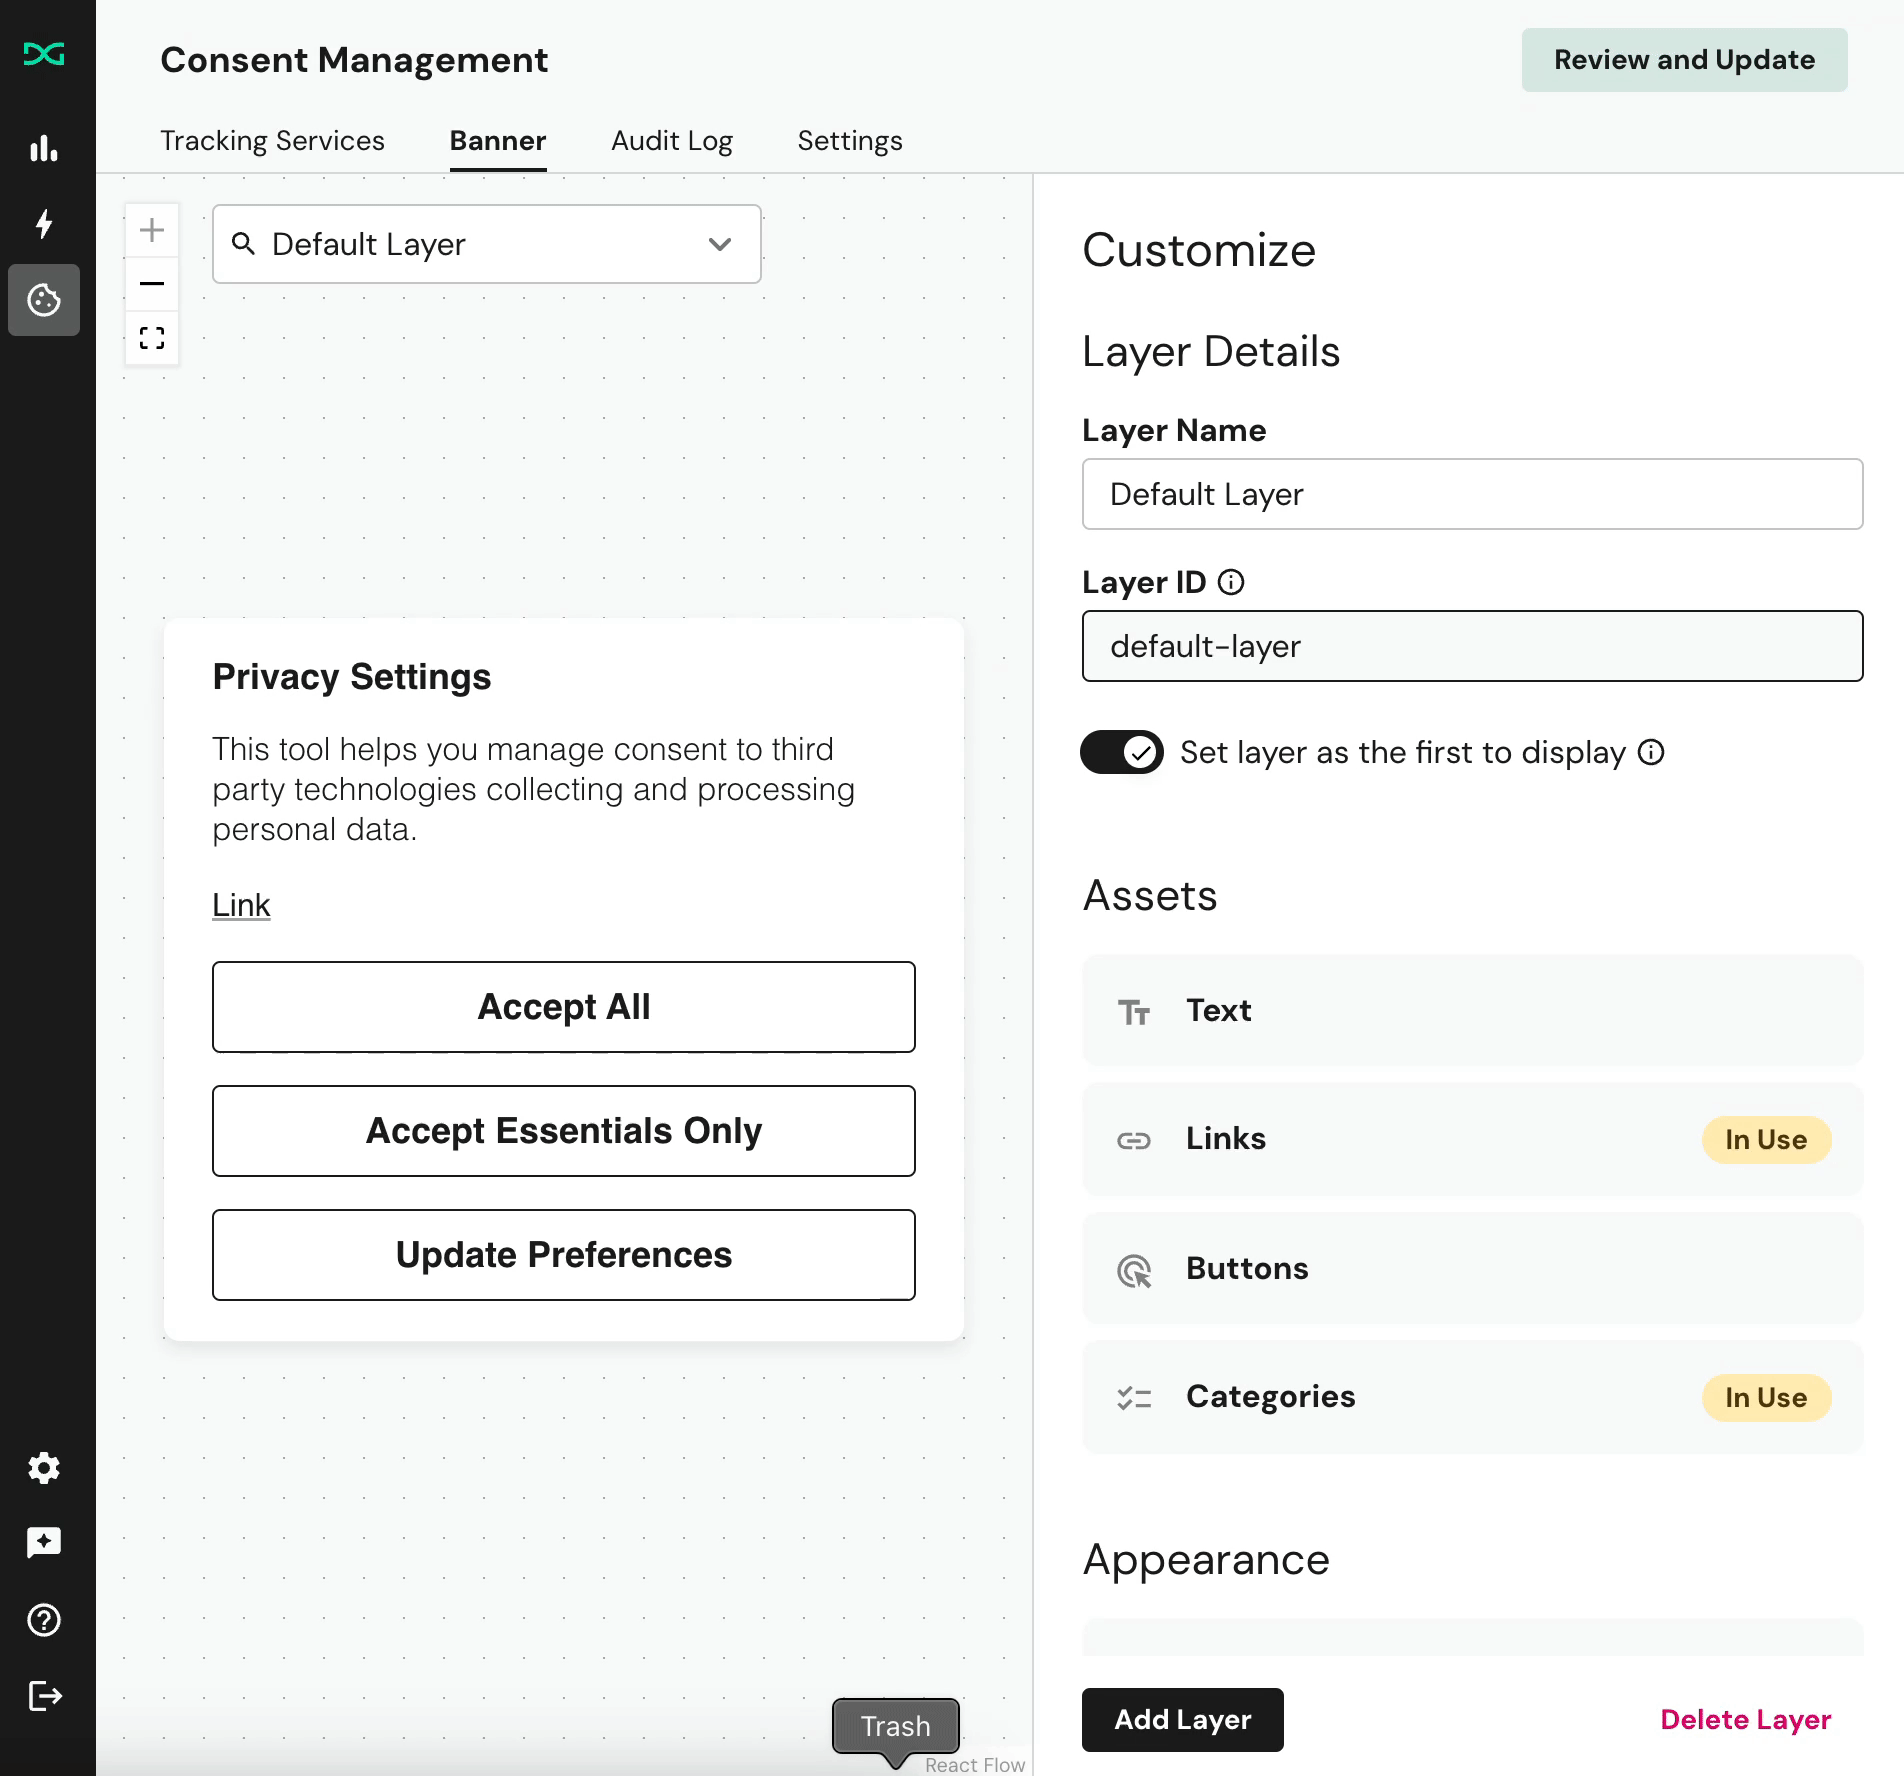
If you want to delete an asset, you can do so by scrolling to the bottom of the asset.
Text Asset
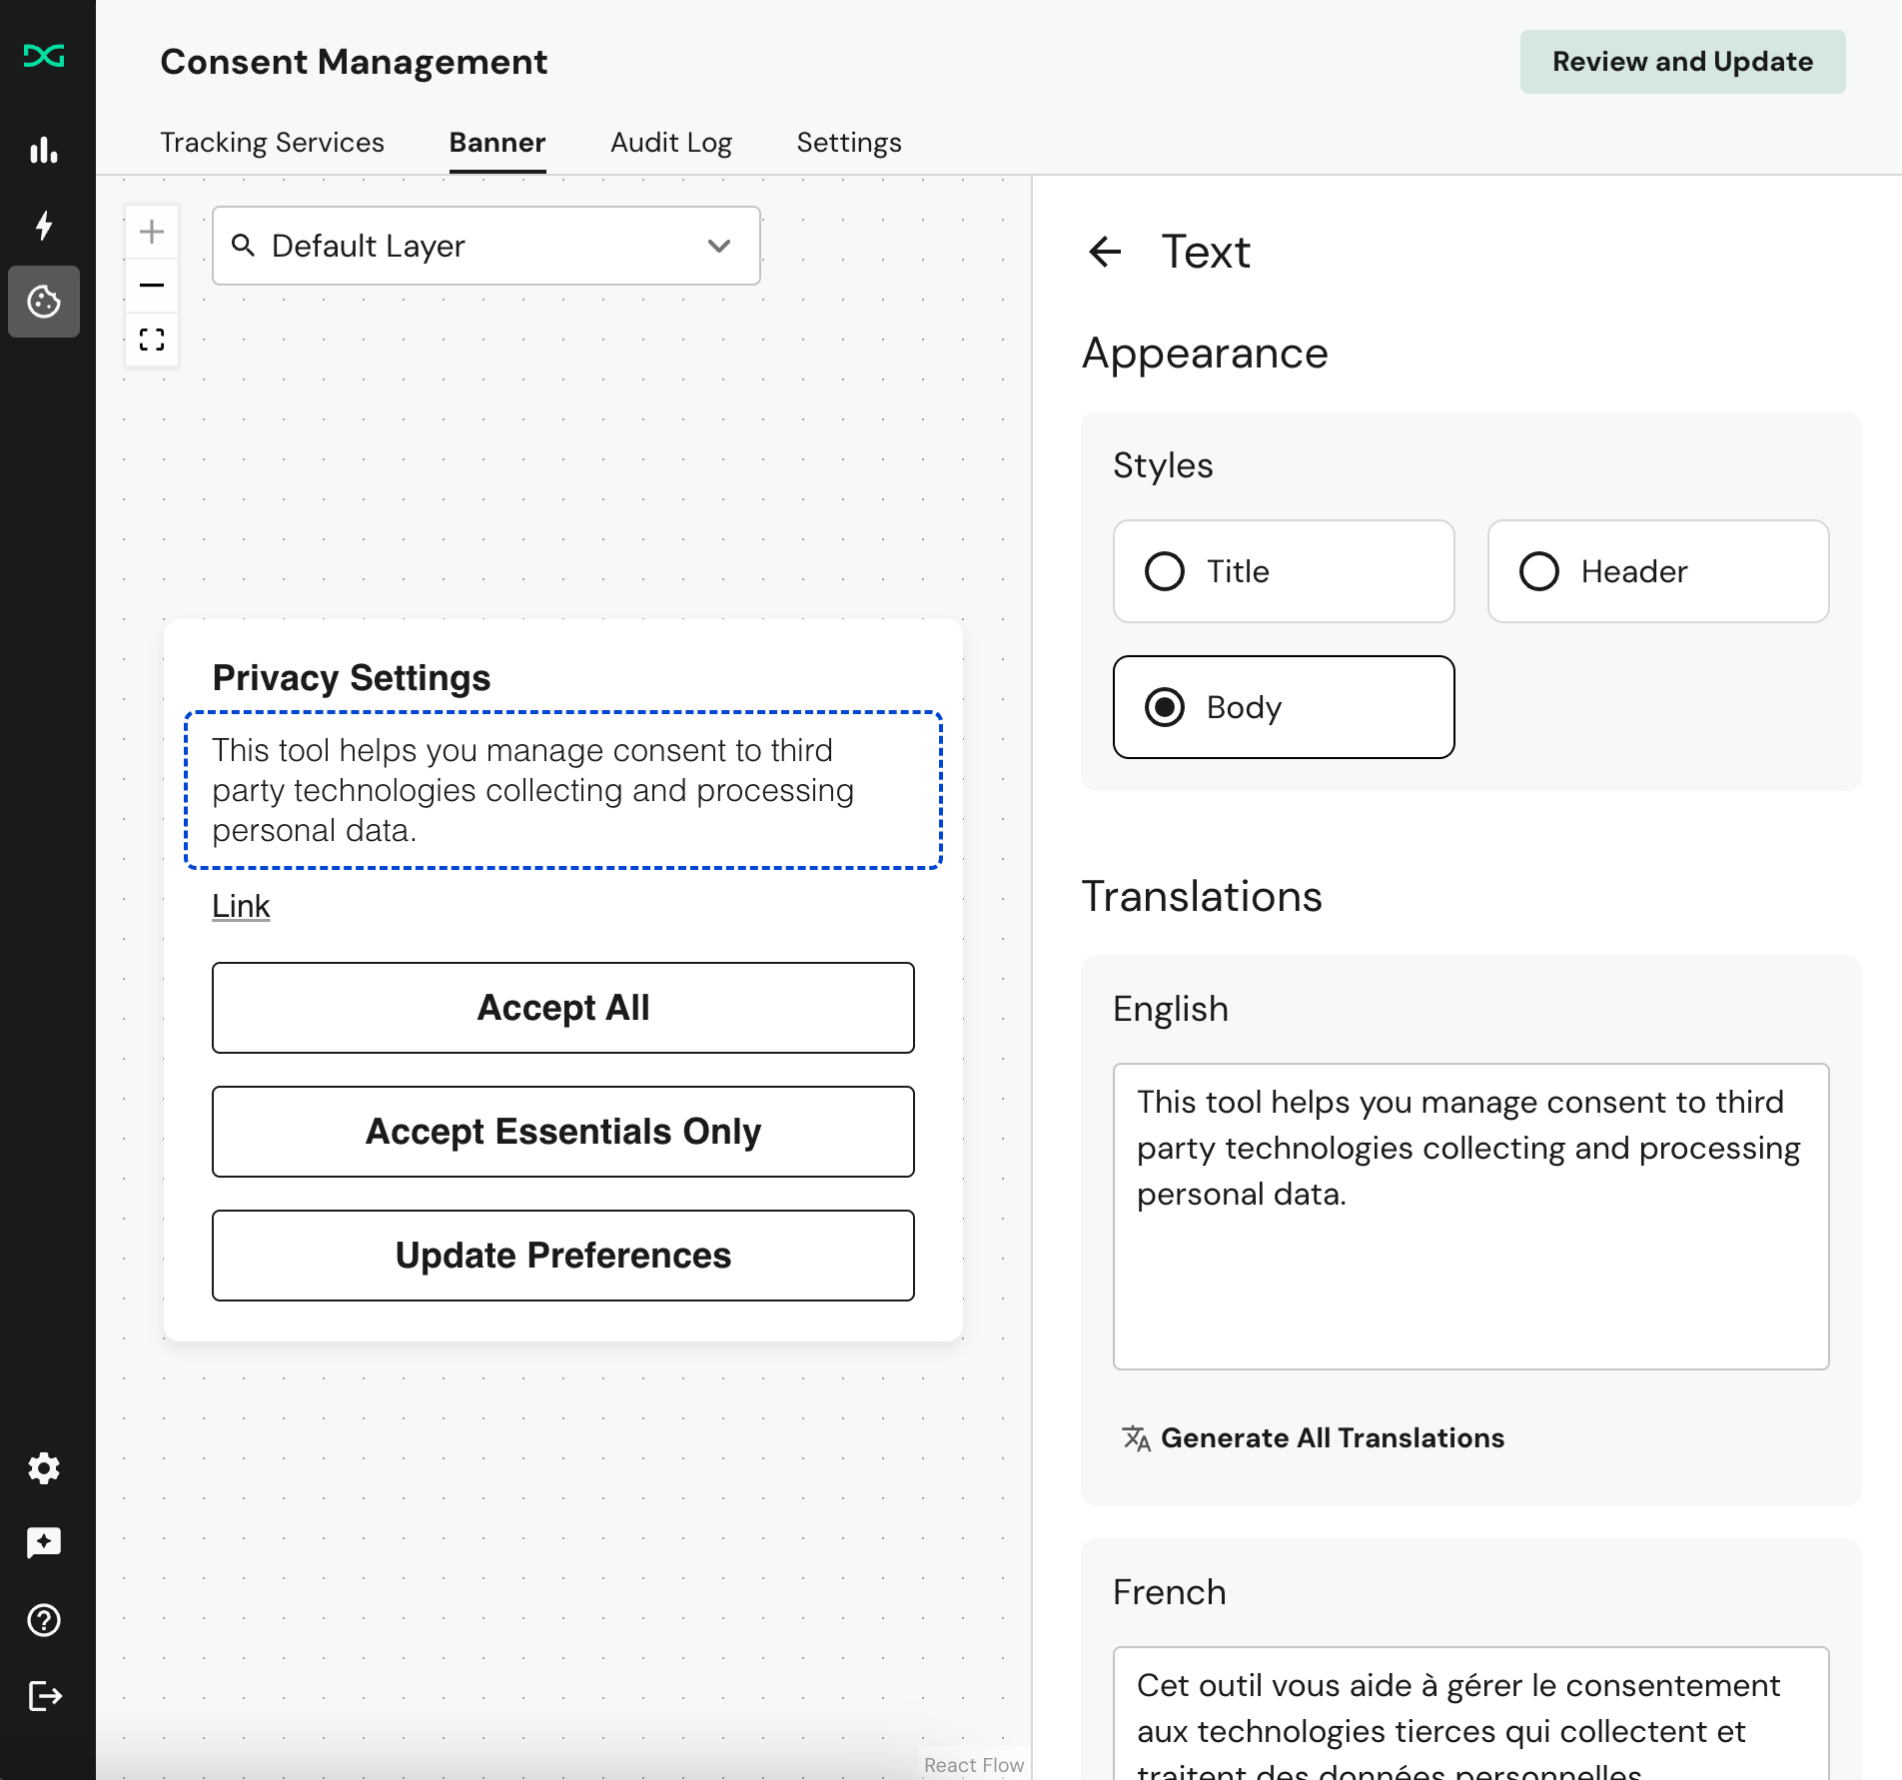
Text assets can be used to title the layout, create headers to separate content, or write out body copy to inform data subjects on their privacy rights for your website. All text can be localized in the languages enabled using our localization feature.
Body text supports rich text formatting through a built-in editor. You can apply bold, italic, and underline styling, insert hyperlinks, and create bulleted or numbered lists. The formatting toolbar appears when editing a body text asset. Title and header text styles remain plain text.
Rich text formatting carries over to all translated versions of the text and renders consistently across web, iOS, and Android banner implementations.
For security, all HTML attributes are stripped from rich text content except href on links. Inline styles, classes, IDs, event handlers, and other attributes are automatically removed when content is saved. If you paste content from an external source that includes these attributes, they will not be preserved. Use the CSS customization approach to style rich text elements instead.
Link Asset
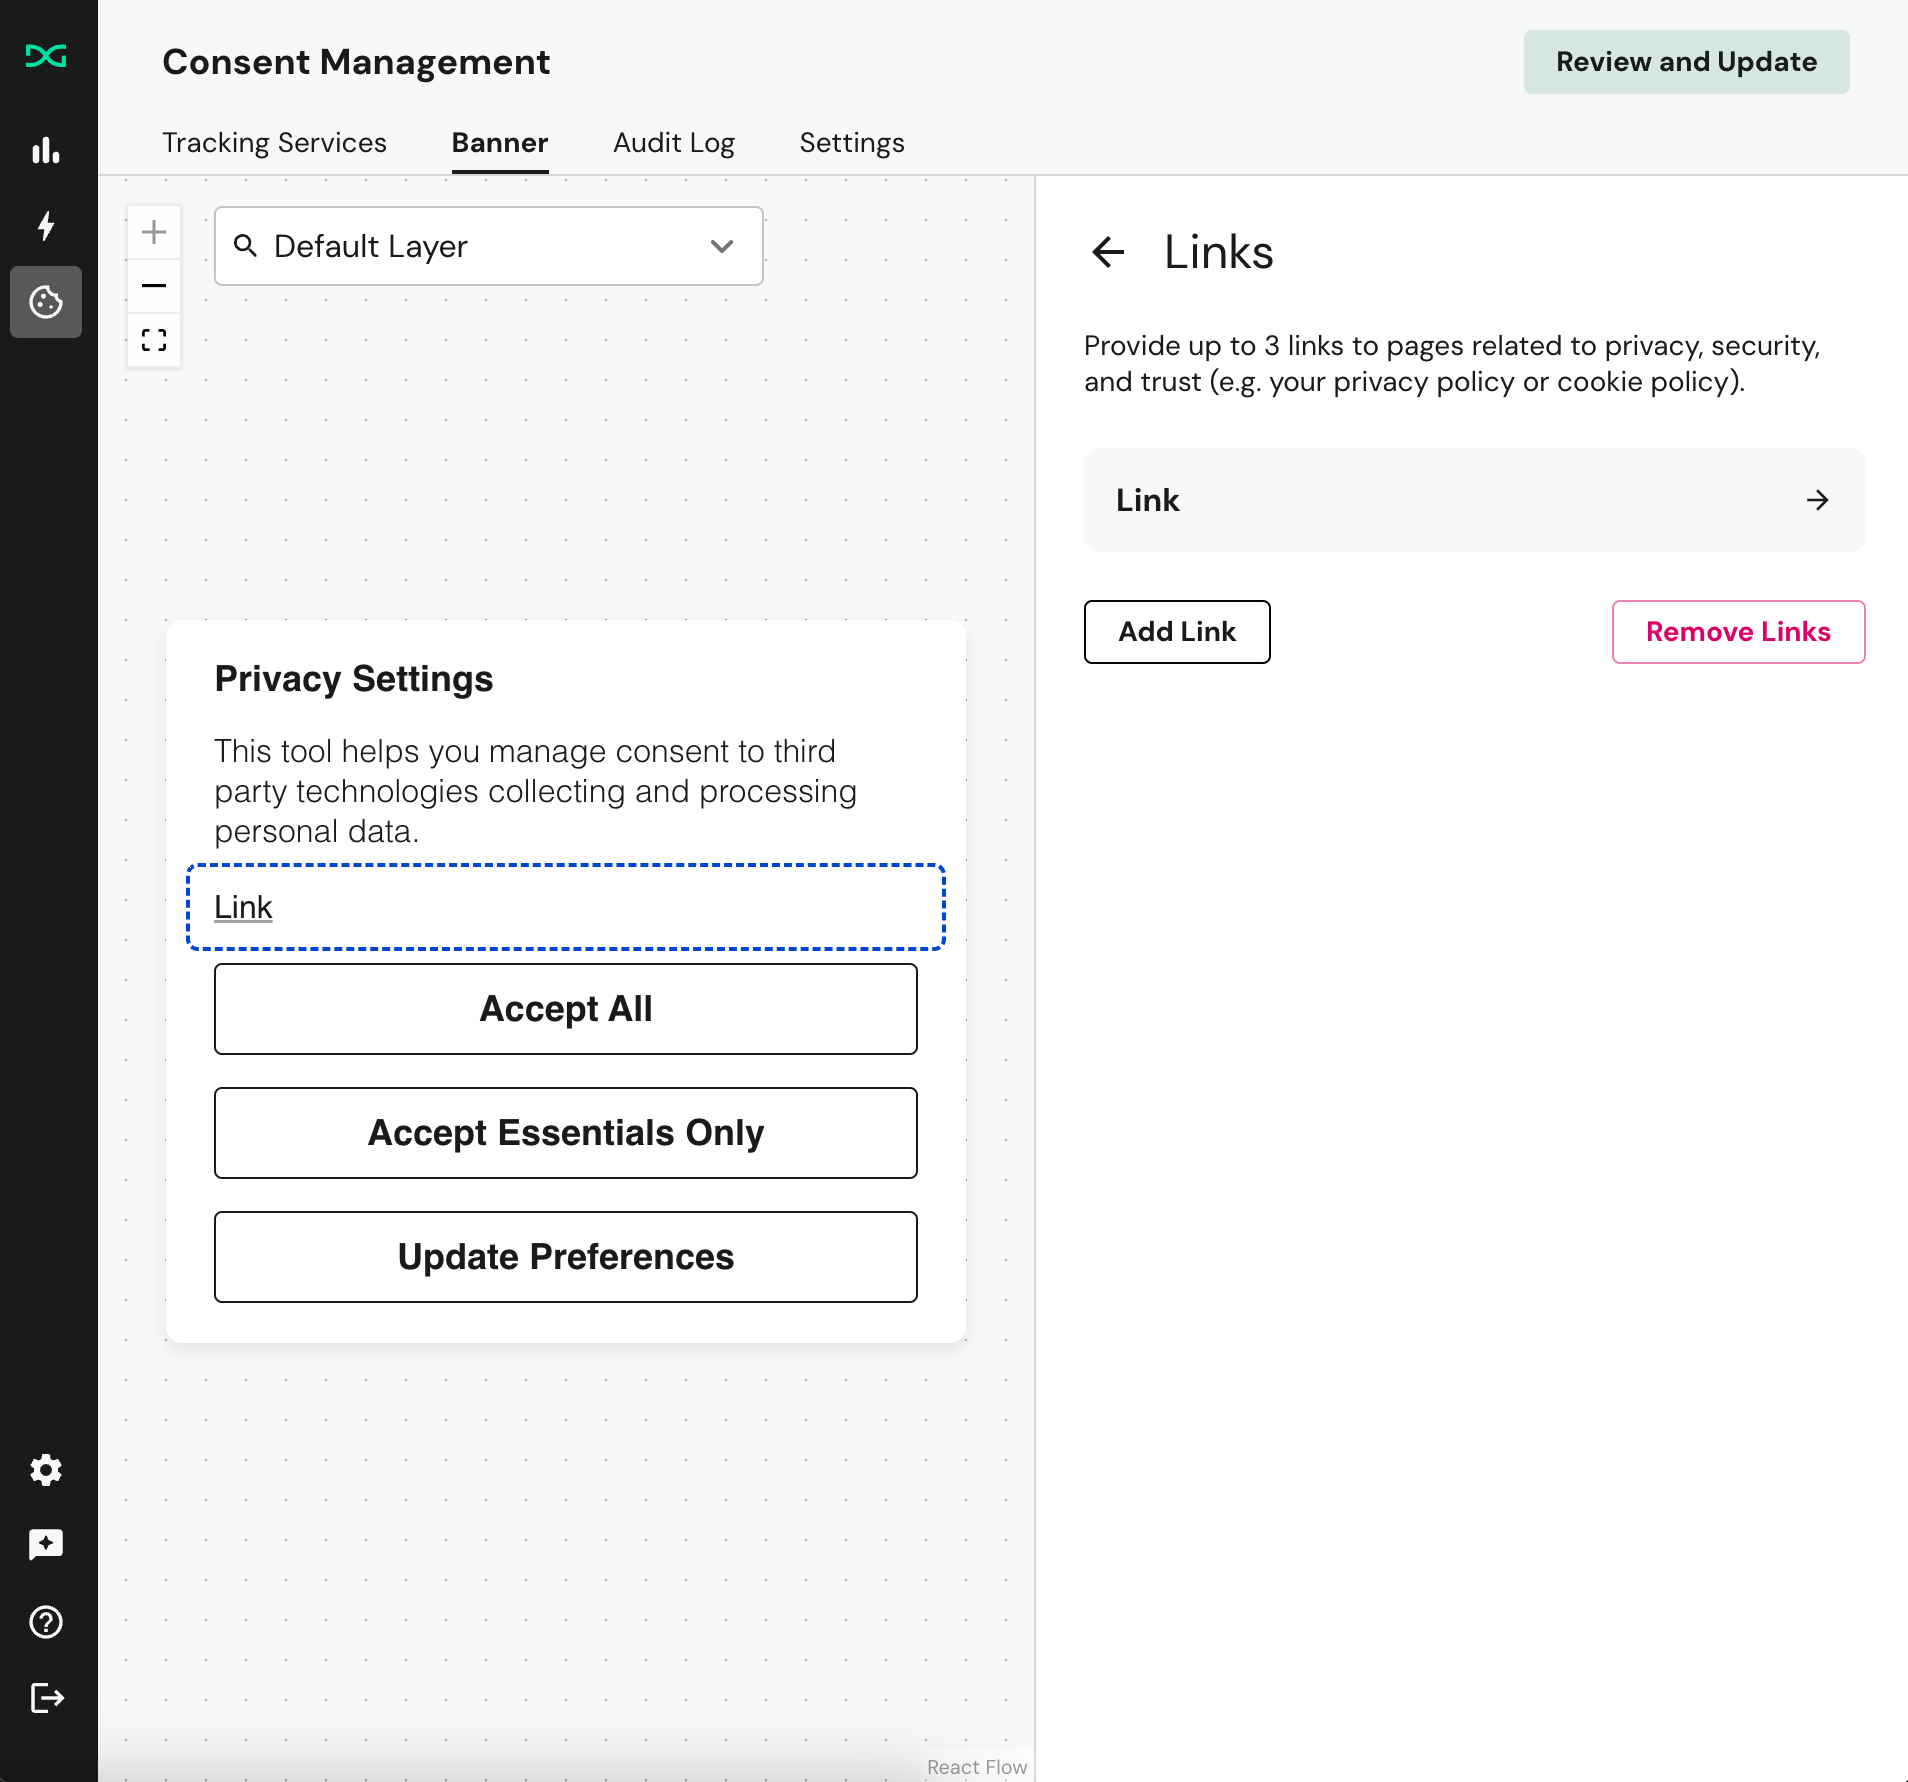
Links are typically used to share additional information that would be too verbose for this notice that appears to all visitors of your website, like your full privacy policy, the offline opt-out form, or other information related to building trust with your users. You can add and localize as many links as you want in for each link asset.
Button Asset
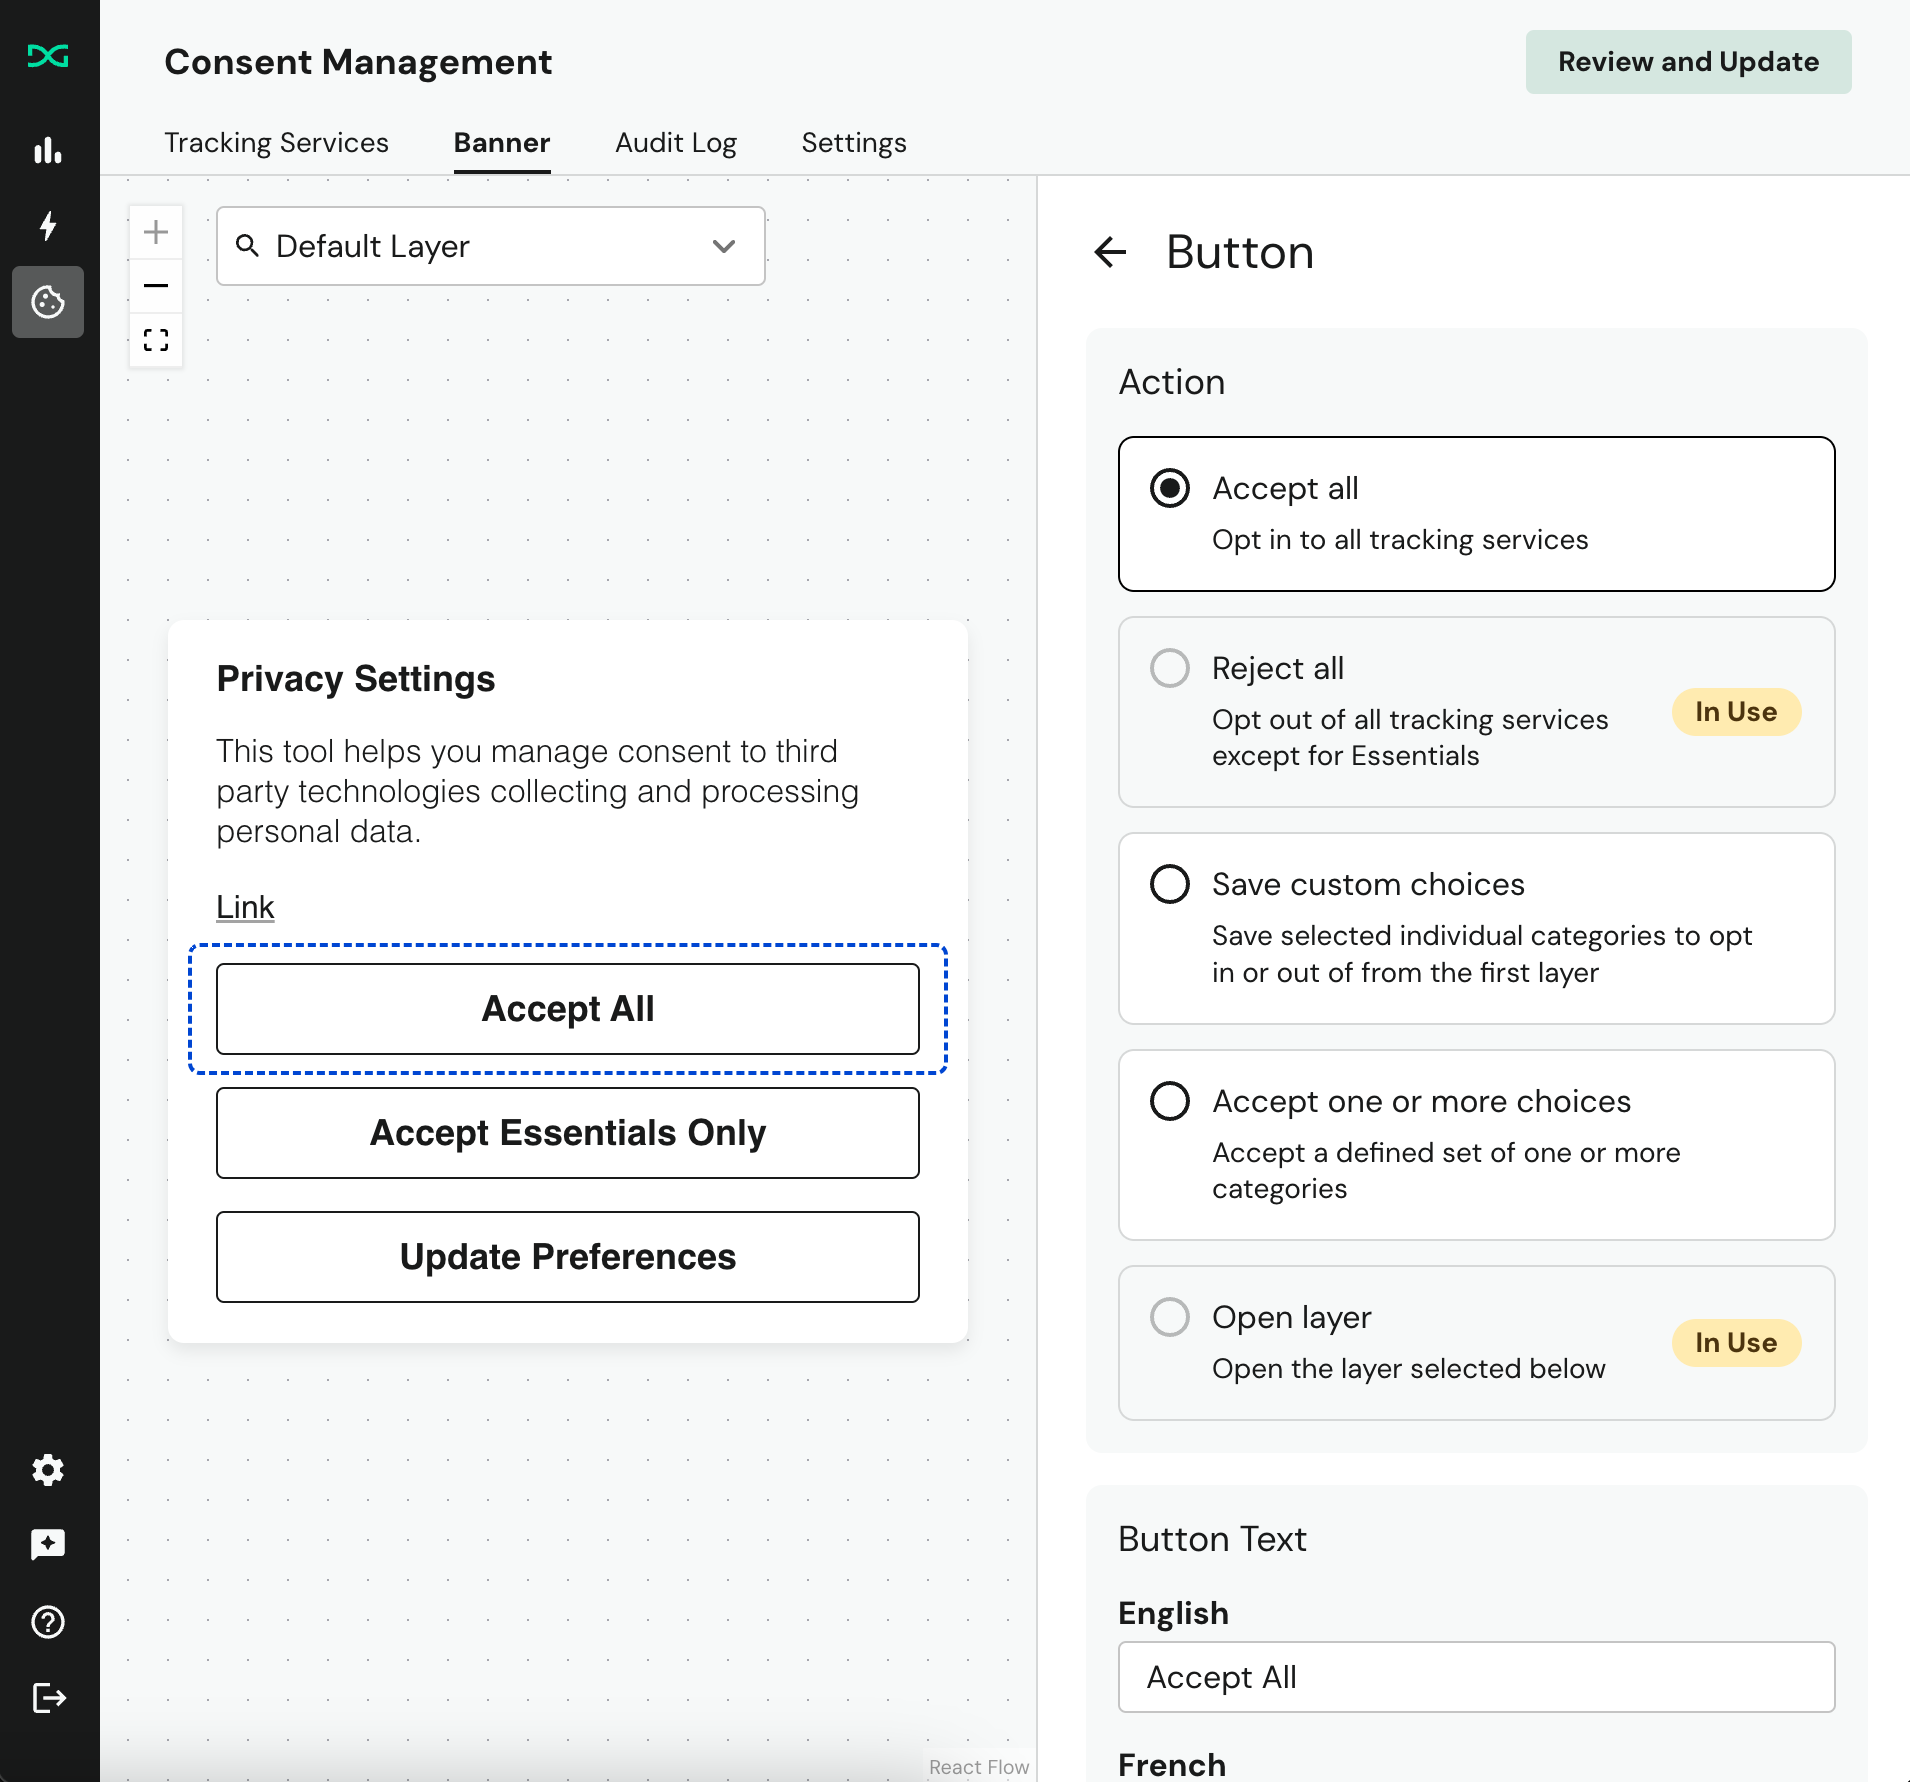
Buttons are used to map actions that generally either accept categories of trackers/cookies from running on your website or to link to other layers you have created as part of the layout.
Category Asset
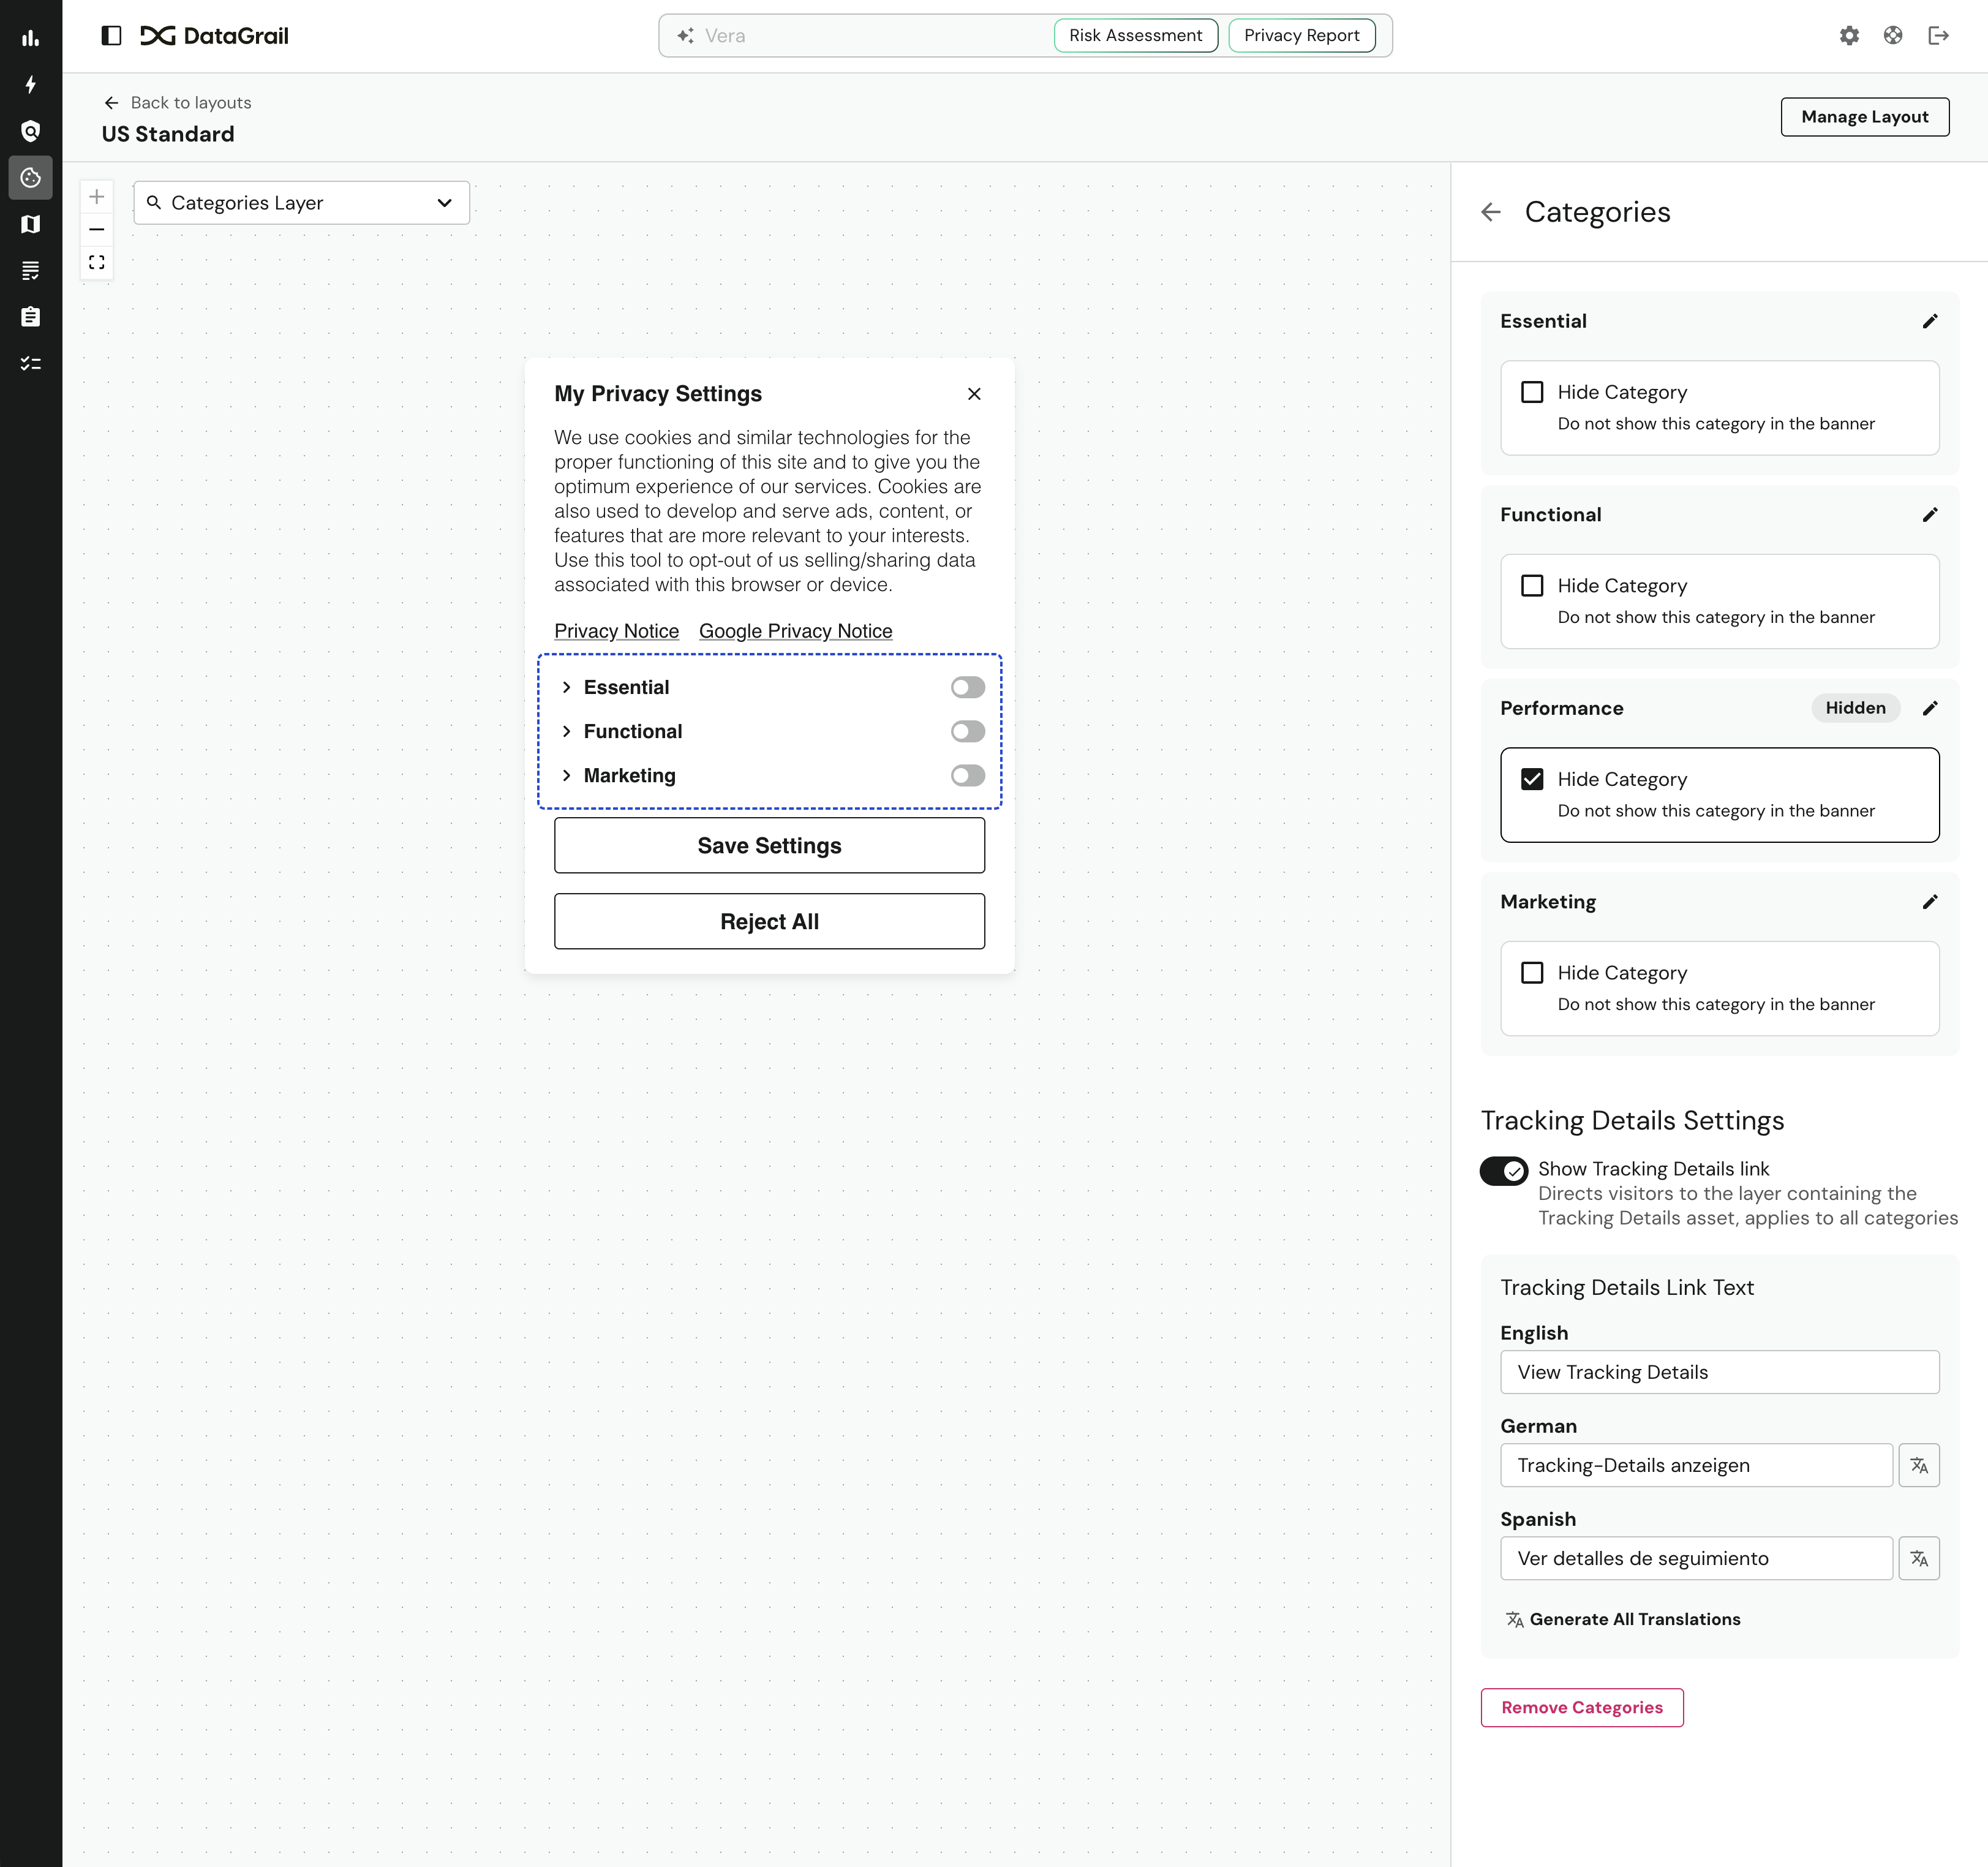
You can allow data subjects to make granular choices on which categories of trackers/cookies they want to opt in to. You must have the button asset with the action to save custom choices on the same layer for the choices to be saved.
Category descriptions support the same rich text formatting as body text assets — bold, italic, underline, hyperlinks, and lists — to help you clearly communicate what each category covers.
By default, we will reveal all categories/services that DataGrail Consent has built into the product for selection. In the future, you'll be able to create additional category purposes that can map to category selections within this asset.
Browser Signal Notice Asset
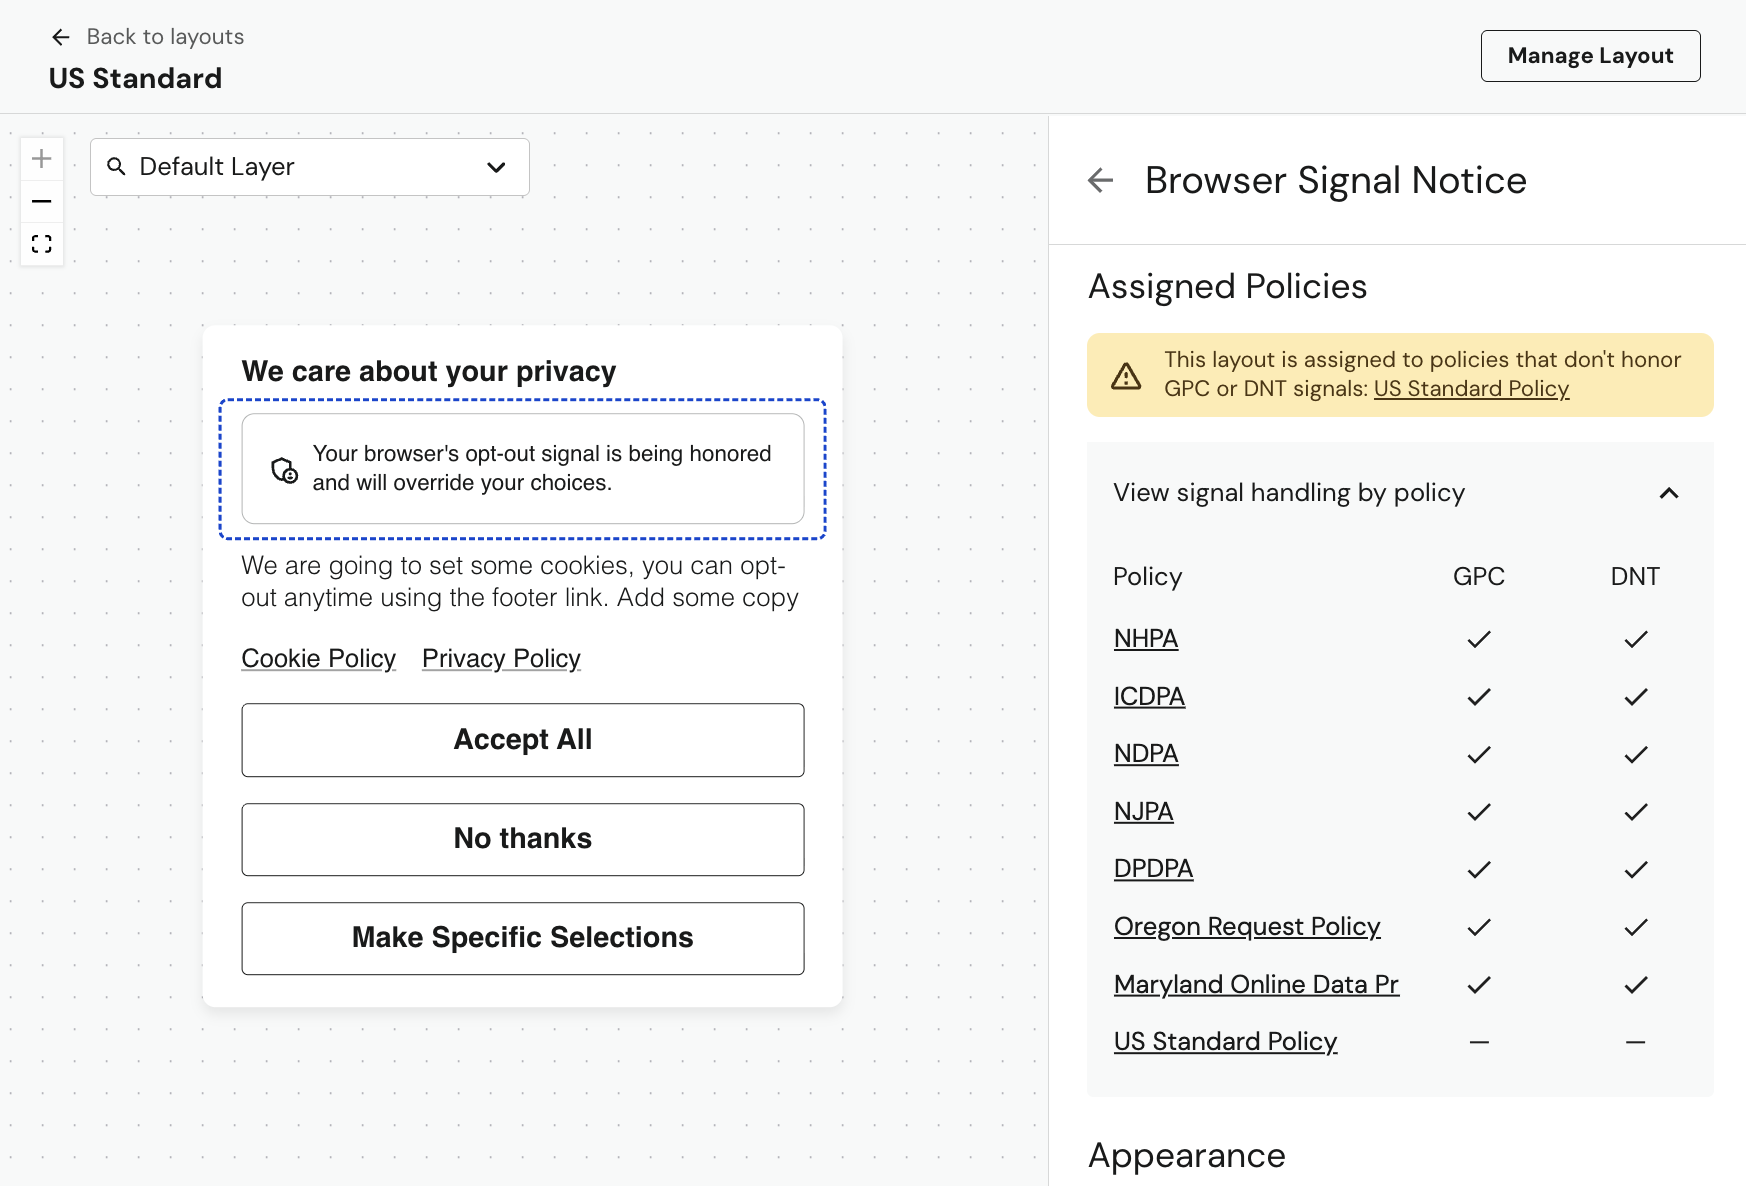
The Browser Signal Notice asset allows you to conditionally display a notice when a universal opt-out signal (such as GPC or DNT) is received and honored.
The asset configuration pane will warn you if the policies assigned to this layout are not configured to honor browser opt-out signals. When the policy does not honor the signal, this asset will not appear in the banner.
We automatically translate the default text for this asset.
This feature is recommended for compliance with Section 7025(c)(6) of the CCPA.
You can also configure how the entire layout behaves when an opt-out signal is detected. See Position above for more details.
Tracking Details Asset
![]()
The Tracking Details asset allows you to list service and cookie tracking information across your consent categories.
- Use the Show Tracking Services toggle to control whether services/tags managed in Tracking Services are visible in the list.
- Use the Show Cookies toggle to control whether cookies managed in Cookies are visible in the list.
- Select Show Icons to display icons next to each list item, indicating whether it is a cookie or tracking service.
- Choose to group by name or vendor to organize how services and cookies appear in the list. Vendor grouping makes the list more manageable when you have dozens of rules and services to track.
It is best practice to use the Tracking Details asset on its own layer and link to it from another one on the banner. The Tracking Details layer should use the same Position as the layer it is linked from for a seamless experience.
Each item in the list will be expandable and include the following information:
| Field | Description |
|---|---|
| Category | The category the service/cookie is managed by in DataGrail consent. |
| Type | Either "Tracking Service" or "Cookie". |
| Match criteria | The cookie matching rule. |
| Vendor | The vendor you have defined for the service/cookie. |
| Retention | The retention period (seconds) you have defined for a cookie rule. |
| Description | The description you have defined for the service/cookie. |
You can additionally link each category on your Categories asset to the Tracking Details layer, if it is present. Translations must be generated for the Tracking Details Link Text when this feature is used and translations are enabled.
![]()
Language Asset
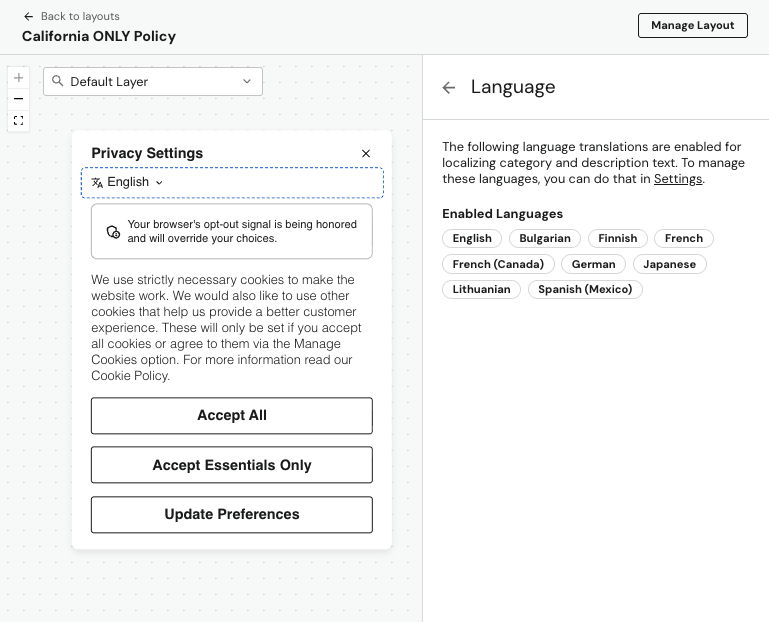
The Language Asset displays the translations currently enabled for your banner and allows data subjects to select their preferred language. It is an always-on component — it cannot be disabled or removed from a layer — so no additional configuration is required to activate it.
Like other assets, the Language Asset can be dragged and dropped to reposition it within your layer.
How it appears in the preview:
- If no languages are configured, or if only English is set up, the asset will render without a dropdown caret.
- If languages beyond English are enabled, a dropdown caret will appear, allowing data subjects to switch between available languages.
The Language Asset card always displays an "In Use" badge, reflecting its status as a permanent component of the layout.
Selecting the Language Asset in the layout editor opens a details panel on the right, which shows:
- A list of all enabled language translations for your banner.
- A direct link to manage your language settings in Settings.
To add or remove languages, navigate to Settings from the link provided in the asset panel. Changes made there will automatically be reflected in the Language Asset.
Appearance
You have a few additional appearance options within the layout builder, which can be augmented with CSS customization.
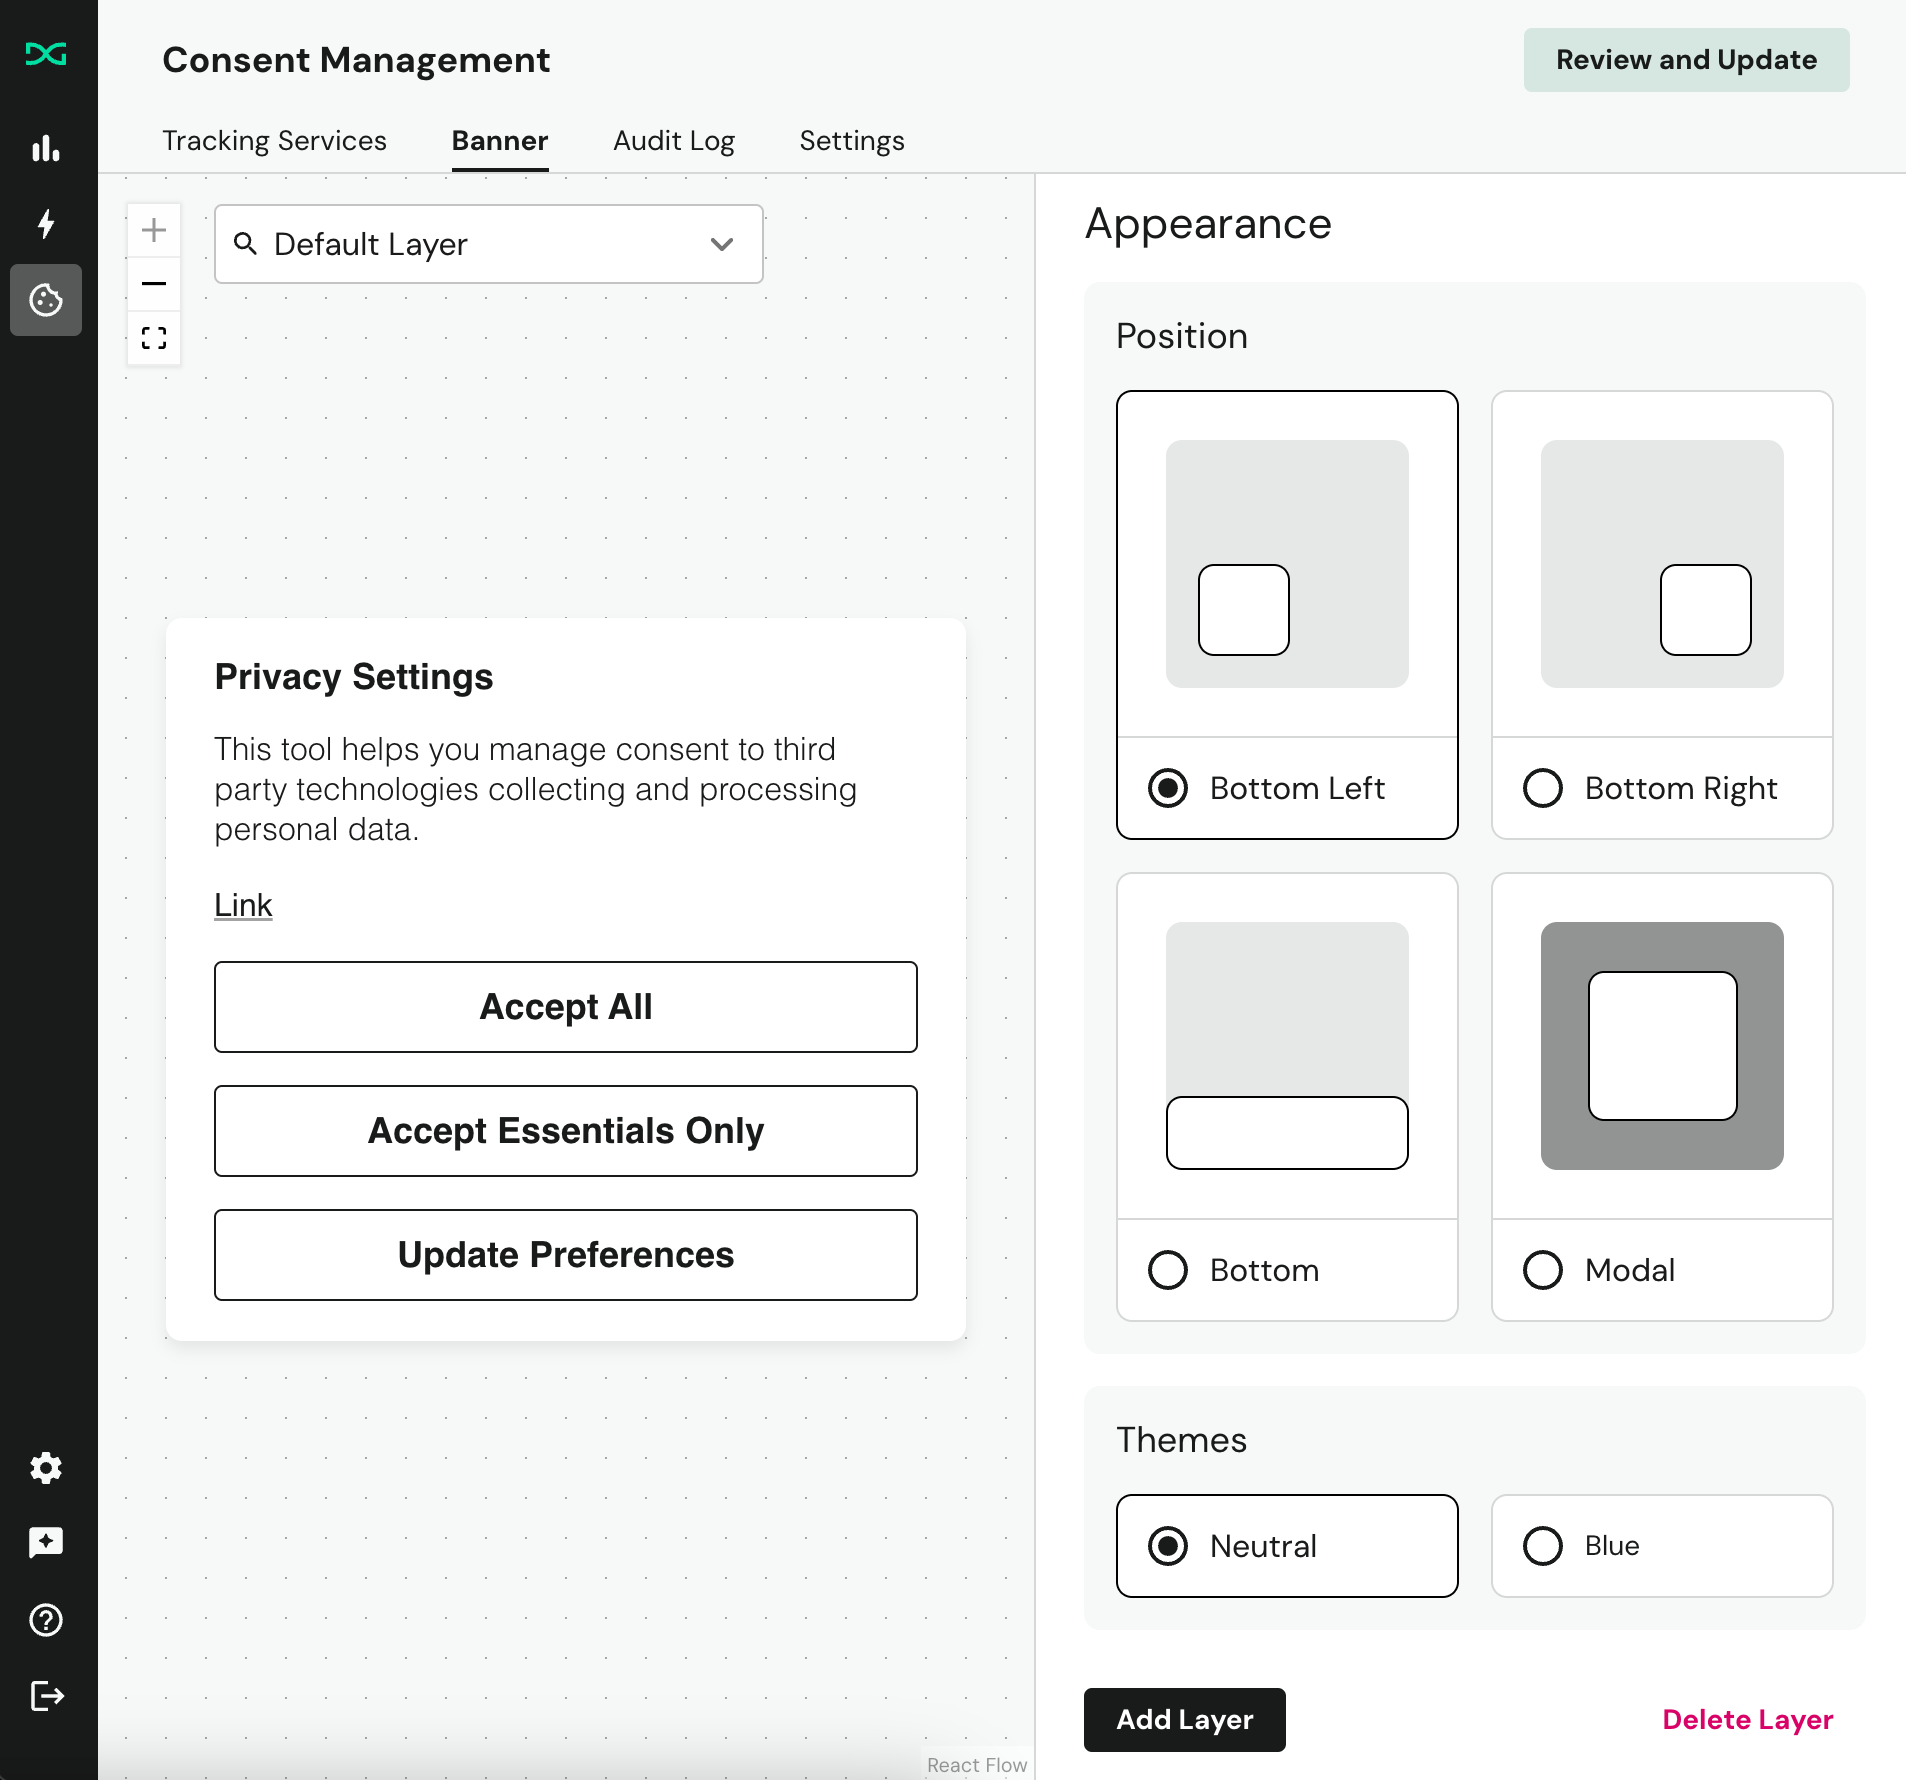
Position
You can uniquely define how the layer appears when loaded on the website. For example, the first layer can appear on the bottom left, but the second layer (with category selections) can be a full screen modal takeover.
Themes
The neutral theme has a black and white color scheme, while the blue theme features blue accent colors.
Close Behavior
You can add an "X" button on the top right of the notice which acts as an implicit acceptance of the defined tracking behavior for that region based on the policy settings within DataGrail Consent.
Collapsed Style
The collapsed style setting minimizes any body copy on the first layer for any layout. You can enable this setting on the top level layer details page. You may want to do this to improve mobile performance metrics such as lighthouse scores.
Here's an example of how that looks:
Linking to a Specific Layer
Developers can use a simple JavaScript function to add a link or button to your website, which will bring up a specific layer within the layout available for that region. Certain regions allow for companies to simply display a "notice of tracking" on load, but then providing an affordance to opt out of tracking elsewhere.
To do this, set the first layer to only have text and an "X" option, and create an unlinked second layer within the layout. After doing this, you can define a button or link on your website (such as the "your privacy choices" link at the footer of your website) which calls the following function:
window.DG_BANNER_API.showLayer('banner_api_id')
banner_api_id should be replaced with the Layer ID, which can be found in the Layer Details section.

In the example above, the function should be:
window.DG_BANNER_API.showLayer('default-layer')
This field cannot be changed after the layer is created, to ensure that your website links do not break when publishing updates made to a layer.
Accessibility
The DataGrail Consent Banner is designed to meet WCAG 2.1 Level AA standards, so all of your users can manage their consent preferences regardless of ability.
Keyboard Navigation
All interactive elements in the banner — buttons, category toggles, links, and the close control — are reachable via the Tab key. You can dismiss the banner at any time by pressing Escape. When navigating between layers (e.g., opening the categories view), focus automatically moves into the new layer content.
Screen Reader Support
The banner uses semantic HTML and ARIA labels to ensure screen readers accurately announce each control. Category toggles include labels that read the category name (e.g., "Functional", "Marketing"), so assistive technology users can make informed consent choices.
Automated Testing
DataGrail runs automated accessibility checks against the consent banner in CI using axe-core, an industry-standard accessibility testing engine. These checks validate conformance with many WCAG 2.1 AA success criteria across banner configurations (GDPR opt-in, CPRA opt-out) and catch regressions — including color contrast, missing labels, and invalid ARIA — before any release ships.
Disclaimer: The information contained in this message does not constitute as legal advice. We would advise seeking professional counsel before acting on or interpreting any material.