Quickstart Guide Using Google Tag Manager
Check Out Our Consent Video Training Series!
DataGrail Consent is a Consent Management Platform (CMP) solution that simplifies and automate compliance with cookie and tracking script opt-in/opt-out. Your privacy and marketing team will use Consent to:
- Automatically display different consent options and banner copy depending on the user’s region and corresponding regulation
- Update policies and copy without any developer intervention required
- Identify scripts that may pose a compliance risk and audit new scripts to determine whether they are exempt from consent opt-out
- Fully customize your consent banner to match your brand
This document covers the purpose of CMPs, our Google Tag Manager integration, and how to set up DataGrail Consent for your website. Reach out to your Customer Success Manager or Account Executive for more information.
How Does DataGrail Consent Help Support My Need For a CMP?
DataGrail Consent automates the collection and processing of your end user's consent preferences when visiting your website.
As the privacy regulatory landscape continues to change, DataGrail provides an integrated solution that ensures you are up-to-date and compliant with new frameworks and revisions to existing ones, like the GDPR and CPRA.
DataGrail's Consent offering provides an easy-to-use experience for privacy managers and operators applying these frameworks to your websites. Additionally, this solution makes it easy for developers to set up the Consent module and manage the execution of tracking scripts based on an end user's preferences.
What is Google Tag Manager and What Does it Have to do With DataGrail Consent?
Google Tag Manager (GTM) is a tag management system (TMS) that manages the execution of tags, which are snippets of code that execute based on events that occur while your experience runs for end users. Over 90% of businesses have Google Tag Manager installed on their websites to offer personalized marketing experiences to their customers.
DataGrail Consent offers a turnkey, foundational integration to Google Tag Manager that makes it easy to rapidly deploy a CMP within minutes. DataGrail both manages tag execution based on consent preferences and publishes the banner to your website via your existing GTM integration. Your GTM admin simply needs to sign in with their Google account, and DataGrail takes care of the rest.
Learn more about the Google Tag Manager integration here.
What if I Need to Manage Services Outside of Google Tag Manager, or I Don't Want to Use Google Tag Manager at All?
No problem! DataGrail can manage anything you'll need to ensure total coverage of tracking technologies, including:
- Scripts embedded onto your website directly.
- First-party cookies stored on user browsers via software installed on your site.
- Third-party tools that are not implemented via a script (such as ad network solutions or hosting platform integrations).
You can manage the solutions with the GTM integration, or you can use our embedded deployment capability to have more control over how DataGrail Consent is integrated to your website.
Looking to better understand the different mechanisms for retrieving consent for a data subject?
Check out DataGrail Consent For Privacy Managers to learn more about these different consent mechanisms and how DataGrail helps automatically support them!
Quickstart Guide
Getting a consent banner deployed on your site is as easy as integrating Google Tag Manager, categorizing relevant services, and letting DataGrail handle the rest.
Prerequisites
- You have a Google Tag Manager account setup and connected to your website. For more information on Google Tag Manager, see the following documentation. You must have publish permissions in your Google Tag Manager environment to connect to DataGrail using our supported Google Tag Manager integration.
- Your DataGrail account has been provisioned for Consent.
- You have Request Policy Frameworks created in your DataGrail environment.
- You have the Consent Management Admin or Consent Management Edit role in DataGrail. This is required to configure your Consent and Banner settings within the app. The Connections Manager role is also required to establish the connection to Google Tag Manager.
Please reach out to your Account Manager if you have any questions about the requirements listed above.
Setup Overview
DataGrail Consent can be deployed to your site in three steps and just a few minutes:
- Set up the Google Tag Manager integration in DataGrail
- Classify services ("tags") to the appropriate categories
- Test and publish Consent by publishing to Google Tag Manager
After completing these steps, there are additional features that enable you to control trackers deployed outside of GTM, customize and configure banner notices by policy, and manage cookies for an additional layer of compliance.
Set Up Google Tag Manager
When your DataGrail environment is enabled to use DataGrail Consent, the first step prompts you to connect the GTM integration:
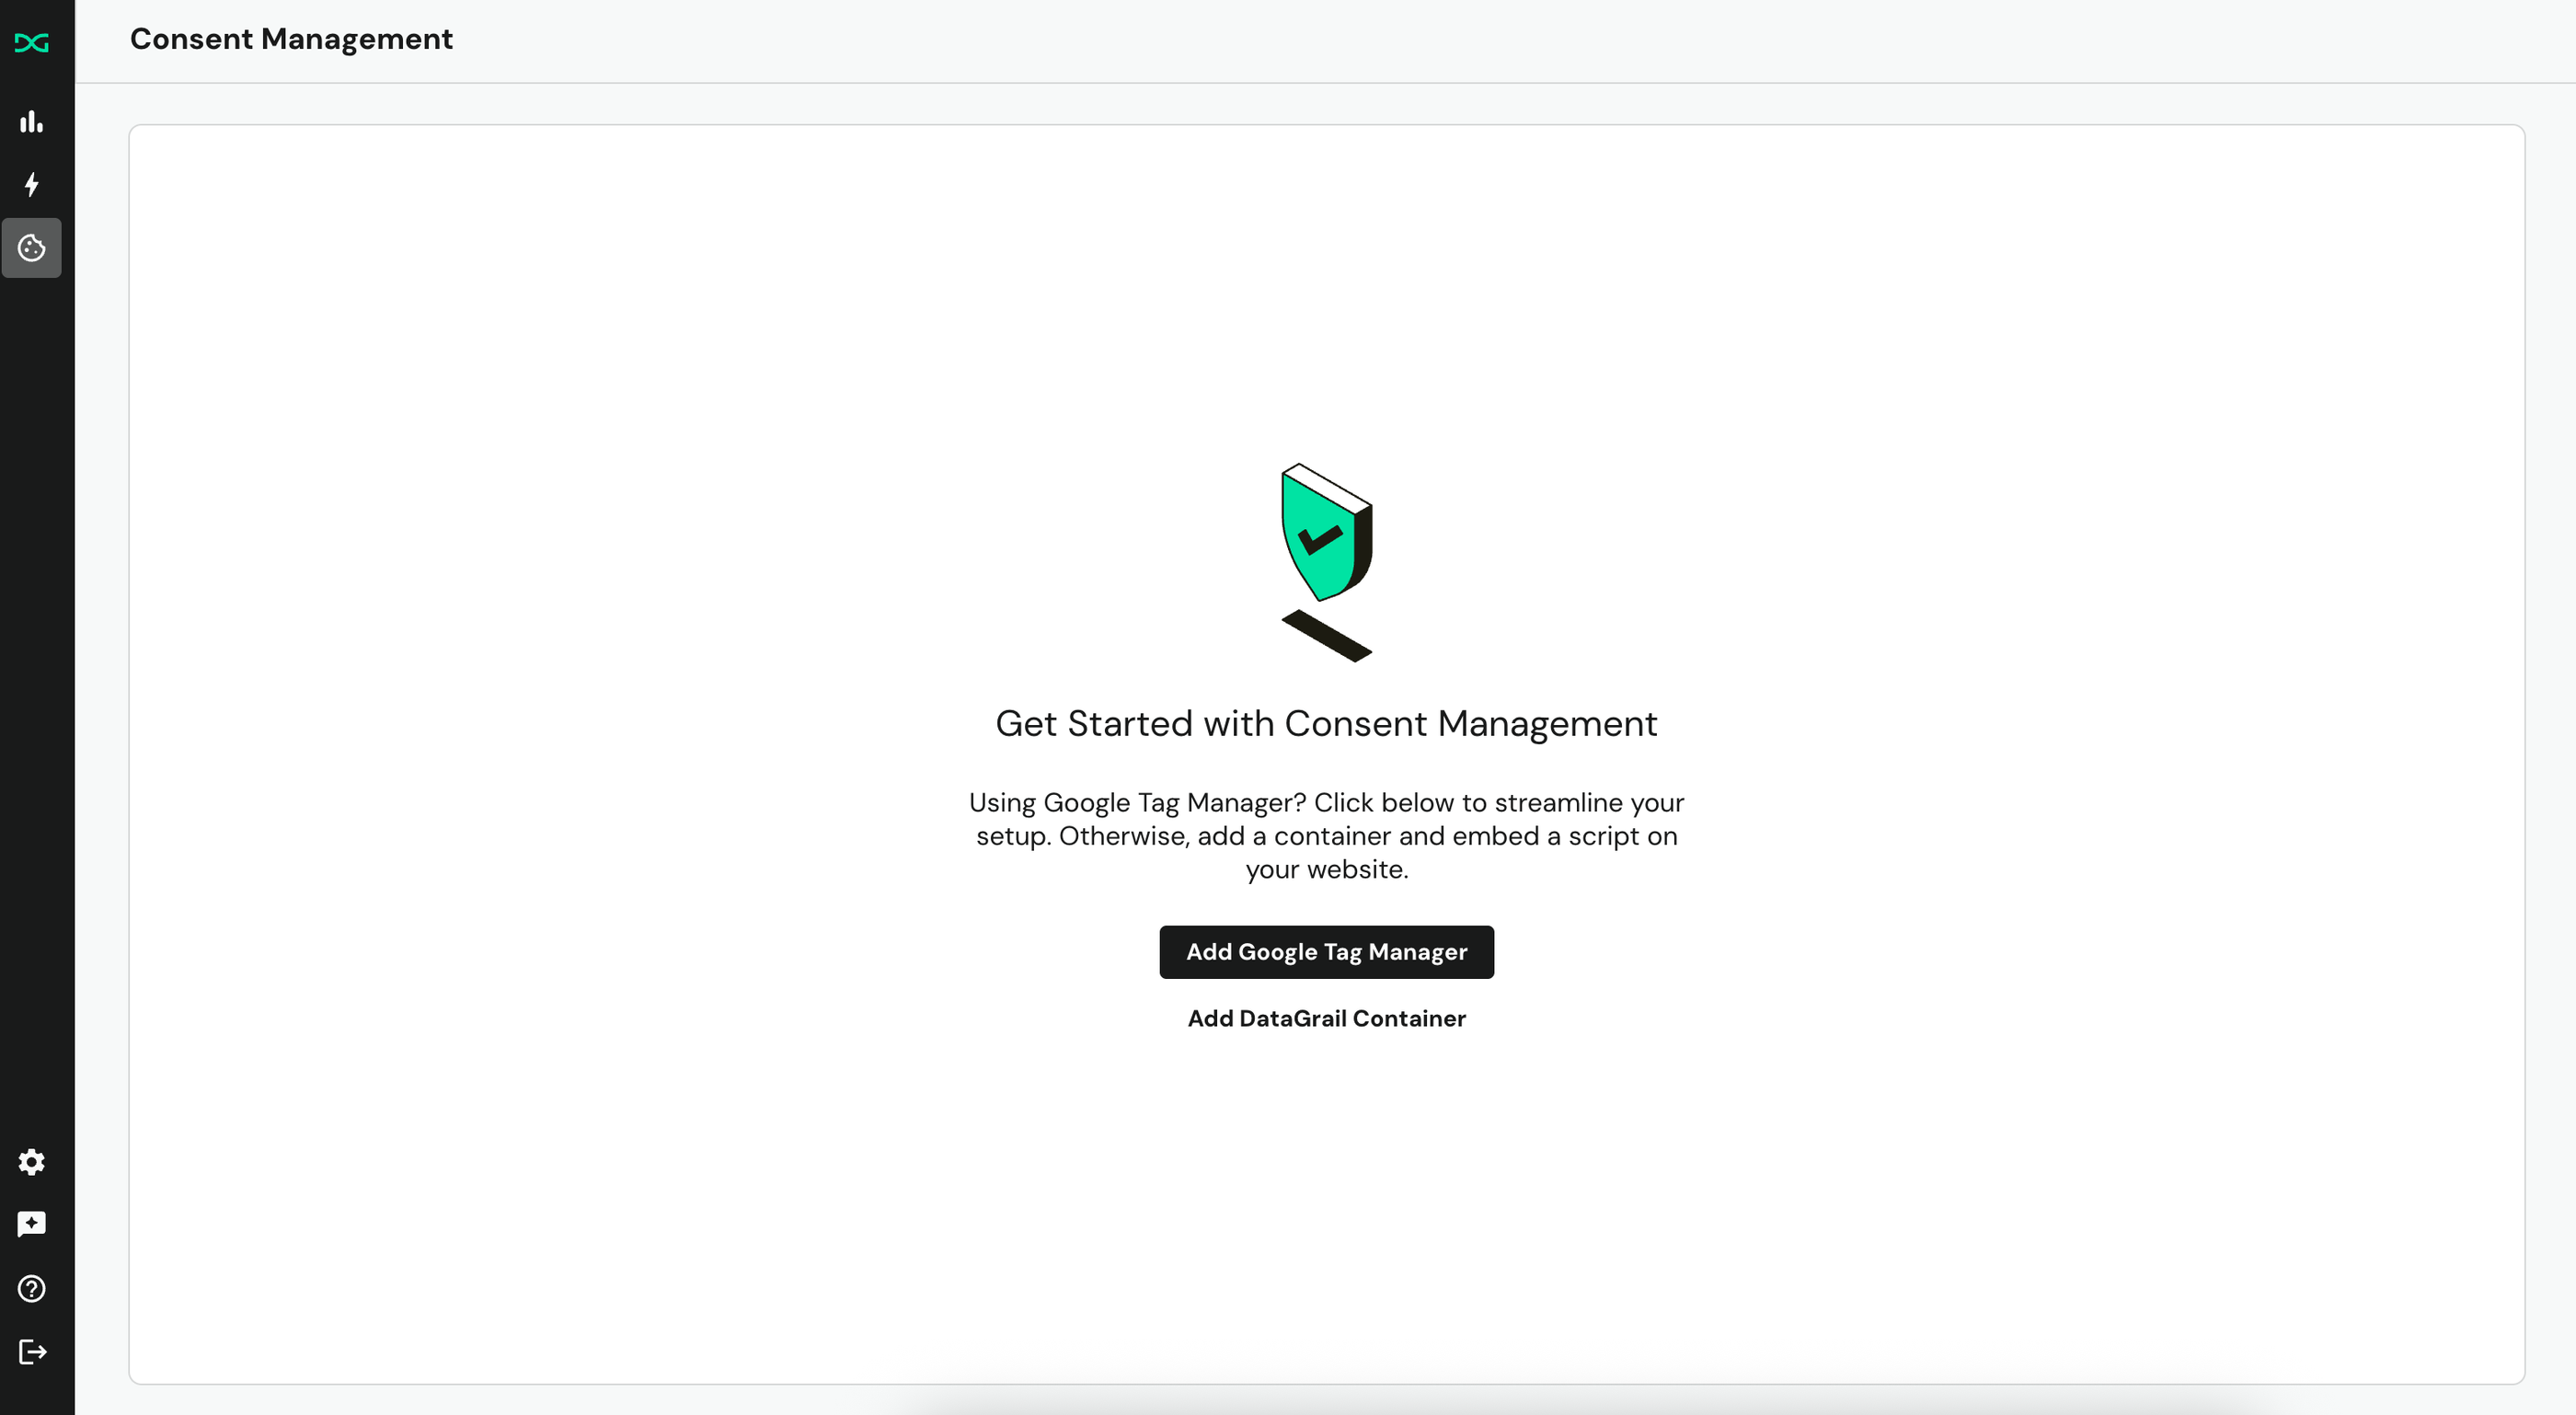
The primary action to Add Google Tag Manager takes you to our integrations portal where you'll begin the steps to connect DataGrail to your GTM container(s).
Google Tag Manager Admin Required for Setup
You will need to ask the GTM admin who has publish rights to the containers connected to your website to complete the connection steps.
After the GTM integration connection is established, head back over to DataGrail Consent to select the containers you wish to manage.
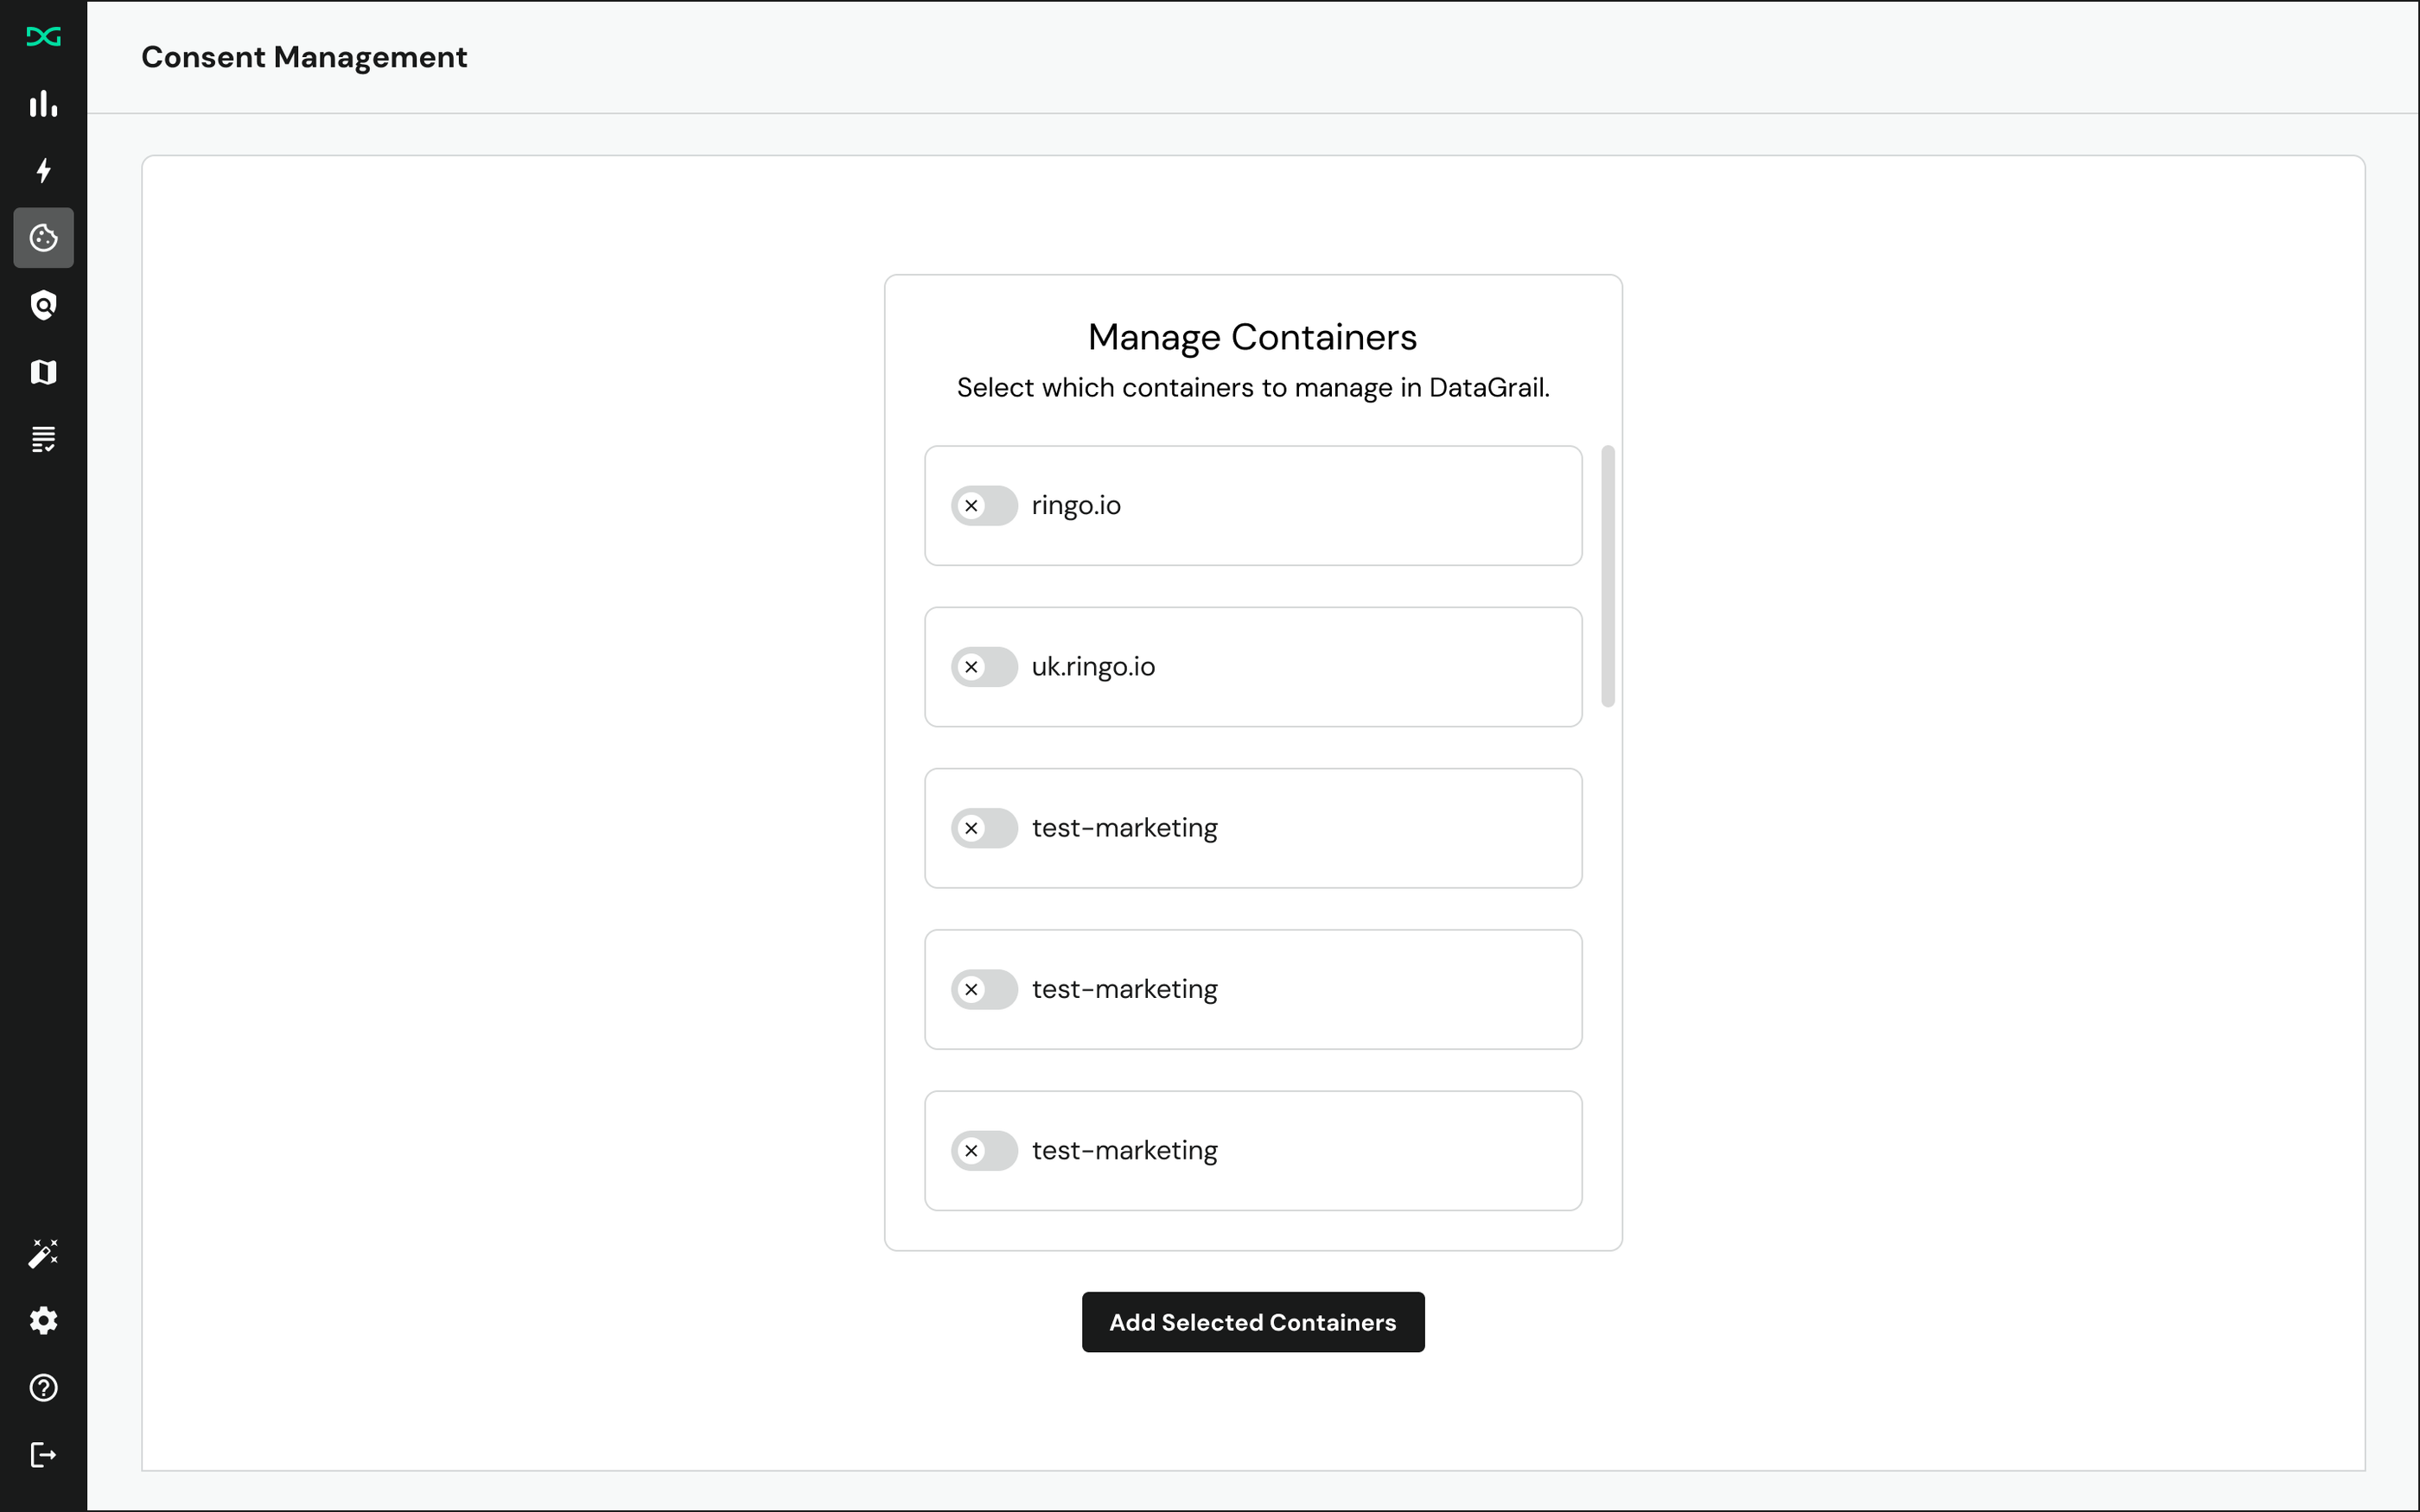
Once you've selected the containers connected to the websites you want to start with, you'll see the tags appear in the services table that are available within the container.
DataGrail Consent requires the container to have at least one published and live version of the container available to retrieve the tags from your container.
Classify Tags For Management
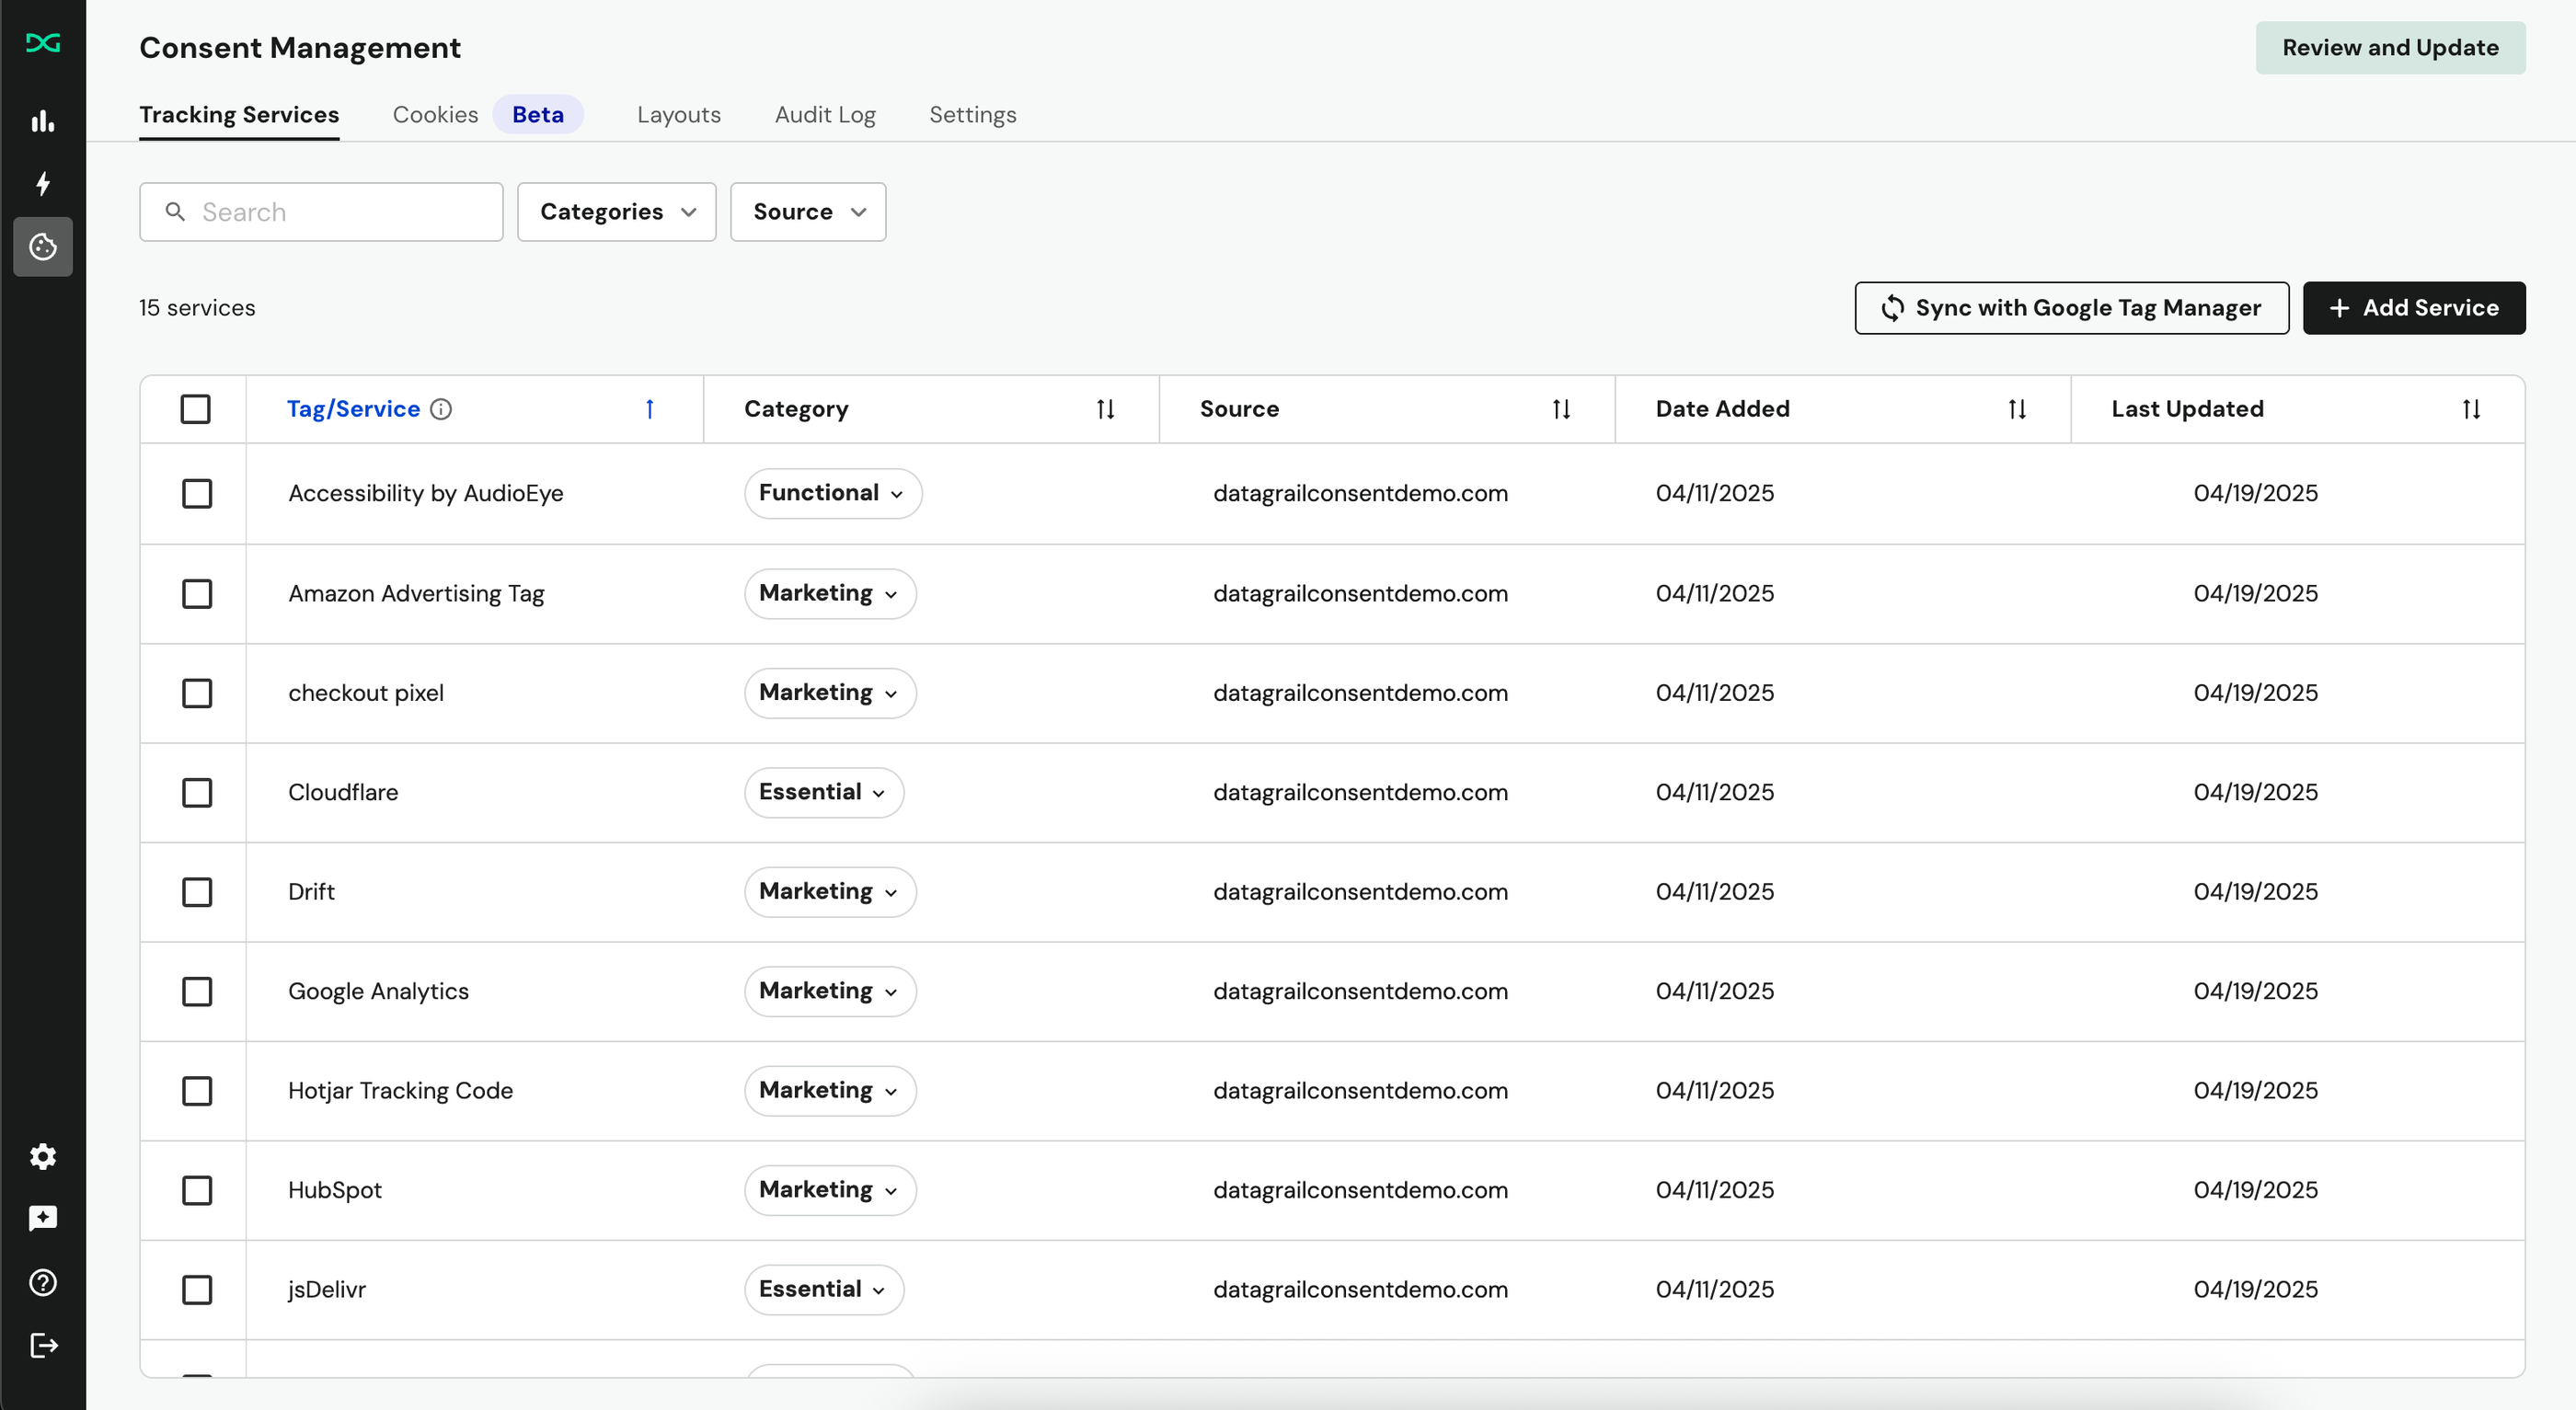
Each tag within this table is pulled from your GTM container list, and many tags will have a category preselected based on DataGrail's internal classifications.
You will need to classify the remaining tags by collaborating with your internal marketing and development teams to ensure they accurately represent the purpose they have for your website. For more information on tag categories, see this article.
Test DataGrail Consent And Publish to Users
Now that you've classified your site's tags, you can confirm DataGrail Consent correctly hands script behavior based on your consent choices by creating your first version of DataGrail Consent and sending it to your GTM container(s).
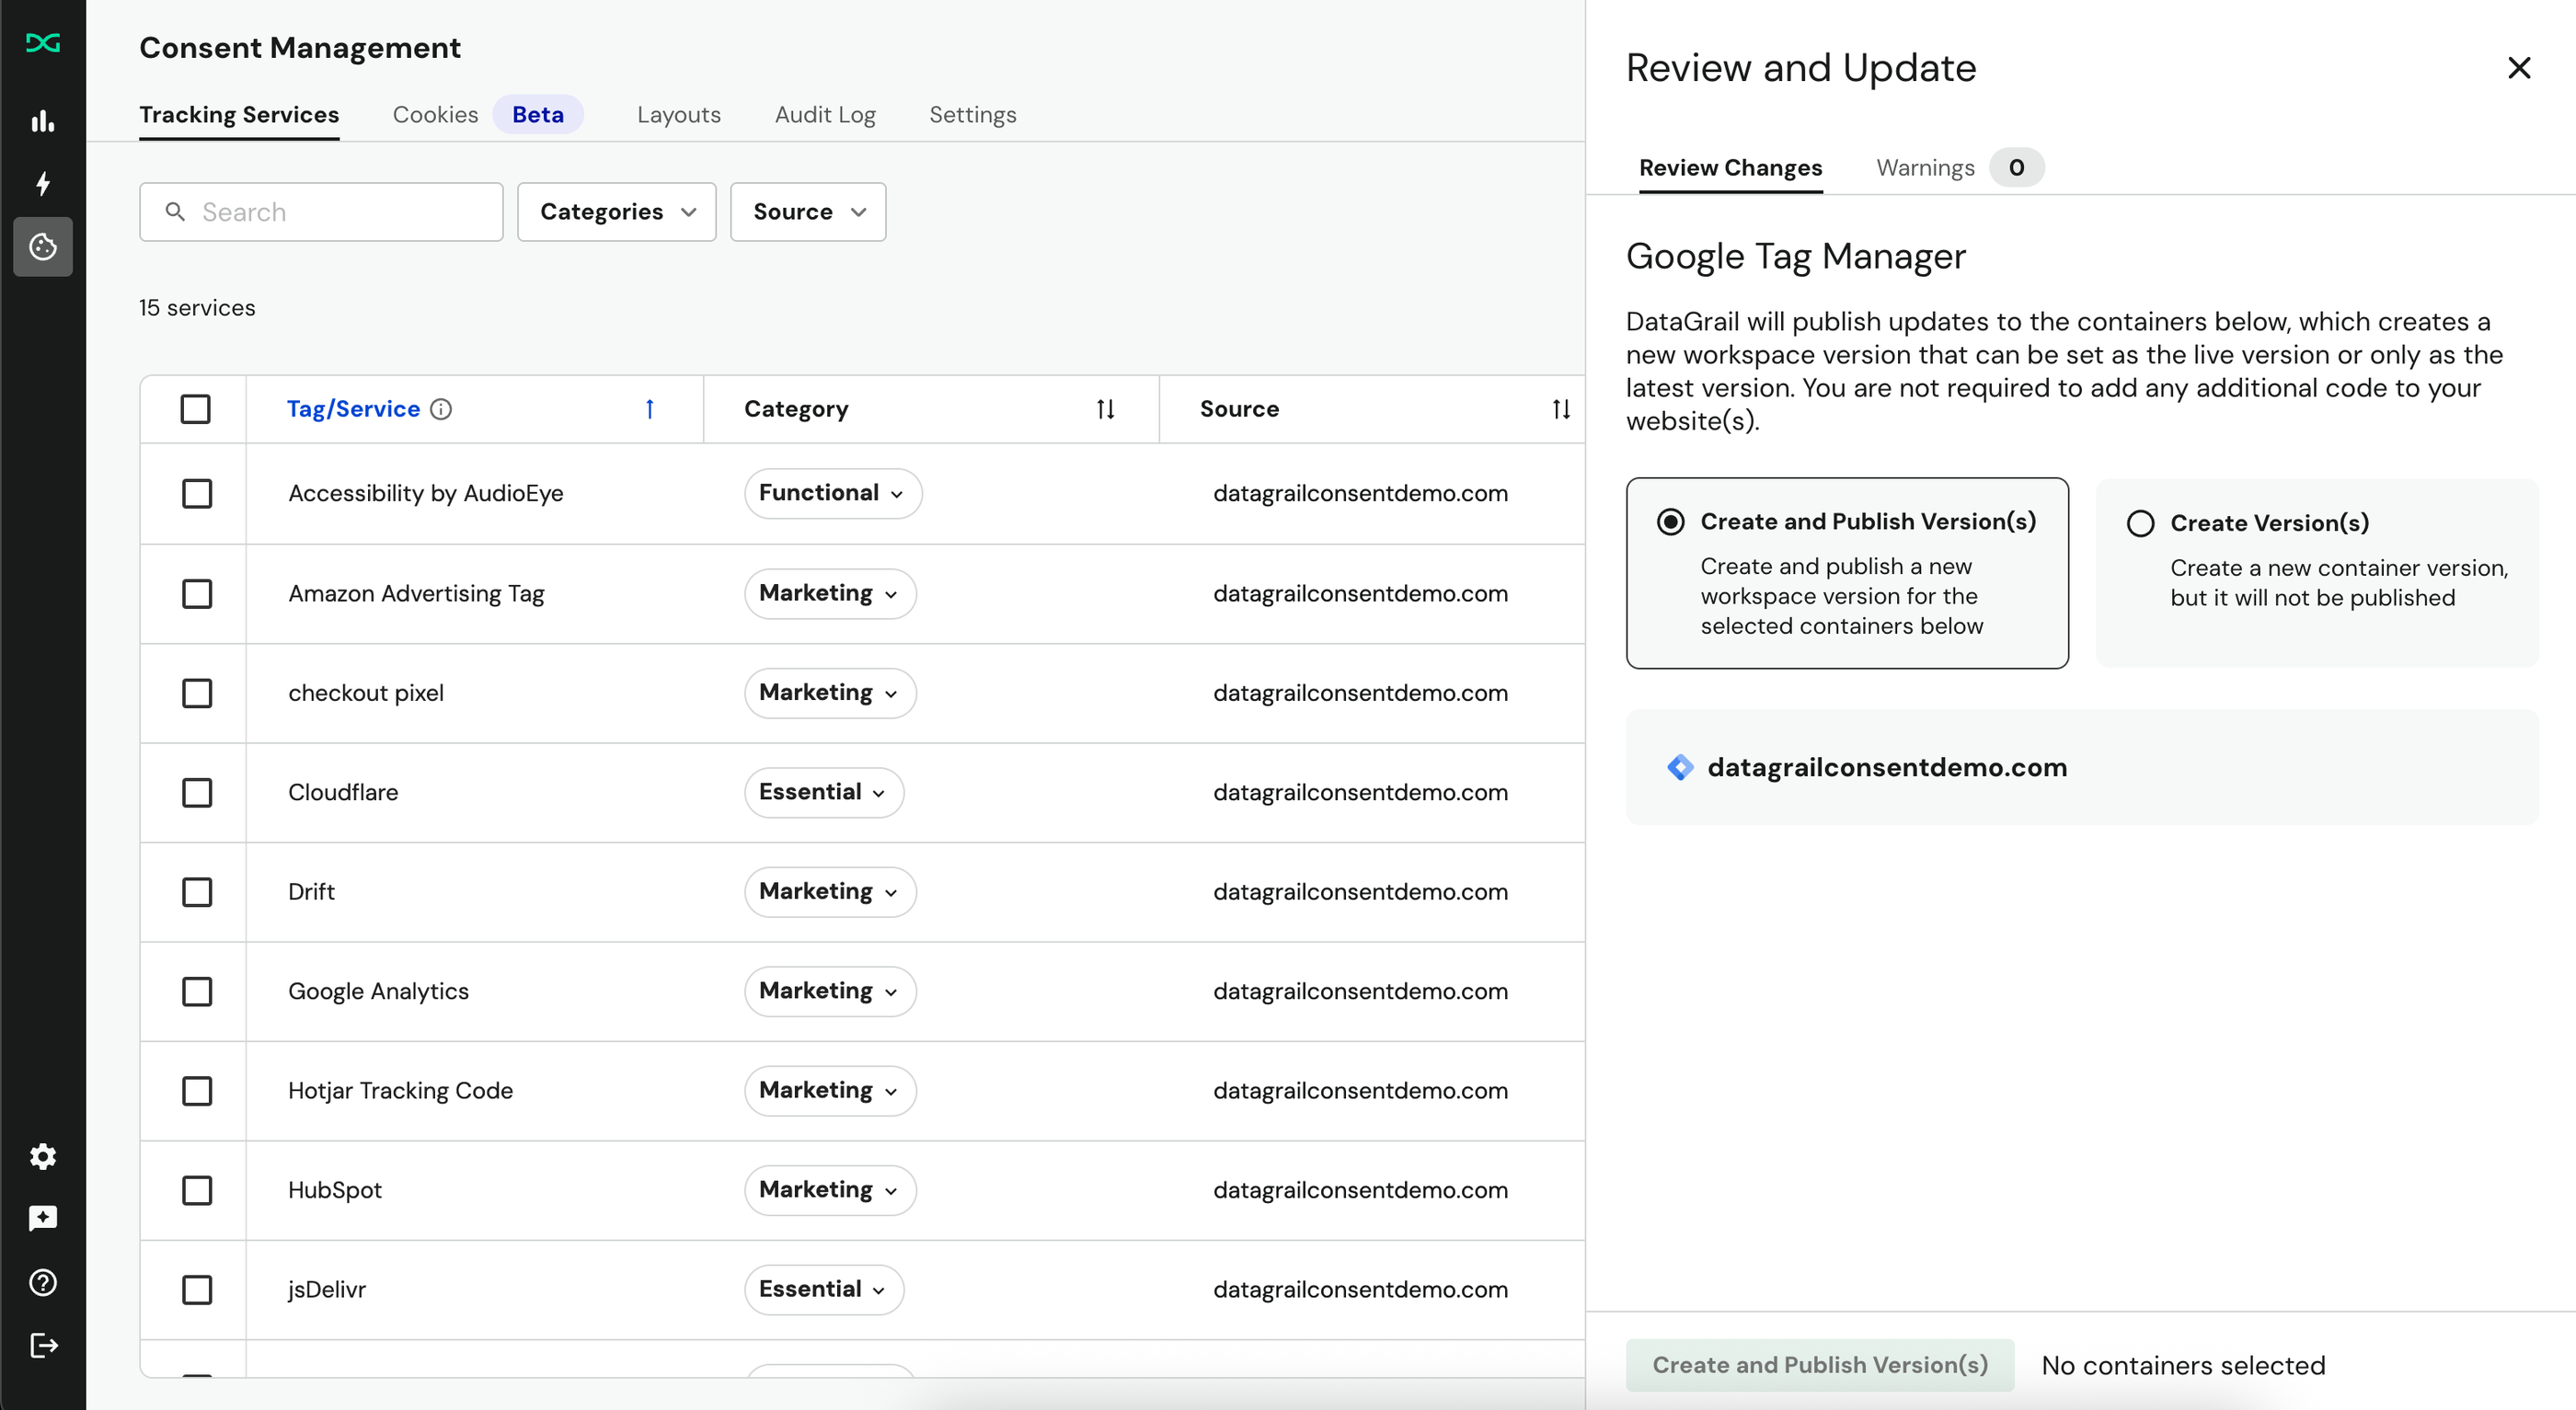
You'll see two options for reviewing and updating your container(s) version(s):
- Create and publish: This pushes DataGrail Consent's banner software (
consent.js) and all necessary configurations to control GTM tags as a new, published and live container version. This means sites with the corresponding GTM container code installed will have DataGrail consent live for all visitors to the site. - Create versions (only): As before, DataGrail Consent's software and all configurations to handle tag behavior are sent to the GTM containers selected; however, the previous version of the container remains the live, published version. You can navigate to the versions tab in your DataGrail container to inspect and preview the changes, which is useful if you want to test changes before manually promoting them as the live, latest version to visitors.
You can learn more about our recommendations for testing and publishing DataGrail Consent updates using this guide. The guide also includes how to use the DataGrail Privacy Inspector to see how changing Consent preferences impacts tag/service tracking behaviors in real time.
Additional Steps
After this step, you'll be nearly complete with your DataGrail Consent deployment! Here's a quick set of next steps to have a fully compliant, brand-matched consent solution running on your websites:
- Ensure full tracking coverage. There may be scripts deployed as a result of your hosting platform, embedded scripts, or third-party scripts injected by external systems (i.e. ad networks). You can read this Best Practices Guide to get a full sense of how to achieve total coverage of trackers and be fully compliant.
- Configure the banner language and style. You can use our no-code layouts editor to modify the built in banners we created. For example, if you want to have country specific layouts, you can design these layouts yourself and assign them to the matching policy. You can use our CSS Customization Guide to make match your banner's branding to your company's design system.
Further Reading
To better understand consent management within and beyond DataGrail, we recommend these resources:
- Guide to Consent Management Platforms (CMPs): Learn more about how CMPs work broadly and their importance.
- Lawyers Warn of Wave of Consumer Lawsuits: Recognize the stakes of failing to honor consumer privacy opt-outs, especially for tracking scripts.
- 2024 Data Privacy Trends (Webinar): Uncover new stats on how well websites honor consumer tracking opt-outs and much more.
Disclaimer: The information contained in this message does not constitute as legal advice. We would advise seeking professional counsel before acting on or interpreting any material.