Shopify
This guide covers configuring cookie banner and tracking preferences for Shopify. See also:
- Shopify Integration for access and deletion requests
- Shopify System Detection for discovering apps in your store
DataGrail Consent interacts with the Shopify Privacy API, which passes on consent preferences in a format that pixels, audiences and checkout functionality must respect per Shopify's terms of service.
When a data subject makes a Consent choice, we emit preferences in the browser which can then be translated using a snippet of code to set the consent tracking settings per the API docs above.
It is up to the pixel vendors to respect and honor these tracking settings. While DataGrail can work with you to confirm that we are both accepting and passing preferences to Shopify correctly, we cannot reliably troubleshoot if pixels are behaving in a way that respects consent choices.
Shopify Configuration
To prepare Shopify to accept preferences from DataGrail:
-
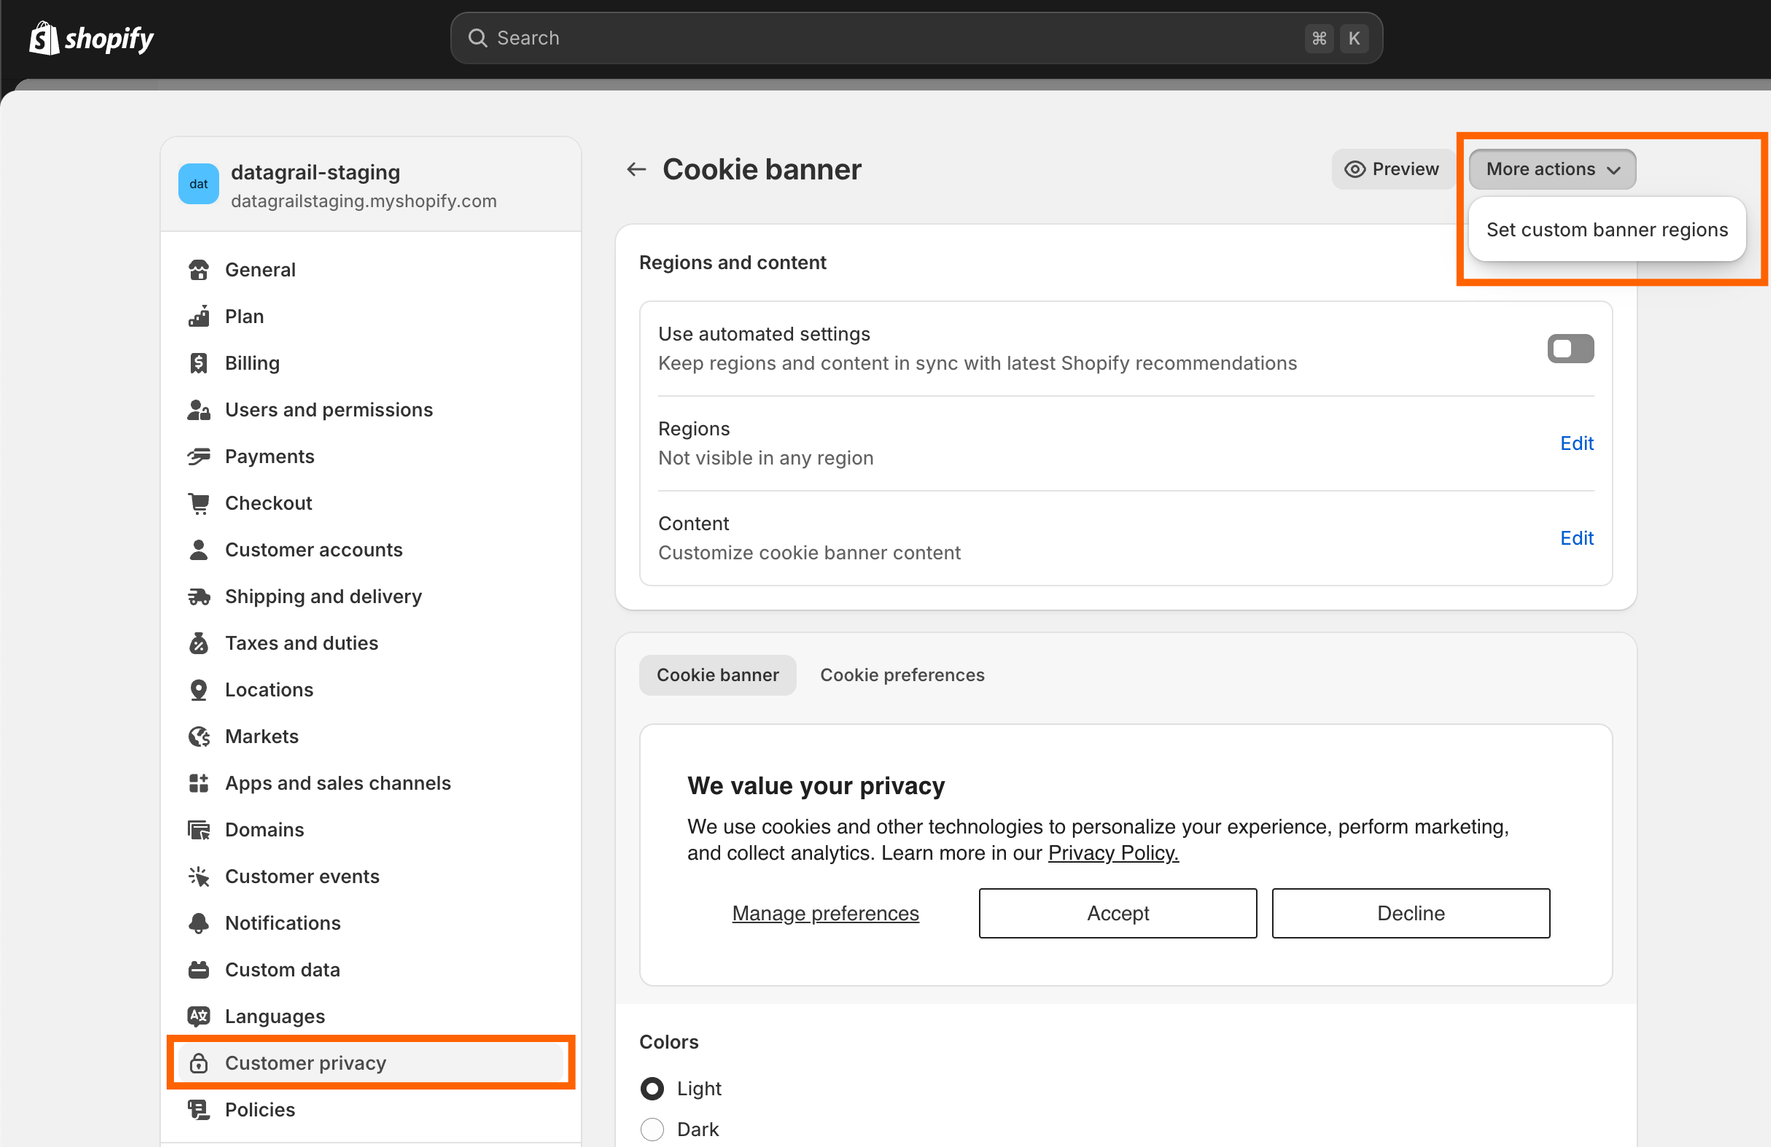
Login to Shopify, select Settings, Customer privacy and then Cookie Banner.
-
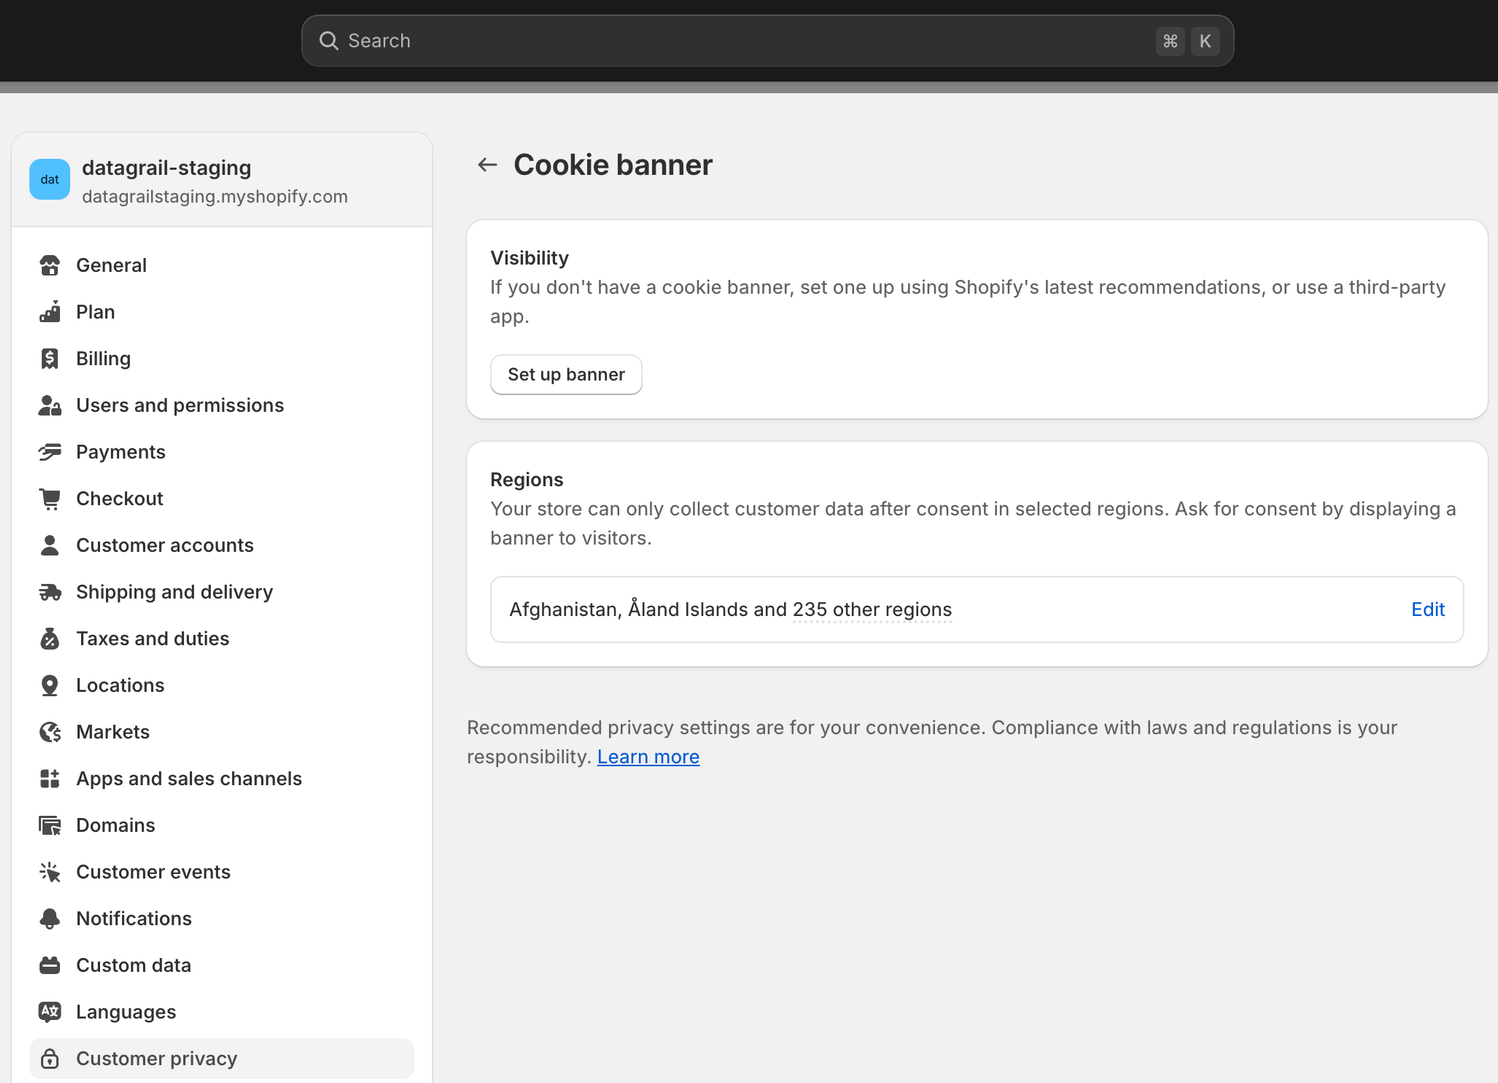
Select the option to set custom banner regions, which offers you the ability to select the countries that you are letting Shopify know you wish to have managed consent.
Since DataGrail works with a wide variety of countries and geographies, we recommend selecting every region available. This ensures that DataGrail controls the policies and behavior of consent through the DataGrail application.
-
Save your changes and then remove the cookie banner from being visible. This disables Shopify's built-in banner, but you still have the countries you select which inform Shopify to "await Consent" before proceeding with tracking.
Emitting Preferences
With the banner deployed and ready to accept a consent choice, you now need to send this consent choice to Shopify so that it handles the behavior of pixels within Shopify. This is required if you are using built in tracking pixels from Facebook, TikTok, and other vendors with deep integrations into the product.
Container Plugins
The simplest way to integrate with Shopify's Privacy API is to use our container plugin. You can toggle on the Shopify plugin within each container to automatically connect to Shopify's consent system.
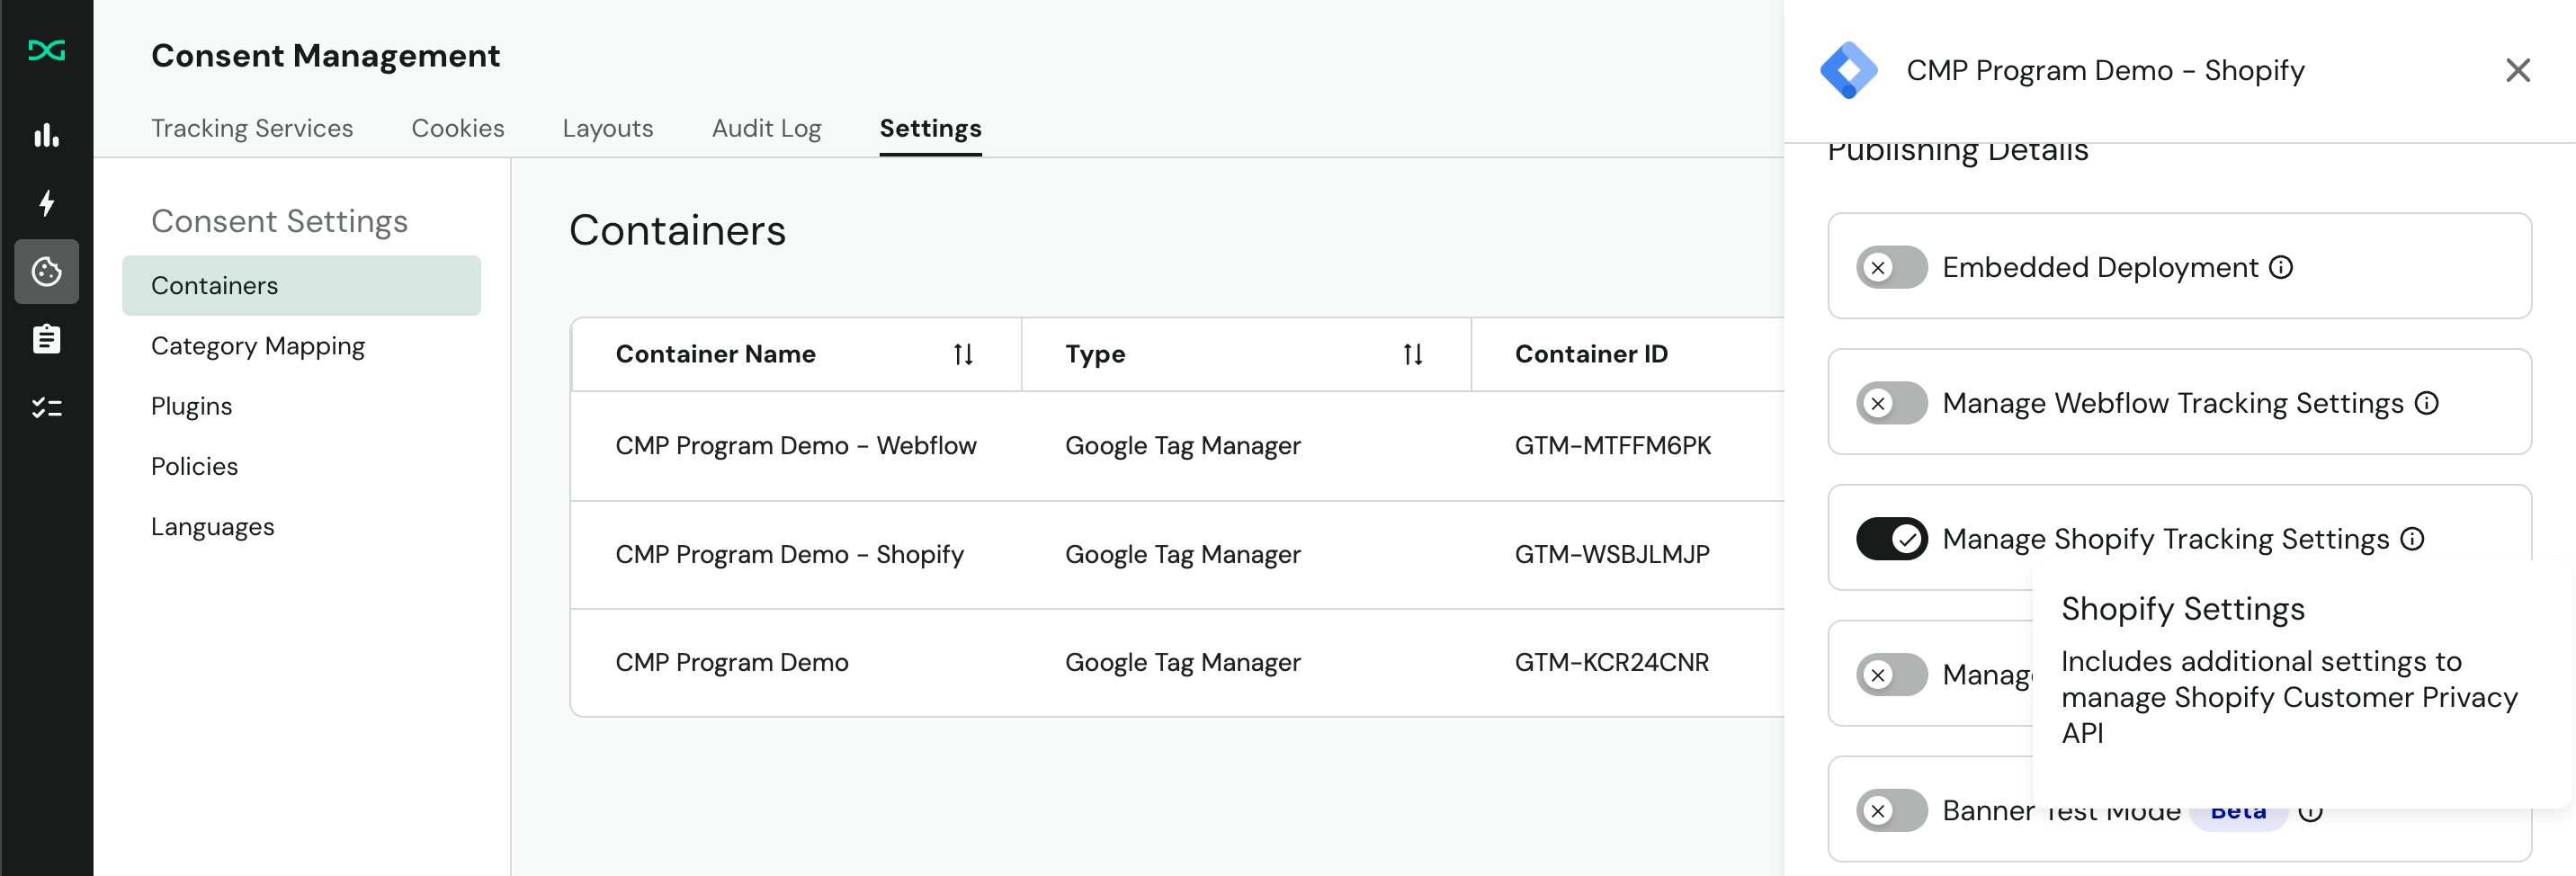
When you enable this toggle, DataGrail automatically maps your consent categories to Shopify's Privacy API:
| DataGrail Category | Shopify Privacy API |
|---|---|
| Marketing | sale_of_data, marketing |
| Performance | analytics |
| Functional | preferences |
For Google Tag Manager: DataGrail creates a new tag containing the necessary information to communicate with Shopify's Privacy API.
For embedded containers: DataGrail includes this information as part of the data loaded with the consent-loader.js script.
Callback Functions
When a user makes a consent choice with DataGrail, the preferences are saved and available as a callback function. You can use this callback to write custom code that maps DataGrail consent categories to Shopify's tracking options. Your code should call the setTrackingConsent API method with the mapped result.
Here's an example implementation:
<script>
  window.dgEvent = window.dgEvent || [];
  function sync_receive_prefs(dgEventData) {
    const cookiePreferences = dgEventData?.consentPreferences?.cookieOptions;

    window.Shopify.loadFeatures(
      [
        {
          name: "consent-tracking-api",
          version: "0.1",
        },
      ],
      (error) => {
        if (error) {
          console.error("Error loading Shopify Customer API", error);
        }
        window.Shopify.customerPrivacy.setTrackingConsent(
          {
            preferences: true,
            analytics: window.DG_BANNER_API.categoryEnabled("performance"),
            marketing: window.DG_BANNER_API.categoryEnabled("marketing"),
            sale_of_data: window.DG_BANNER_API.categoryEnabled("marketing"),
          },
          (arg) => console.log("Consent captured", arg)
        );
      }
    );
  }

  window.dgEvent.push({
    event: "preference_callback",
    params: sync_receive_prefs,
  });

  window.dgEvent.push({
    event: "initial_preference_callback",
    params: sync_receive_prefs,
  });
</script>
This code saves the consent preferences provided by a user and maps them to Shopify's tracking consent preferences using the API method above.
Verifying Preferences
To verify Shopify Consent preferences:
- Confirm the values that have been set by DataGrail Consent, based on the Data Subject's policy settings or their explicit choices via the banner displayed.
window.DG_BANNER_API.getConsentPreferences()

{isCustomised: true, cookieOptions: Array(3)}
  cookieOptions: Array(3)
    0: {gtm_key: 'dg-category-performance', isEnabled: true}
    1: {gtm_key: 'dg-category-essential', isEnabled: true}
    2: {gtm_key: 'dg-category-marketing', isEnabled: false}
  length: 3

...
- Confirm the value set for the Data Subject's consent preferences within Shopify. You can see the a
falsevalue for thedg-category-marketingor "Marketing" purpose has appropriately set the value formarketingandsale_of_dataasno.
window.Shopify.customerPrivacy.currentVisitorConsent();

{marketing: 'no', analytics: 'yes', preferences: 'yes', sale_of_data: 'no'}
Shopify restricts third-party JavaScript from running on checkout and cart pages, which prevents the DataGrail Consent Banner from loading. However, if a visitor’s consent preferences were already set and passed to Shopify on earlier pages, those preferences will still be applied on checkout and cart pages, even when the banner is not visible.
Disclaimer: The information contained in this message does not constitute as legal advice. We would advise seeking professional counsel before acting on or interpreting any material.