Integrating LiveChat
DataGrail’s LiveChat Integration provides data mapping and privacy request functionality allowing your business to do the following:
- Identify Data Subject PII stored in LiveChat for automatic fulfillment of privacy requests.
- Delete Data Subject PII stored in LiveChat for automatic fulfillment of privacy requests.
**Note: if you do not have admin rights in LiveChat you will not be able to complete this integration. Please contact your LiveChat Admin for assistance.
Step 1: Setup Live Chat Application
- Log in to the LiveChat Developer Console with your account (different from LiveChat application account).
- Navigate to Apps → Your apps in the left side menu, then click the Create new app button.

-
Add an application name, select Blank template, then click the Continue button.
-
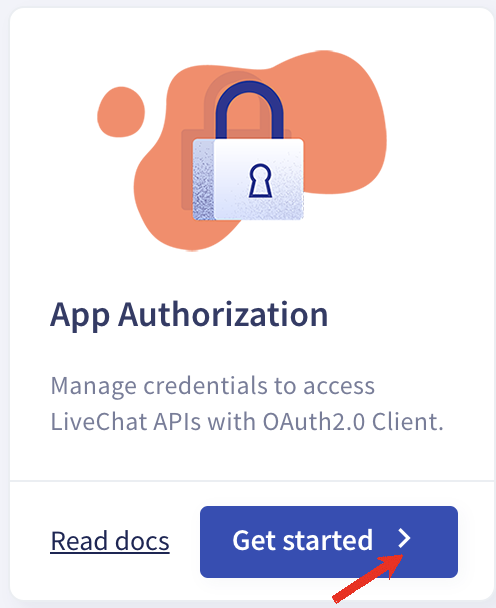
Select the App Authorization building block, then click the Get started button.
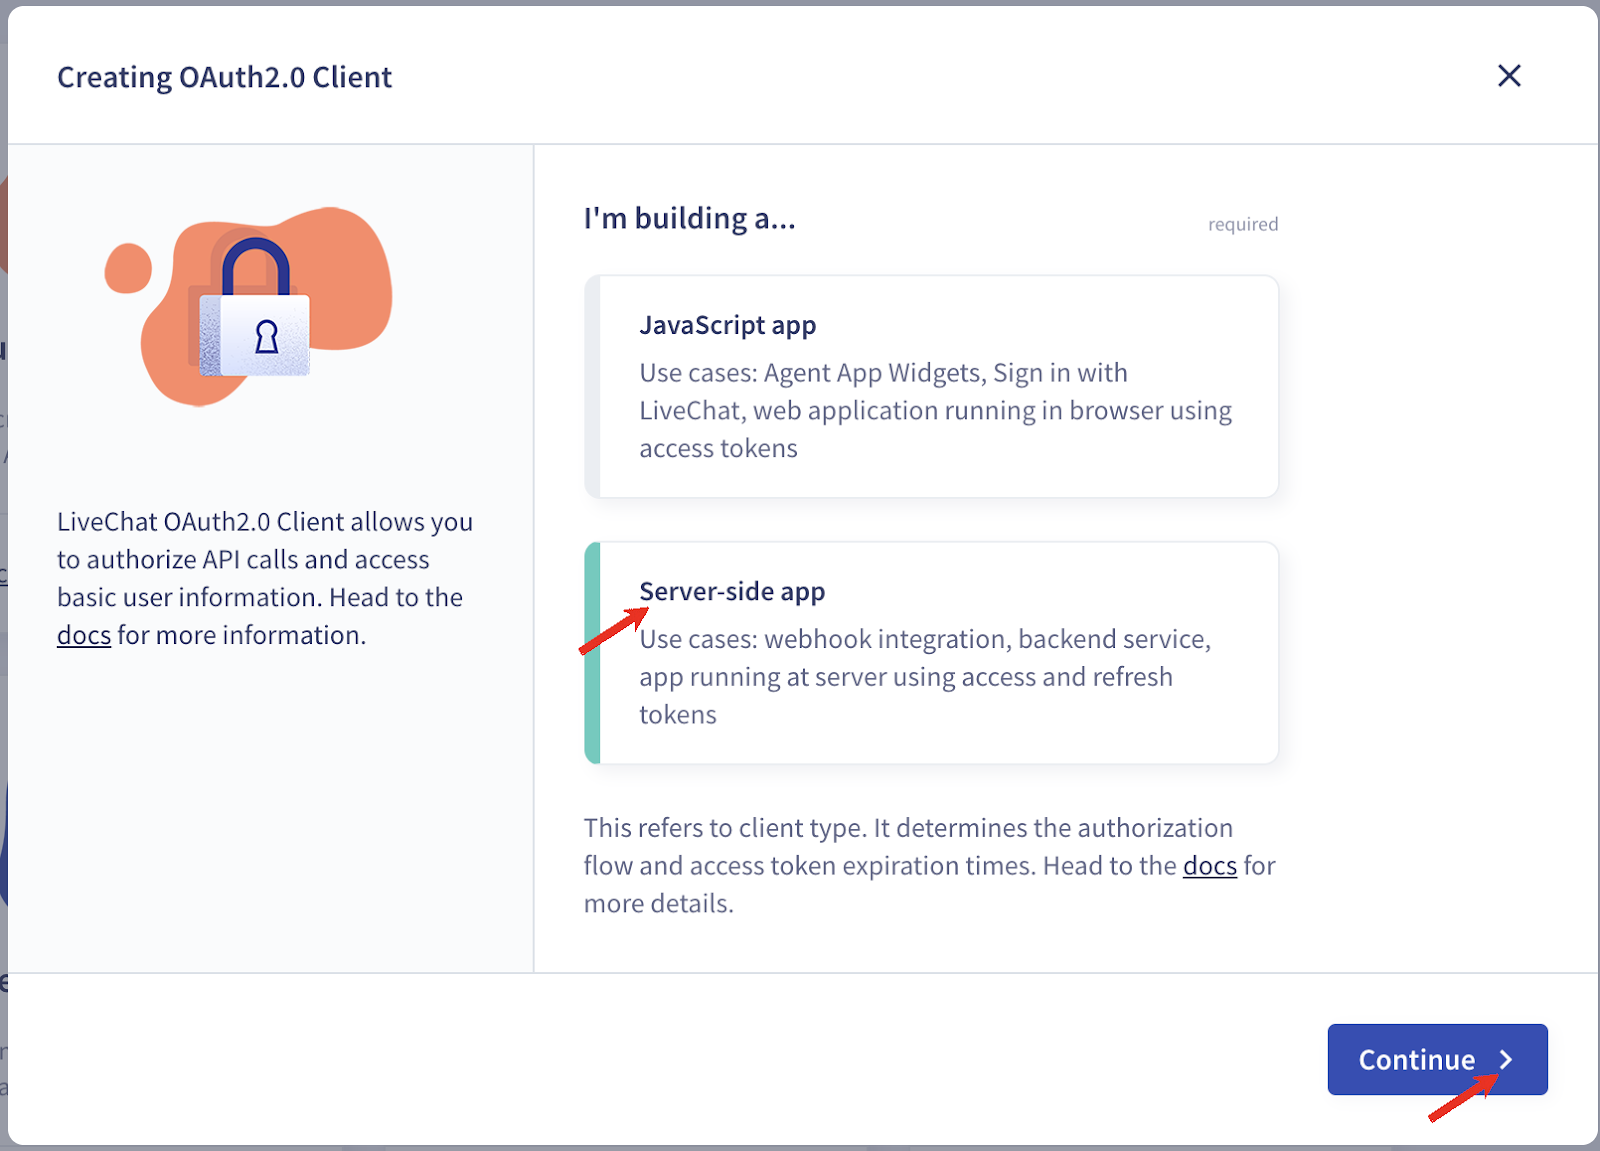
- Select Server-side app client type, then click the Continue button.
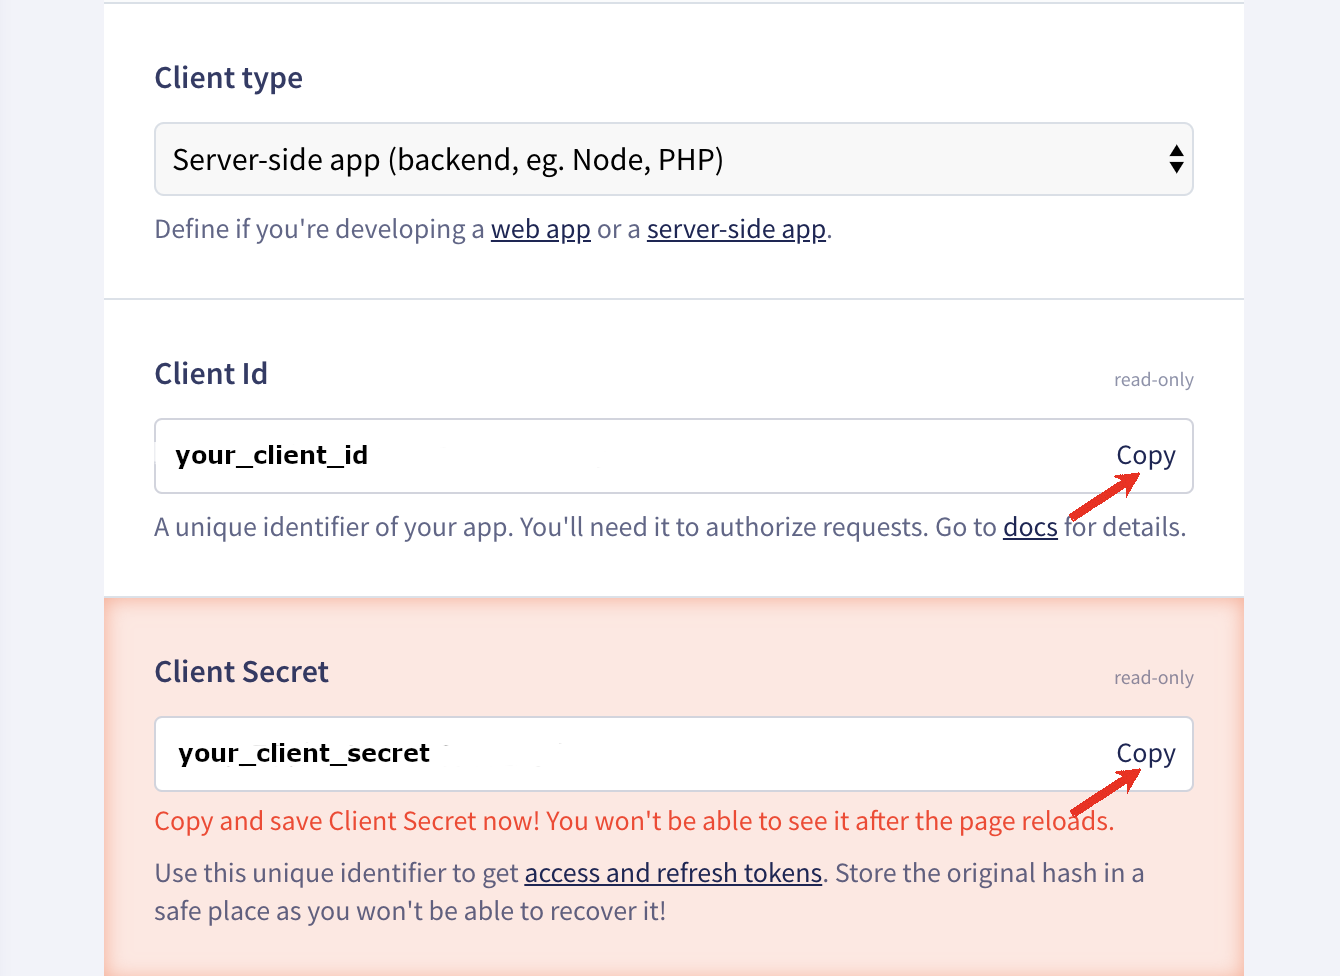
- Copy your Client ID and Client Secret
-
Setup Redirect URI as:
https://datagrail.io/oauth/livechat, then click the Save changes button. -
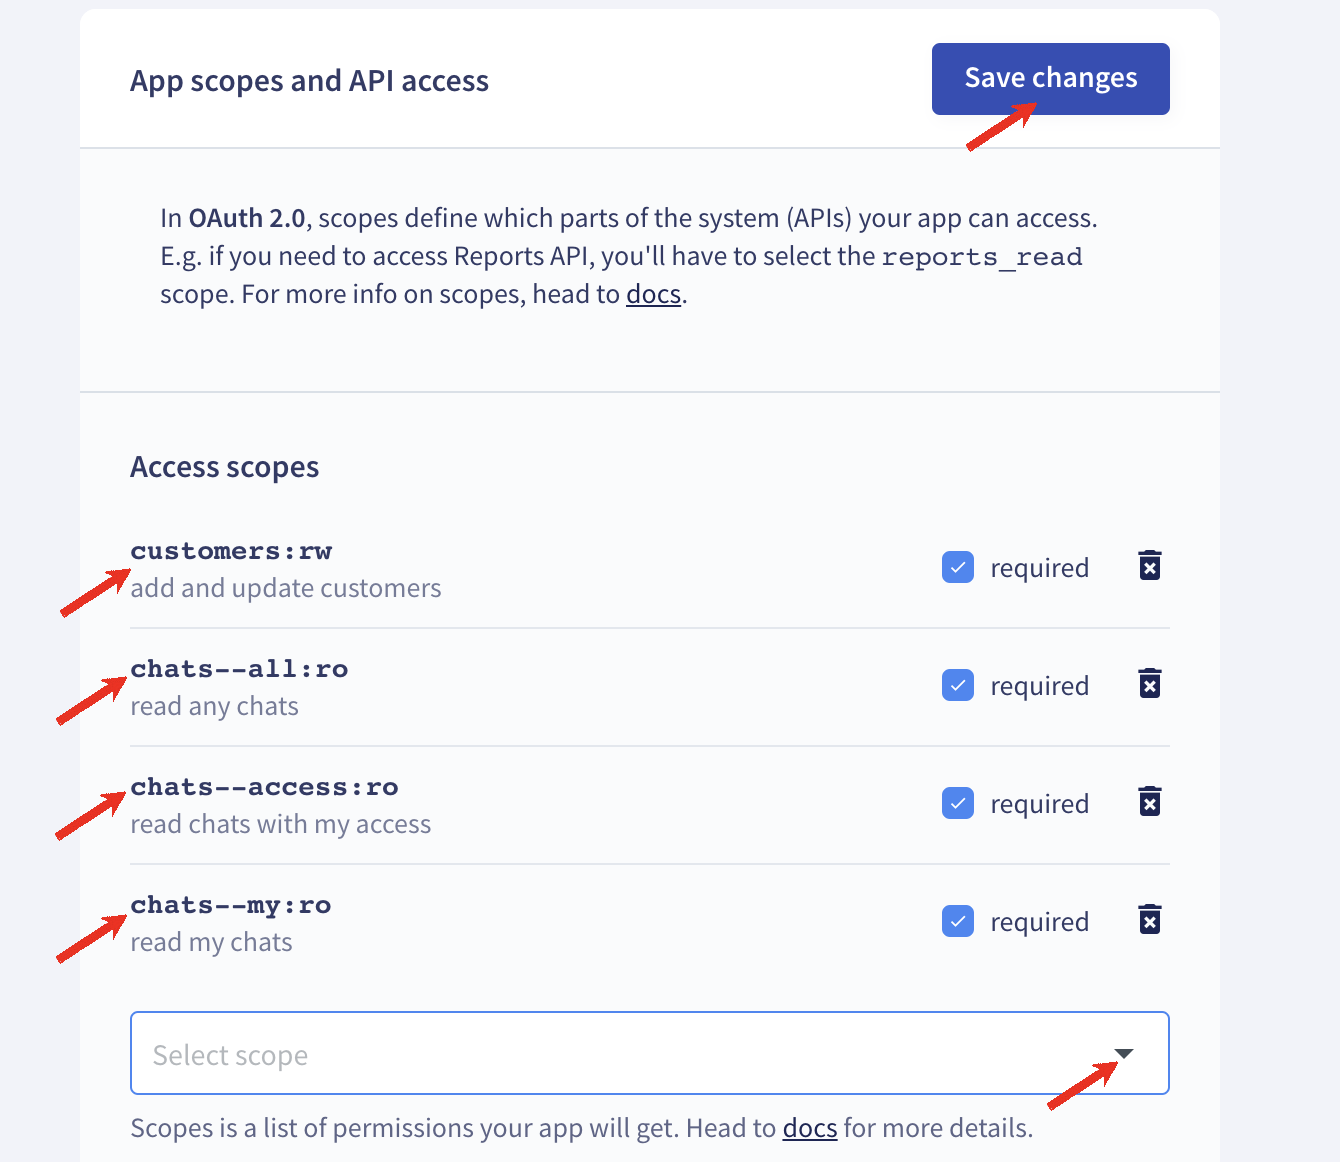
Configure required Access scopes, then click the then click the Save changes button. button.
- customers:rw
- chats--all:ro
- chats--access:ro
- chats--my:ro
- Optionally, update Display details, then click the Save changes button.
Step 2: Connect LiveChat
- Log in to DataGrail.
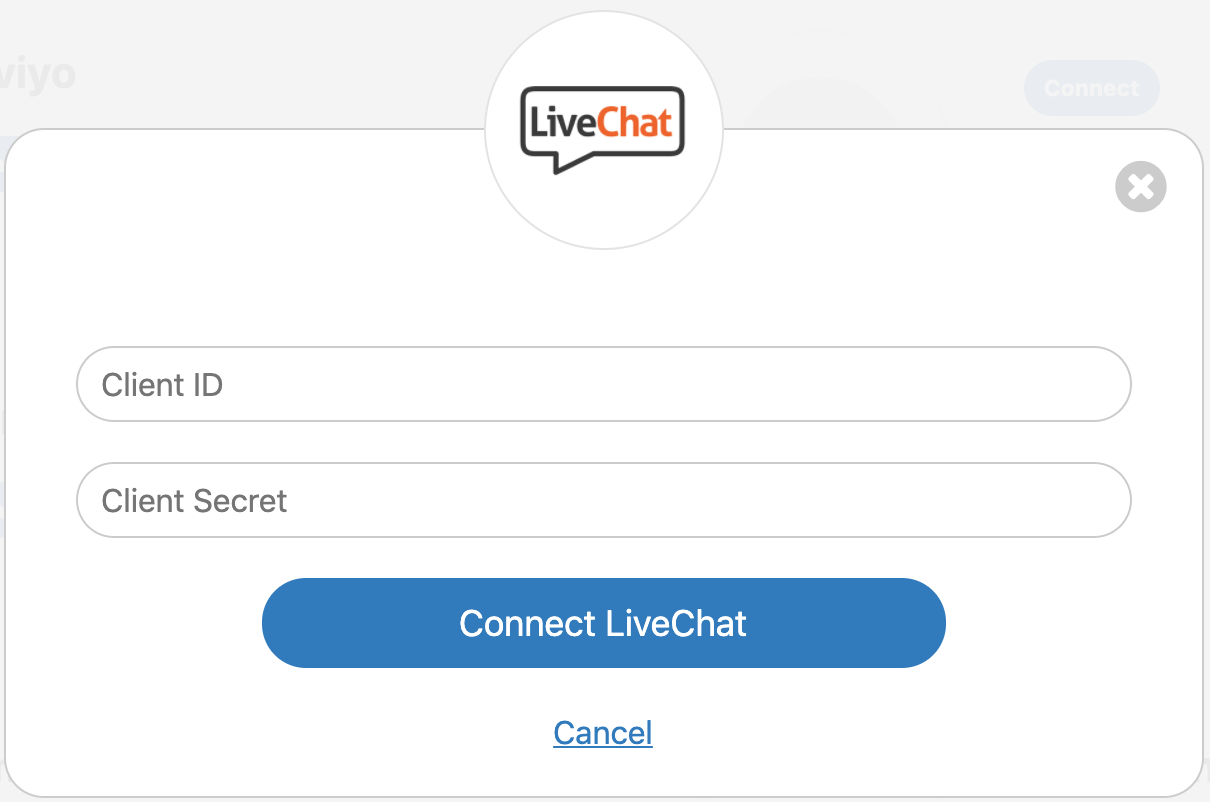
- Click Connect within the Integration page for LiveChat.

- Enter the Client ID and Client Secret obtained from Step 1.
- Click Connect LiveChat.
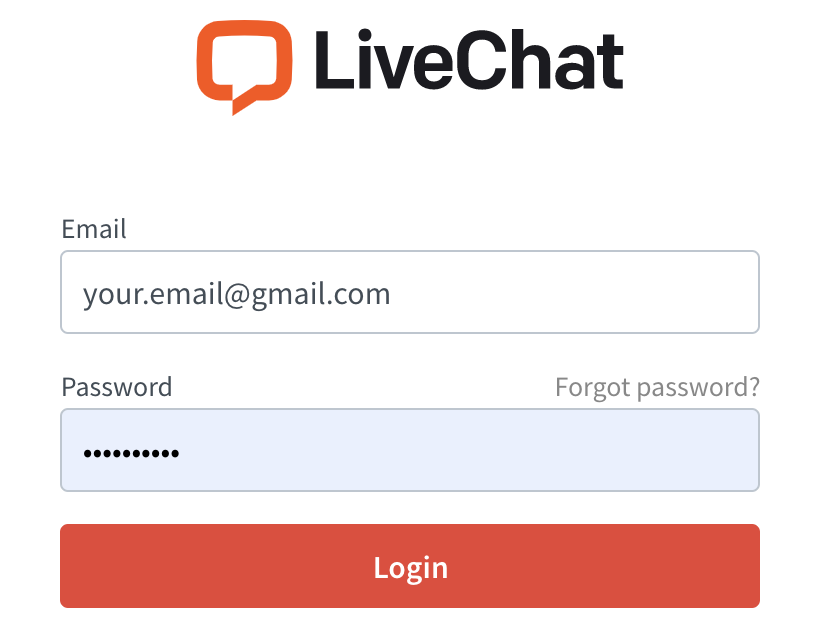
- Log in to LiveChat with your account (this step can be missed if you have already logged in).
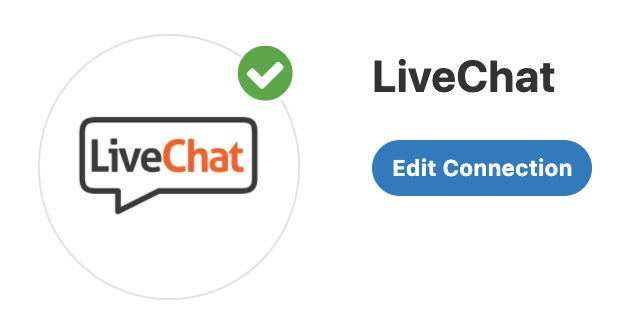
- After successfully authenticating to LiveChat you will be redirected back to DataGrail.

- If there are additional LiveChat accounts to integrate follow these instructions:
-
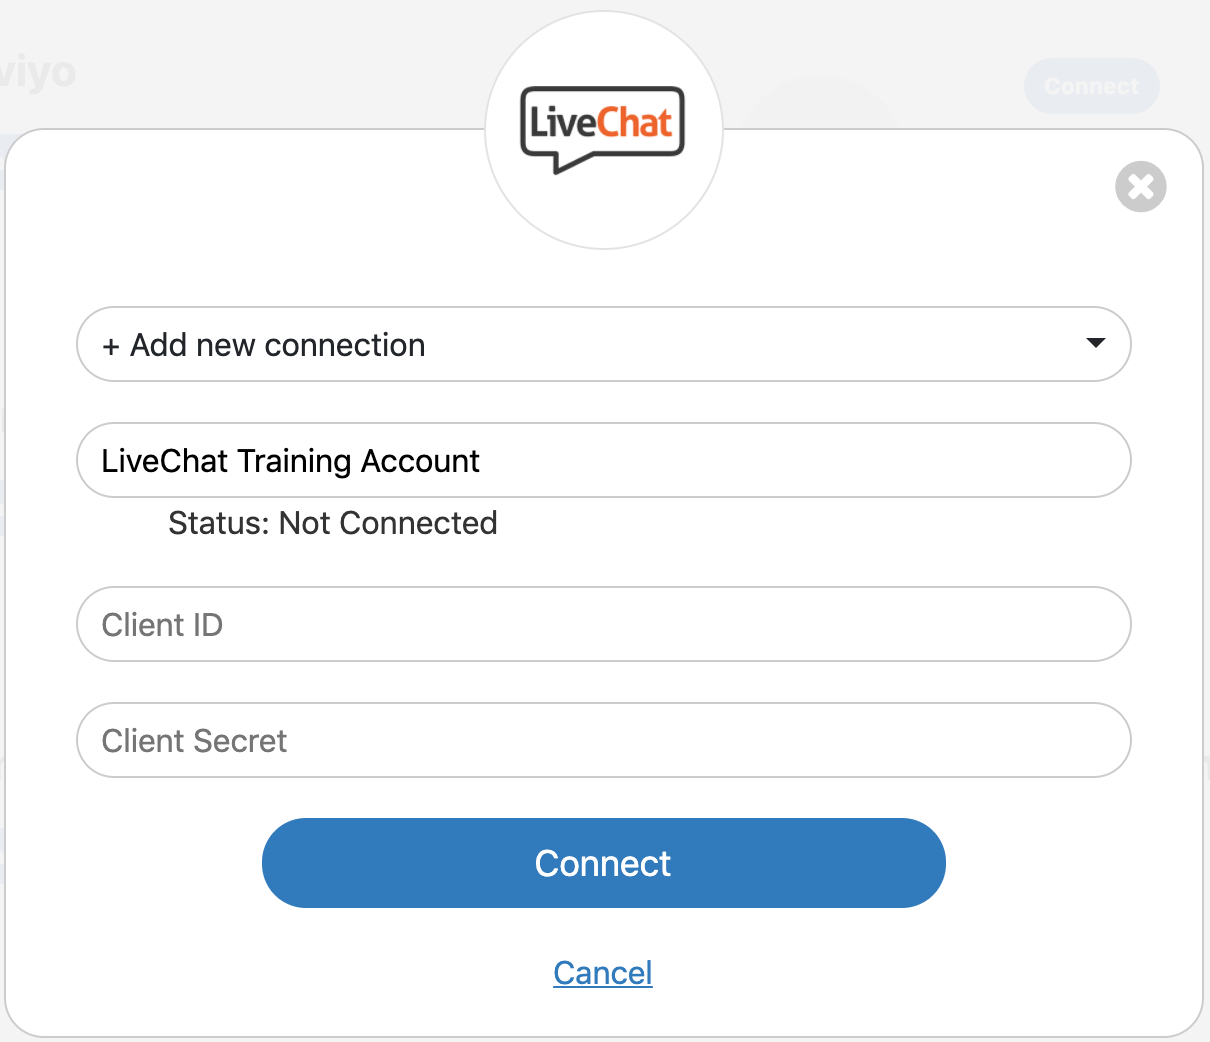
Click Edit Connection within the Integration page for LiveChat.
-
From the drop-down, select +Add New Connection.
-
Under Connection Name, enter a new name to identify this separate account (ex: LiveChat Training Account).
-
Repeat Step 1 to copy Client ID and Client Secret for this new account.
-
Enter the Client ID and Client Secret obtained from Step 1.
-
Click Connect.
-
- In DataGrail, if you have any other integrations not connected (no green check mark) please click Connect to complete the configuration and reference the Help Docs link for instructions
Disclaimer: The information contained in this message does not constitute as legal advice. We would advise seeking professional counsel before acting on or interpreting any material.