IP Allowlisting
IP Allowlisting lets Admins restrict platform access to specific IP ranges. You can restrict interactive sign-in for all users, restrict external MCP client connections, and separately restrict individual API keys or Agents to their own IP ranges.
Restricting Sign-In
You can require that users sign in and interact with the platform only from approved IP ranges. The IP Allowlist field is read-only until you select its edit icon, so an existing list can't be changed by accident.
- Navigate to Settings and select Security.
- Select the edit icon next to the IP Allowlist field.
- Enter one CIDR range per line (for example,
203.0.113.0/24or198.51.100.42/32). - Turn on Enable IP allowlist.
When enabled, anyone signing in from outside the listed ranges is blocked, and any user already signed in is signed out the next time they interact with the platform.
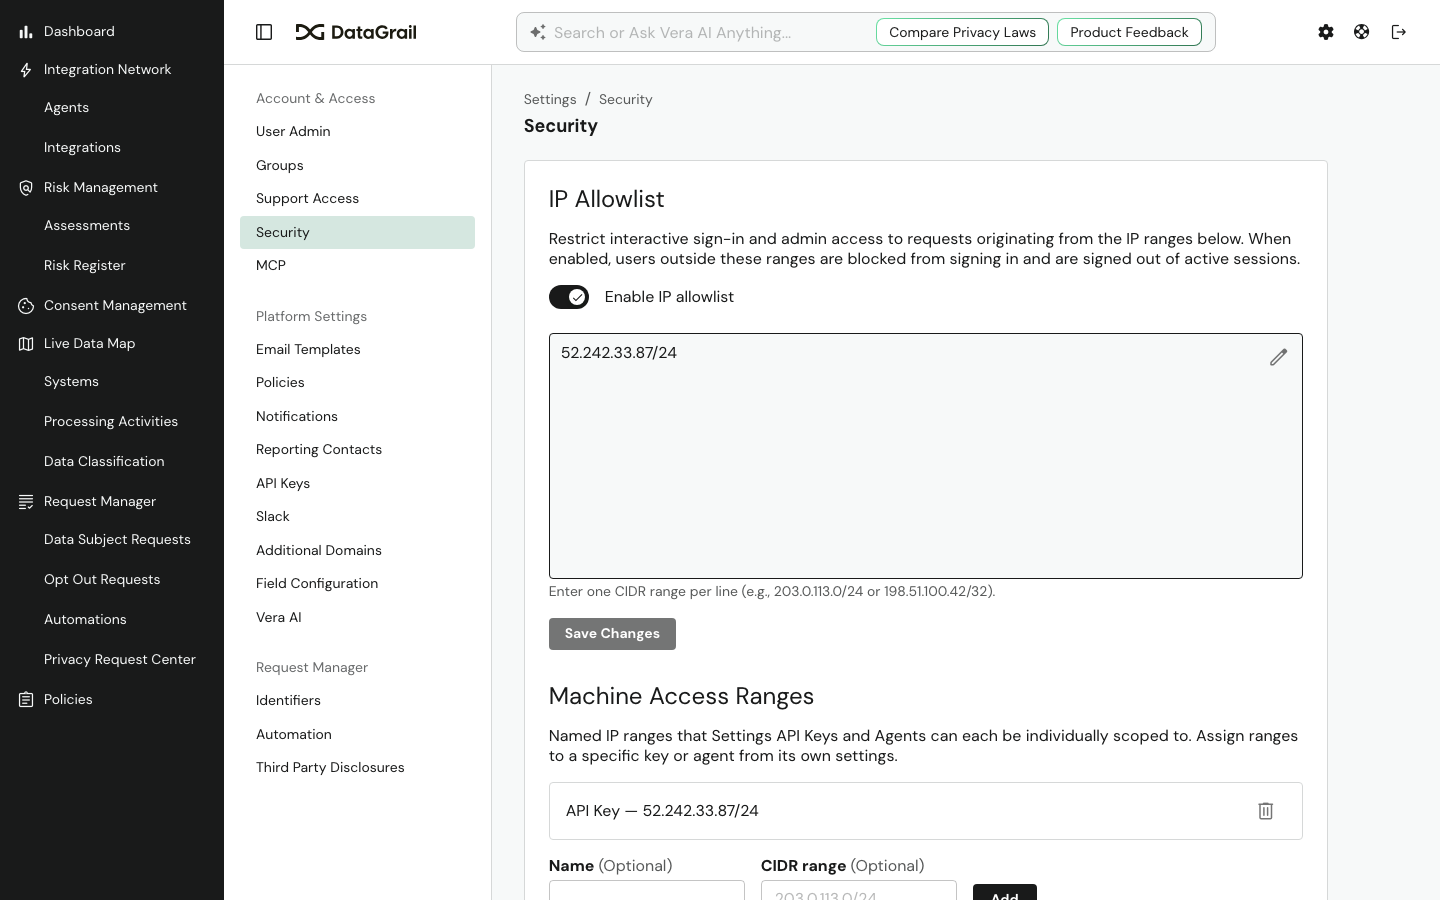
To change the list without changing whether it's enforced, select the edit icon, make your changes, then select Save Changes.
Sign-in attempts blocked by the allowlist appear in the Security Audit Log with the reason Ip Not Allowed.
IP restrictions are checked continuously, not just at sign-in. If you remove a range while a user is actively using the platform from that range, they are signed out on their very next action — you do not need to wait for their session to expire. The same applies to the ranges assigned to API keys and Agents, and to MCP client connections: changes take effect on the next request made with that credential or client.
Restricting MCP Access
Separately from sign-in, you can restrict external MCP clients (such as Claude Desktop or Cursor) to specific IP ranges. This does not affect the Vera AI chat experience.
- Navigate to Settings and select MCP.
- Select the Access tab.
- Under Restrict MCP Access by IP, enter one CIDR range per line (for example,
203.0.113.0/24or198.51.100.42/32). - Turn on Restrict MCP Access by IP.
- Select Save Changes.
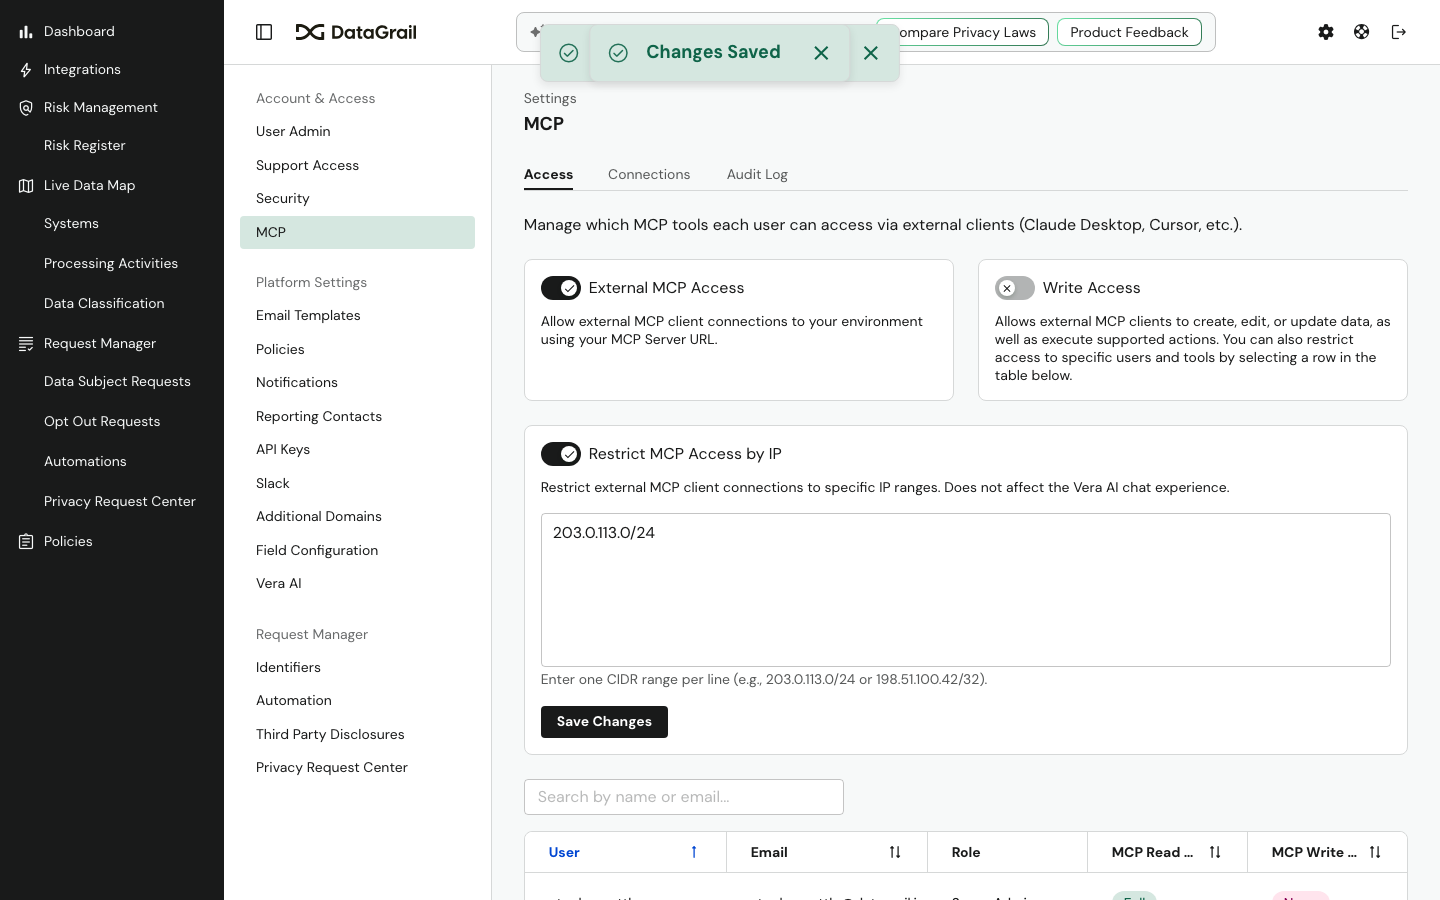
When enabled, external MCP client connections from outside the listed ranges are denied on their next request. The CIDR list can be edited at any time regardless of whether the restriction is currently on or off.
Named Ranges for API Keys and Agents
Separately from the sign-in allowlist, you can maintain a catalog of named IP ranges and assign them to individual API Keys or Agents. This lets you restrict a specific machine credential to its own IP range without affecting interactive sign-in for your users. Adding or removing a range takes effect immediately — there's no separate save step for this catalog.
- Navigate to Settings and select Security.
- Under Machine Access Ranges, enter a Name and CIDR Range for the range.
- Select Add.
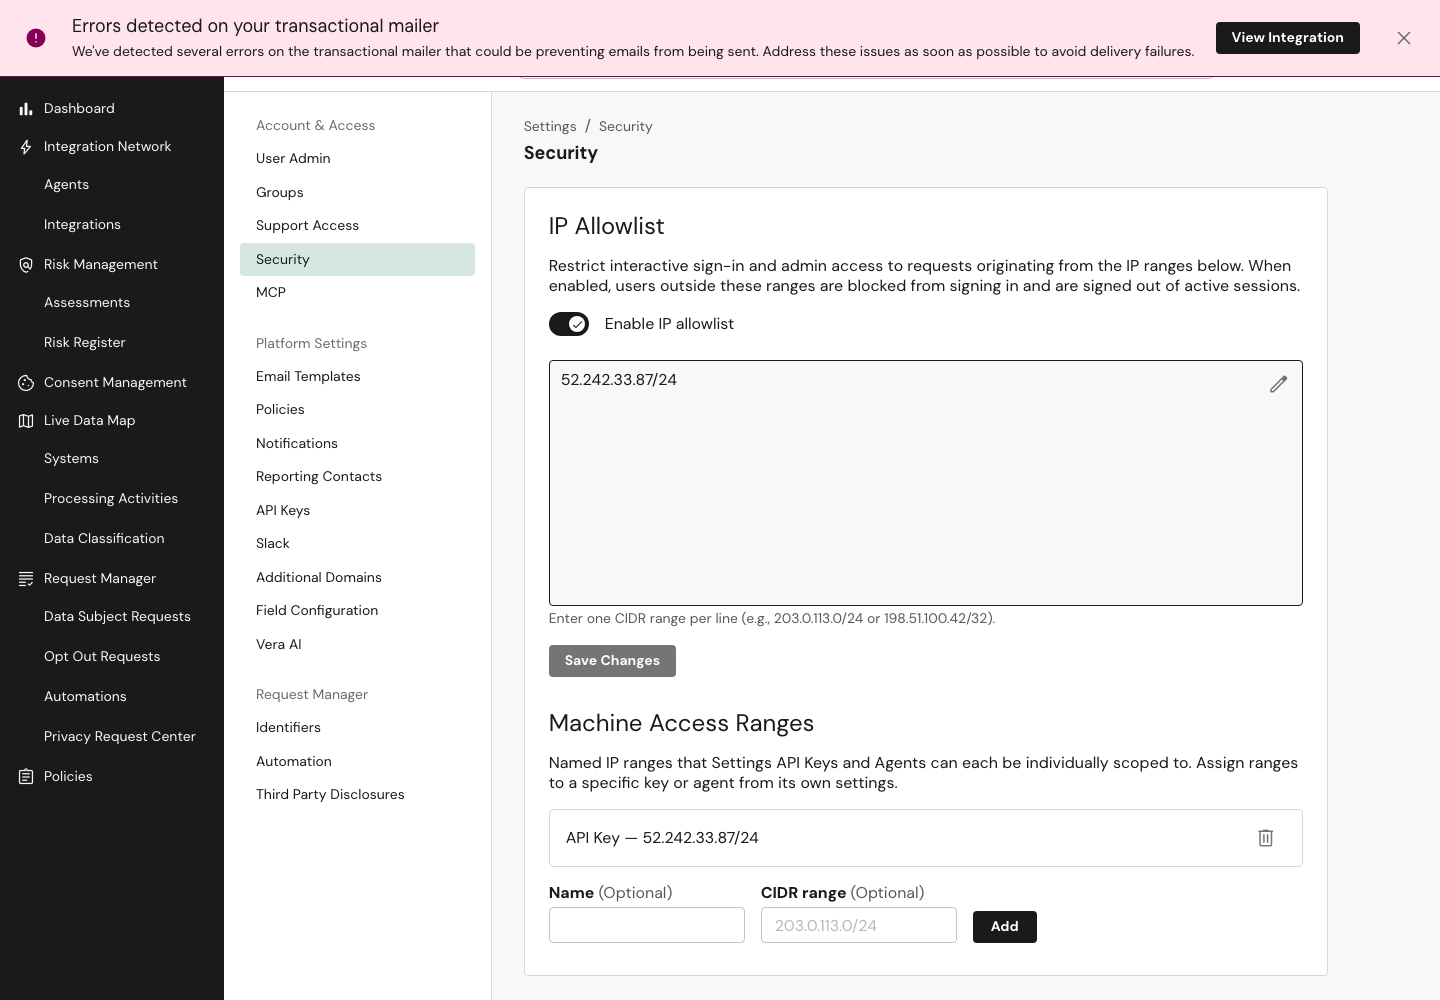
To remove a range, select its trash icon. A named range must be removed from every API key and Agent it's assigned to before you can delete it.
Restricting an API Key
You can restrict an existing API key to specific IP ranges from its settings.
- Navigate to Settings and select API Keys.
- Select the API key you want to restrict.
- Turn on Restrict this key to specific IP ranges.
- Select one or more ranges from the list.
- Select Save Changes.
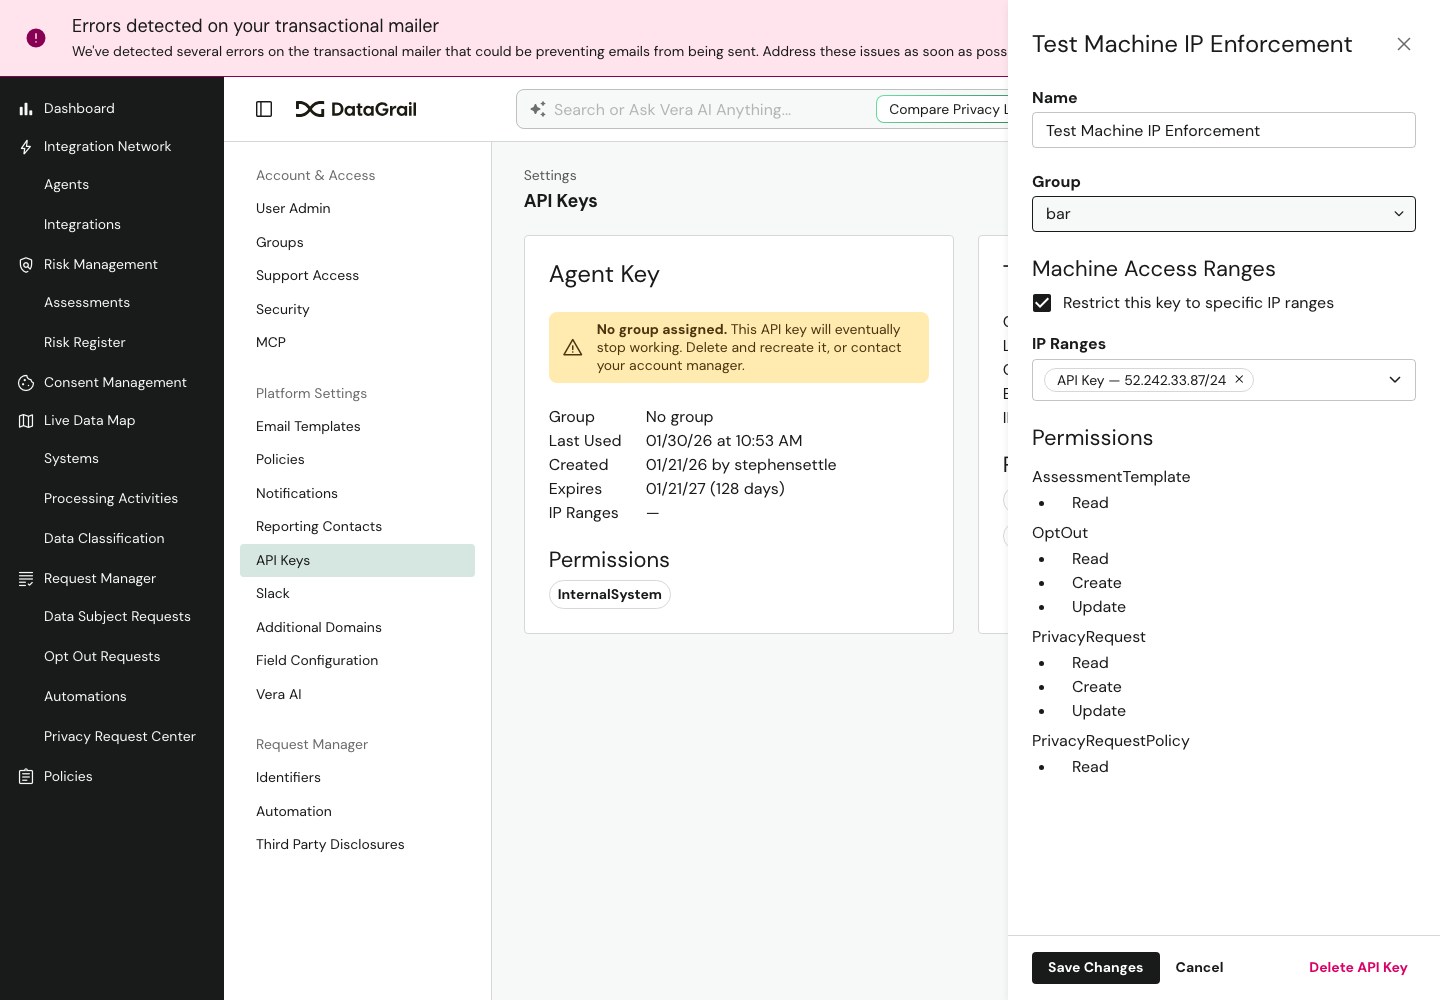
This option is unavailable until at least one named range exists under Machine Access Ranges. Once you turn it on, you must select at least one range — otherwise the key won't save.
Restricting an Agent
You can restrict an Agent's key to specific IP ranges when you create the Agent, or at any time afterward.
When creating a new Agent:
- Navigate to Agents and select Add New Agent.
- Enter a name and select an Agent Type.
- Turn on Restrict to specific IP ranges.
- Select one or more ranges from the list.
- Select Add New Agent.
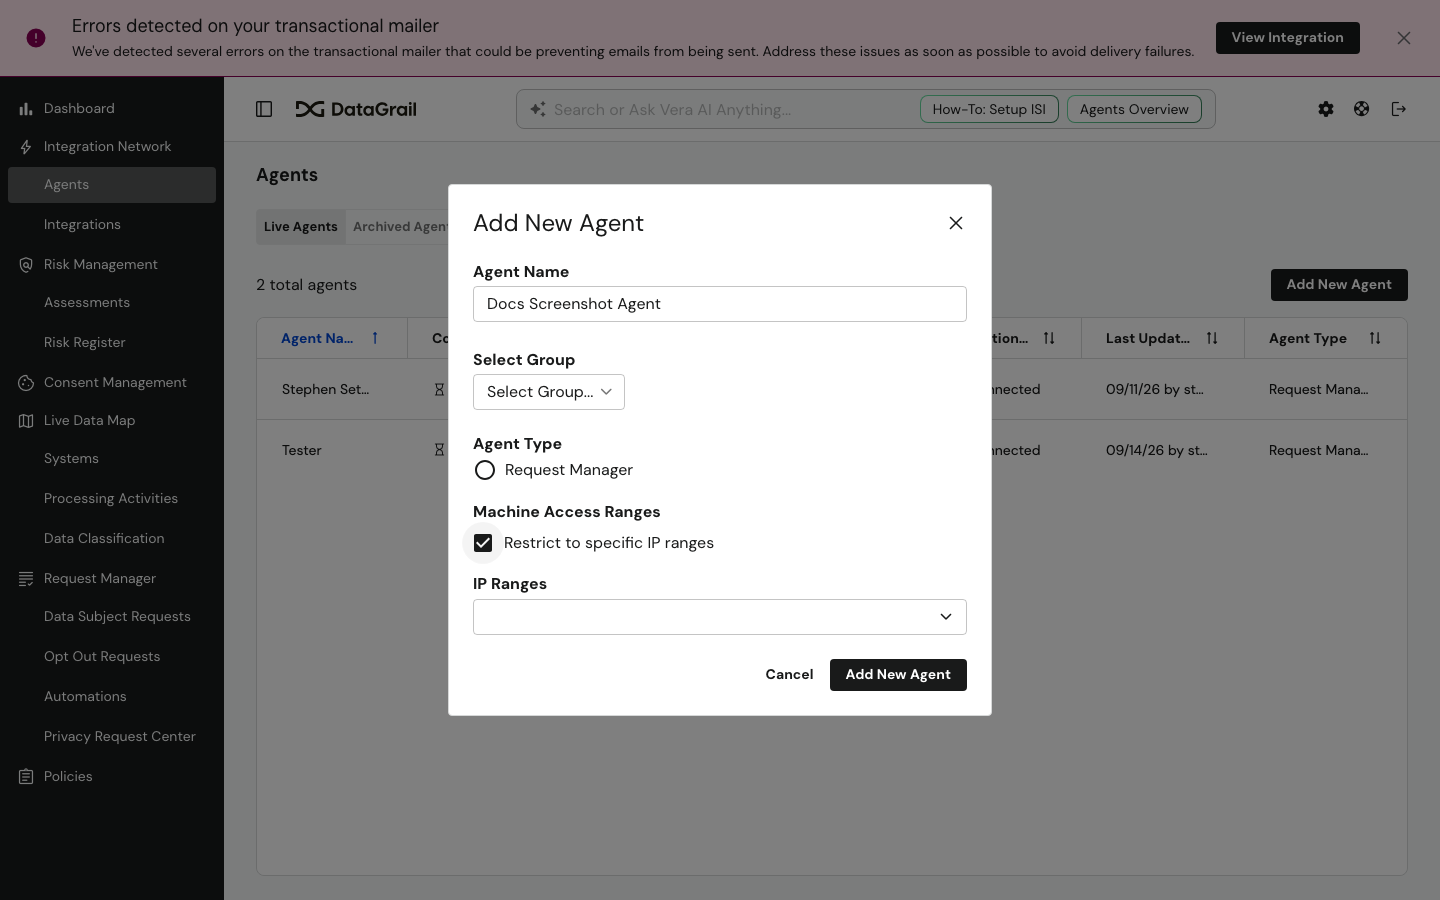
On an existing Agent:
- Navigate to Agents and select the Agent you want to restrict.
- In the Details panel, turn on Restrict to specific IP ranges.
- Select one or more ranges from the list.
- Select Save Changes.
As with API keys, this option is unavailable until at least one named range exists under Machine Access Ranges, and you must select at least one range before the Agent will save.
Disclaimer: The information contained in this message does not constitute as legal advice. We would advise seeking professional counsel before acting on or interpreting any material.