SCIM Configuration
SCIM (System for Cross-domain Identity Management) is in beta for select customers and prospects. Please contact your Account Manager or support@datagrail.io for more information.
SCIM, the System for Cross-domain Identity Management, is an open protocol that automates management of user information between identity providers (IdPs, e.g. Okta, Auth0, Microsoft Entra) and service providers (SPs, e.g. DataGrail). It can be used to control access to the DataGrail application and automate the creation, update, and offboarding of users.
Note: DataGrail only supports connections with SCIM v2.0.
Allocating Keys
Setting up SCIM requires an API key. Instructions on SCIM key creation are below.
Overview on API keys: V2 Authentication Documentation.
-
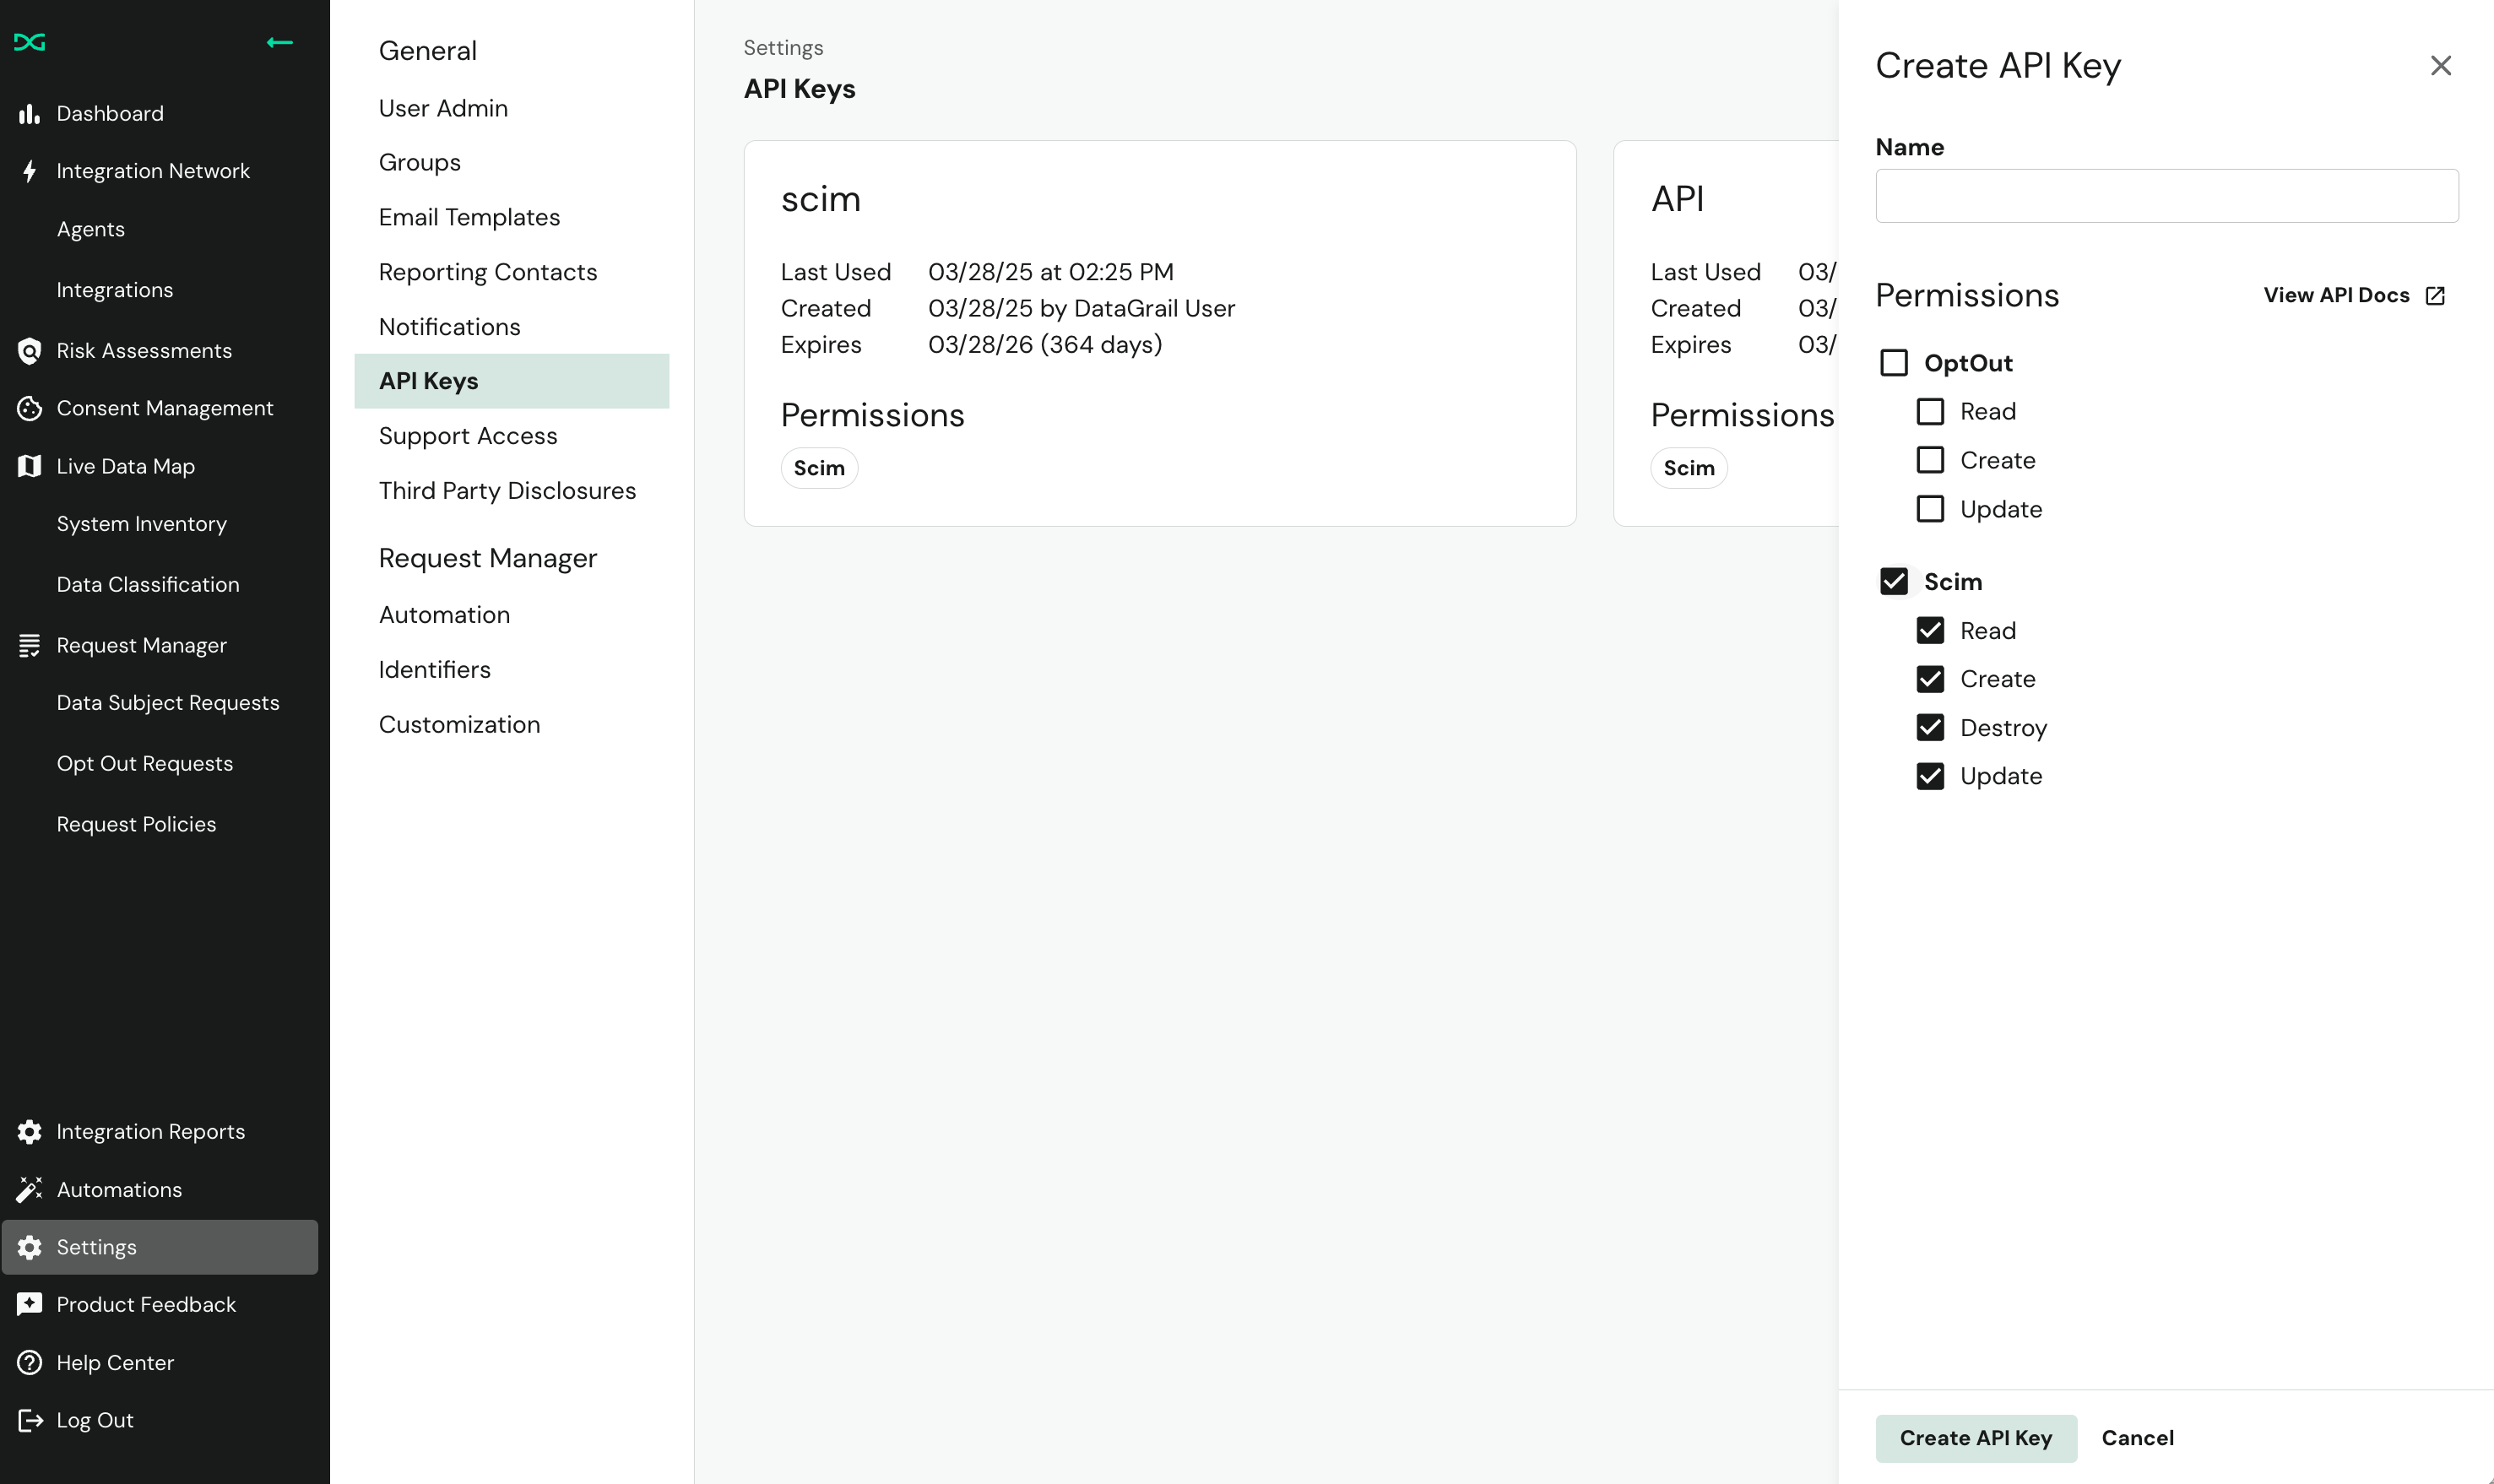
In the DataGrail sidebar, select Settings and then API Keys.
-
Select Create API Key. Name the key, and select all SCIM permissions.

-
Select Create API Key. Make sure to copy the key before closing the modal; the key is not recoverable after the dialog closes.
Standard Configuration For Okta
This section documents the standard configuration for Okta to manage the DataGrail app using SCIM. This section assumes that you've already configured a DataGrail Application with SAML authentication.
-
Sign in to Okta as an admin.
-
In the left-hand menu, select Applications and then Applications.
-
Select your DataGrail Application from the dropdown.
-
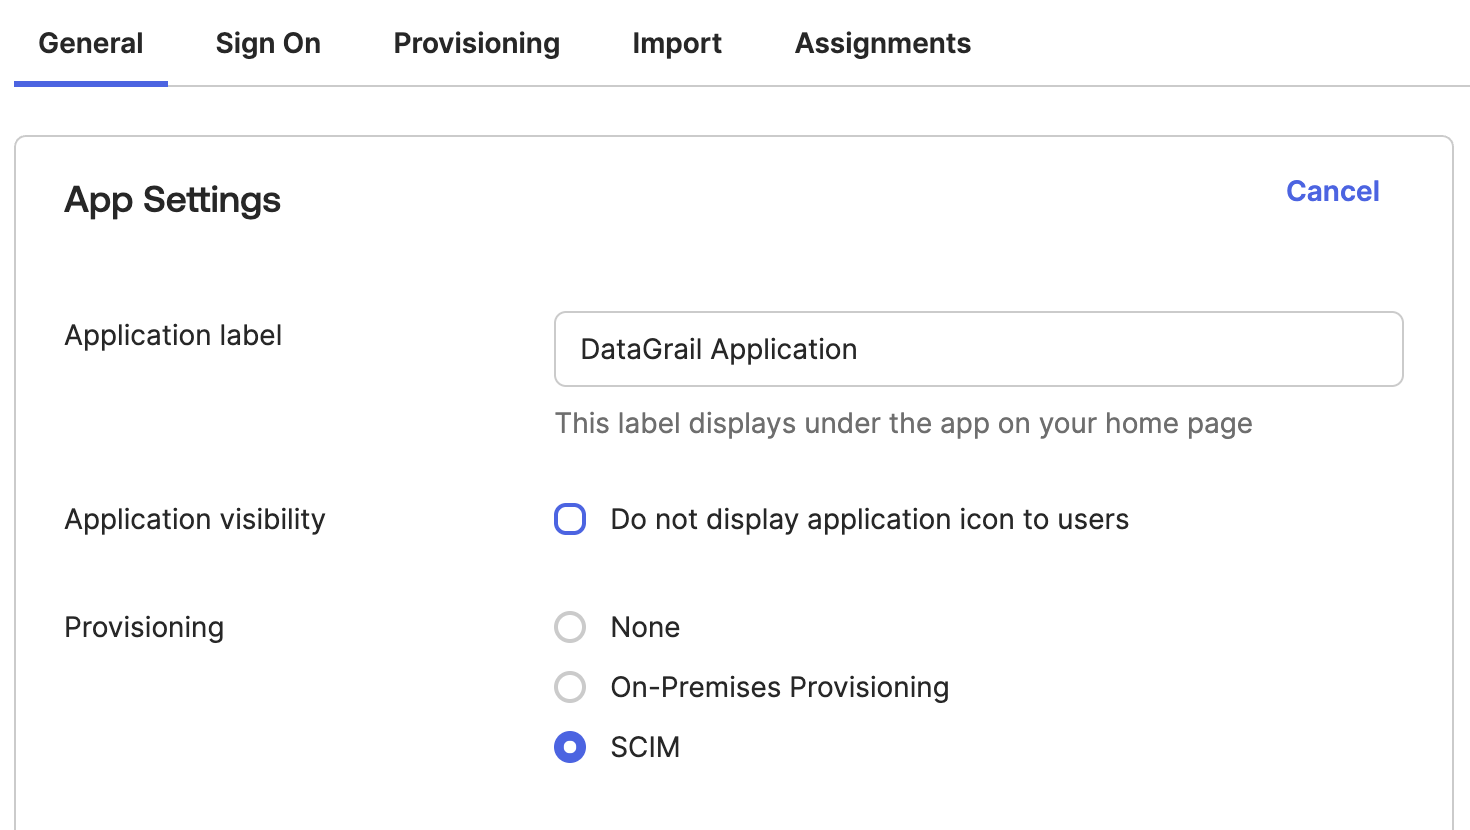
The application should have Provisioning set to SCIM.

-
Once that is saved, open the Provisioning tab and update the configuration to the following, where
customer_nameis the string that precedes.datagrail.ioin your DataGrail login URL (e.g.acmeforacme.datagrail.io).Field Value SCIM connector base URL https://**customer_name**.datagrail.io/scim/v2/Unique identifier field for users email Import New Users and Profile Updates Checked Push New Users Checked Push Profile Updates Checked -
Select Test Connector Configuration.
-
Select Save. This should bring you back to the Provisioning to App screen. Select Edit. Ensure that Create Users, Update User Attributes and Deactivate Users are all enabled, and save.
While this offers a basic setup of SCIM Provisioning, management is very flexible and your particular workflow will be dependent on organizational goals.
Frequently Asked Questions
Why are deprovisioned users still showing up in the DataGrail app?
When you remove a user's access to DataGrail via SCIM, they will immediately lose access to the platform, but their DataGrail user is not deleted.
User accounts are retained for record-keeping purposes, but can only be accessed again when the application is reassigned by the SAML provider.
Disclaimer: The information contained in this message does not constitute as legal advice. We would advise seeking professional counsel before acting on or interpreting any material.