Automations
Automations allow you to create workflows that programmatically define how each phase of a Privacy Request is processed. Workflows can evaluate properties such as requester information and data returned by your integrations, which can be used to determine how the request is processed within your organization.
DataGrail User Roles
The following roles are able to view and interact with Automations:
- Super Admin
- Request Admin
Use Cases
Common use cases for an Automation include, but are not limited to:
- Processing customer and employee Privacy Requests against different integrations.
- Automatically denying requests based on properties of the data subject.
- Only processing deletion against certain integrations based on data retrieved from a primary system of record.
Key Concepts
Before building an automation, it is important to understand the following concepts.
Workflow Phases
The primary trigger for a workflow automation is when a Privacy Request enters one of three states.
Extracting Personal Data
All Privacy Request types go through this workflow phase. In this state, API integrations will begin querying for Data Subject PII.
-
On Access, Access Categories, Rectification, and Data Portability requests, all API Integrations will query for PII and Direct Contact Integrations will send emails to their respective processors.
-
On Deletion and Pause Processing requests, all API Integrations (with the exception of Whole-Record Deletion Integrations) will query for PII. Direct Contact Integrations do not send emails to their respective processors in this state for these request types.
Pending Action
All Privacy Requests types go through this workflow phase. This state allows Privacy Managers to review retrieved data and determine what results to send to the Data Subject or what data to delete. Requests exit this state after a Privacy Manager selects the Process Request button.
-
Access, Access Categories, Rectification, and Data Portability requests, will send the final notification to the Data Subject after this state and then move to closed.
-
Deletion and Pause Processing requests, will move to the Pending Delete state after completing Pending Action.
Pending Delete
Only Deletion and Pause Processing requests enter this workflow phase. In this state, configured API Integrations execute deletion and Direct Contact Integrations send emails to their respective processors.
Once this state is complete, the Data Subject will be notified and the request will move to closed.
Before creating workflows, it is critical to understand the Privacy Request Lifecycle in DataGrail. Please review the Request Lifecycle Overview before creating your first workflow automation.
Nodes, Conditions, & Actions
Workflow automations are composed of Nodes, Conditions, and Actions which can be used to build complex logic for processing Privacy Requests.
| Term | Definition |
|---|---|
| Node | A building block in a workflow that represents either a condition or an action, connected to other nodes to define the flow of logic or tasks. |
| Condition | A node containing logical statement that evaluates to true or false, enabling branching decisions within a workflow (e.g., if X, do Y; otherwise, do Z). |
| Action | A node where a specific task is executed, such as sending an email or assigning a request to a user. |
Creating a Workflow
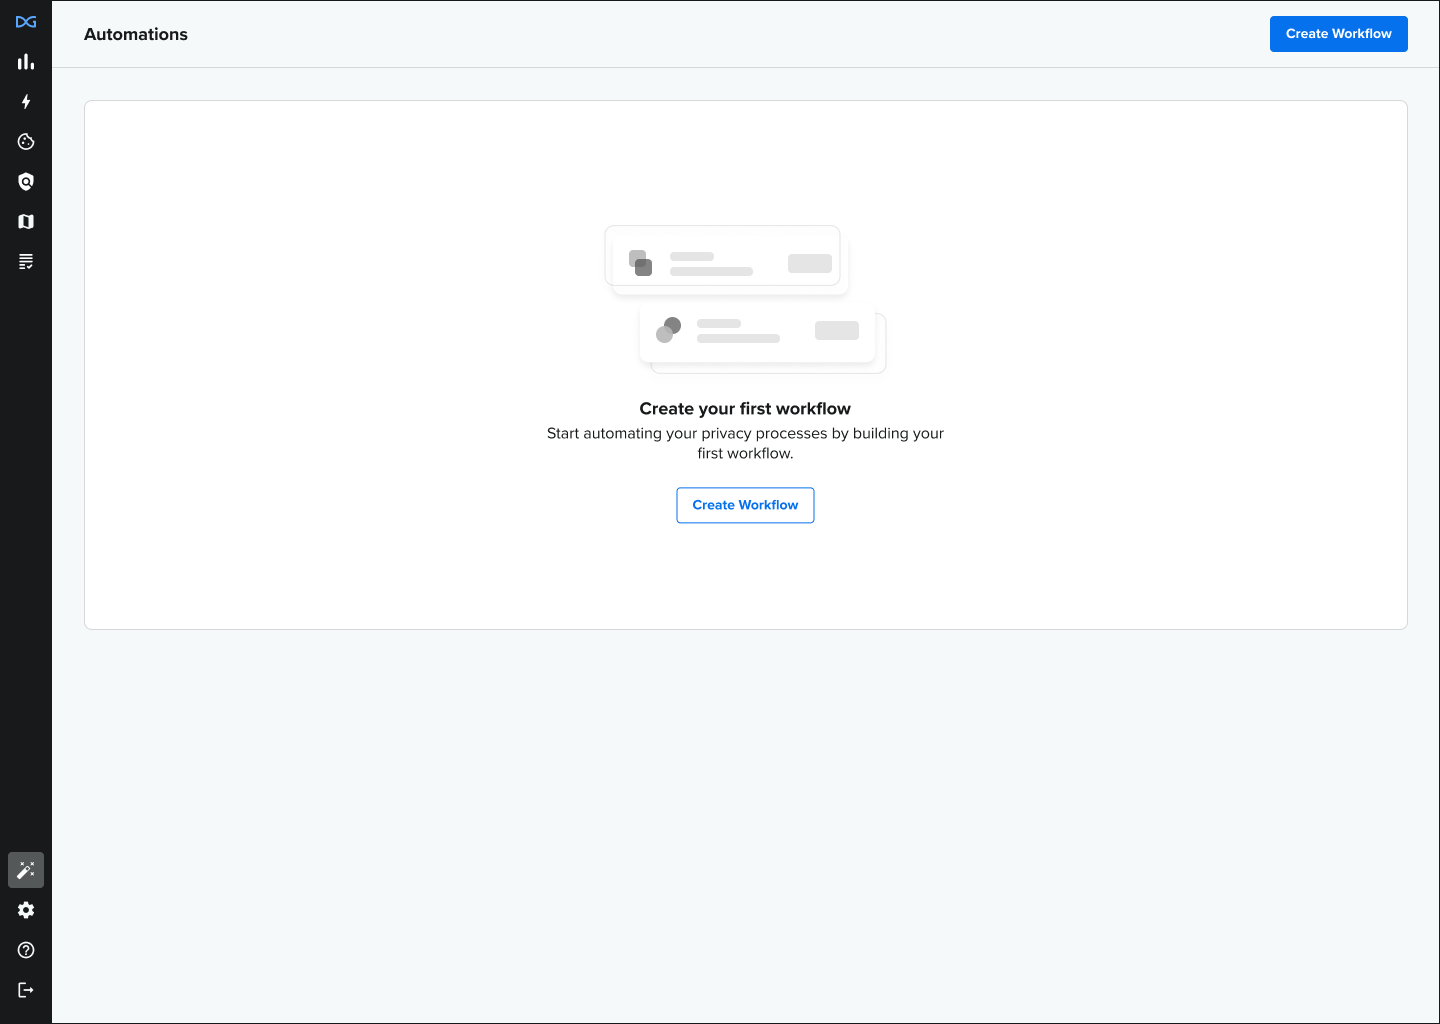
To create an Automated Request Manager Workflow, navigate to Automations in the left-hand sidebar.
Choosing The Workflow State
The trigger for any workflow is when a Privacy Requests enters one of the three valid Workflow Phases. Choosing the correct workflow phase is critical, so it is important to understand your objective before beginning.
The workflow phase you choose is largely dependent on your goal, but you generally want to choose the earliest workflow phase possible (i.e. "Extracting Personal Data" comes before "Pending Delete") to ensure your workflow is efficient.
The following questions can help guide the workflow phase that you choose:
- Is the workflow intended to conditionally trigger the execution of integrations?
- If yes, and the workflow is only intended for Deletion or Pause Processing requests, use Pending Delete as your workflow phase.
- If yes, and the workflow is intended for all request types, use Extracting Personal Data as your workflow phase.
- Is the workflow intended to deny or assign a request to a user?
- If yes, always use Extracting Personal Data as your workflow phase.
All Privacy Request types go through the Extracting Personal Data workflow phase. If you exclude an integration in this phase, it will also be excluded on a deletion request in the Pending Delete state.
Building The Workflow
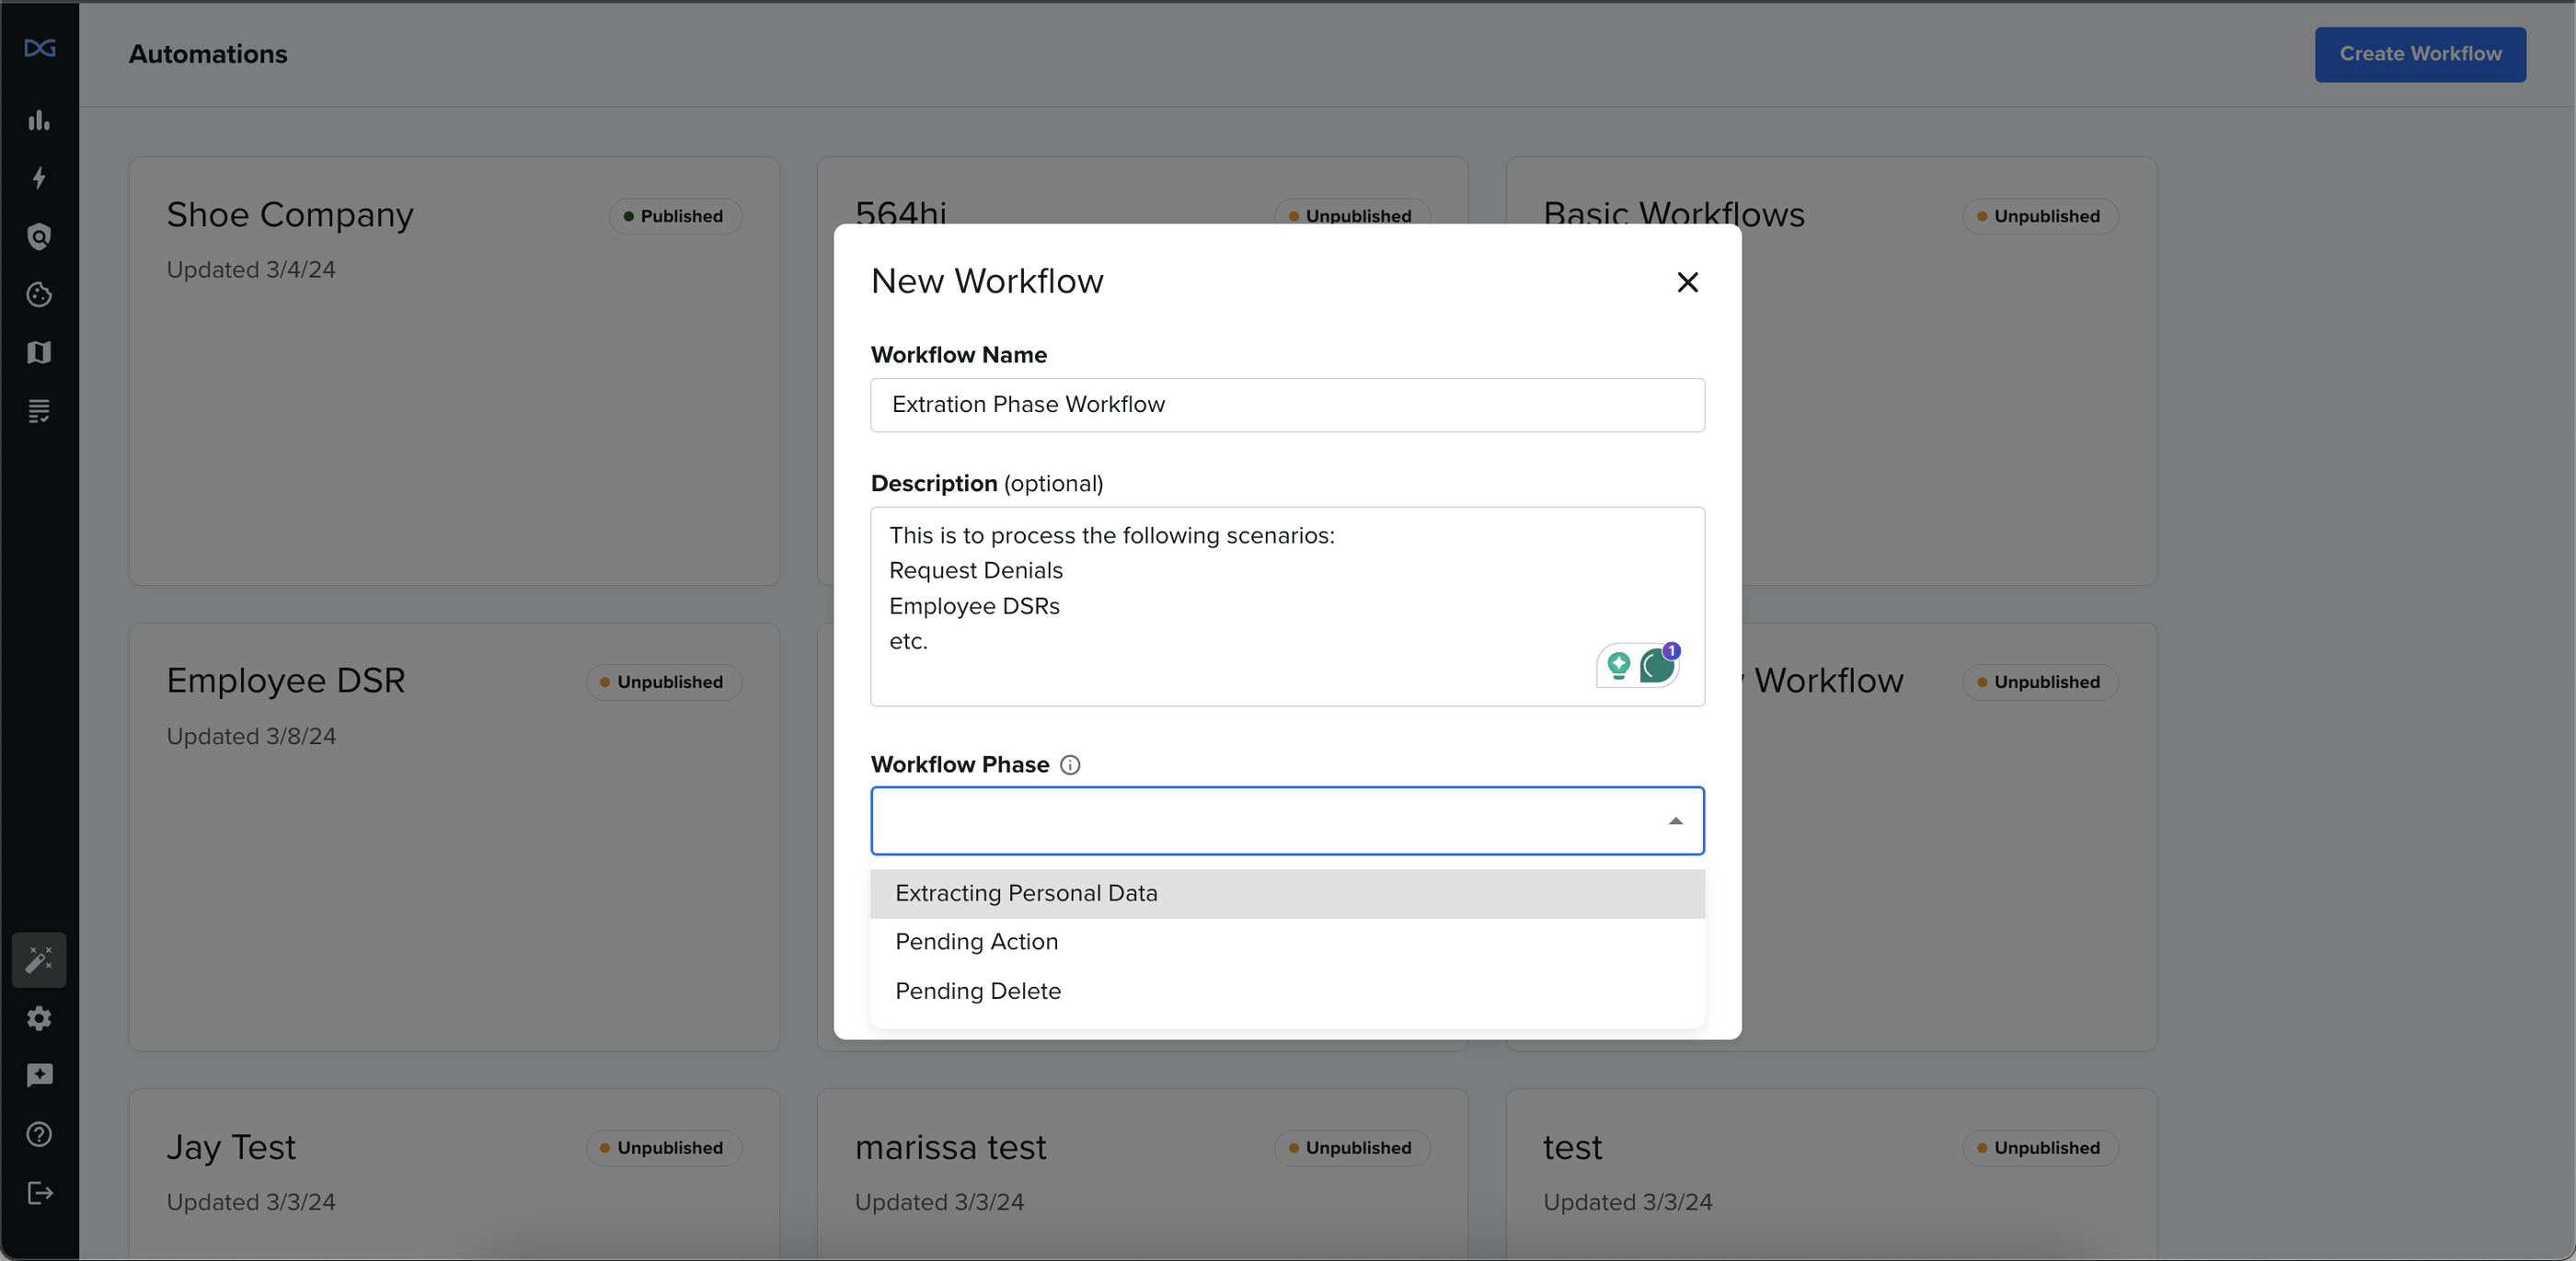
To create a new workflow, select Create Workflow, and you will be prompted to enter three required fields: Workflow Name, Description, and Workflow Phase.
Use the "+" button to build out your workflow logic with supported Conditions and Actions.
Conditions
Conditions allow your workflow to make decisions by evaluating a property or data retrieved by an integration. Some conditions are only available in specific phases or can only precede certain actions.
Creating a Condition
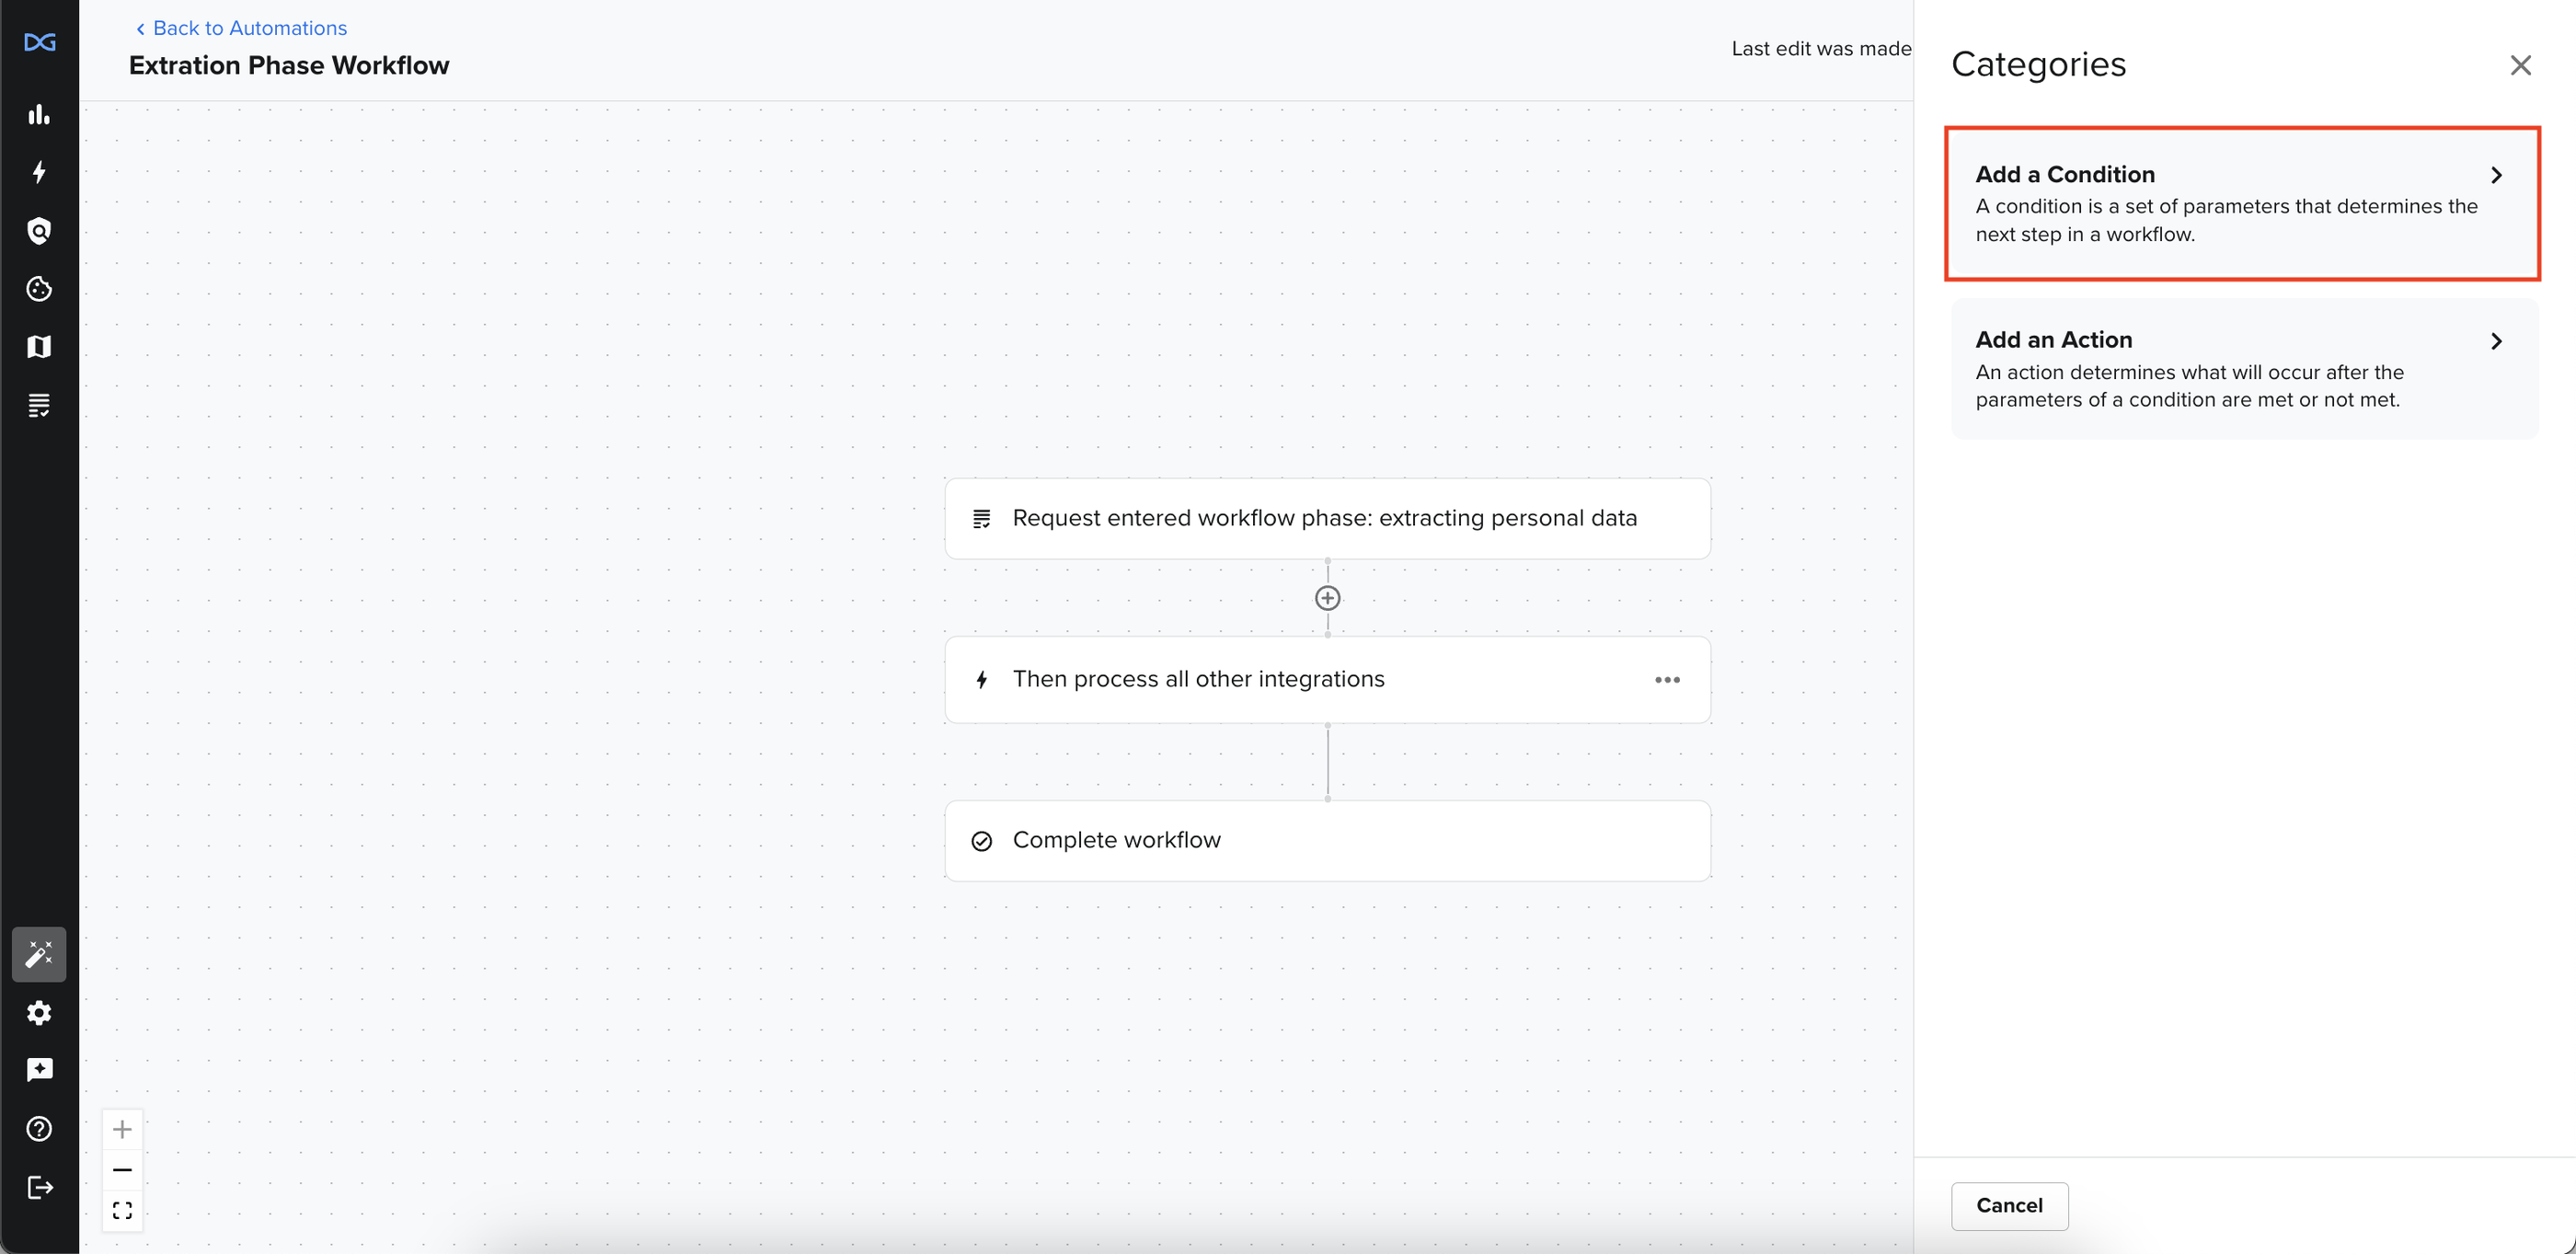
To create a condition node, select Add a Condition and select which condition you would like to start with.
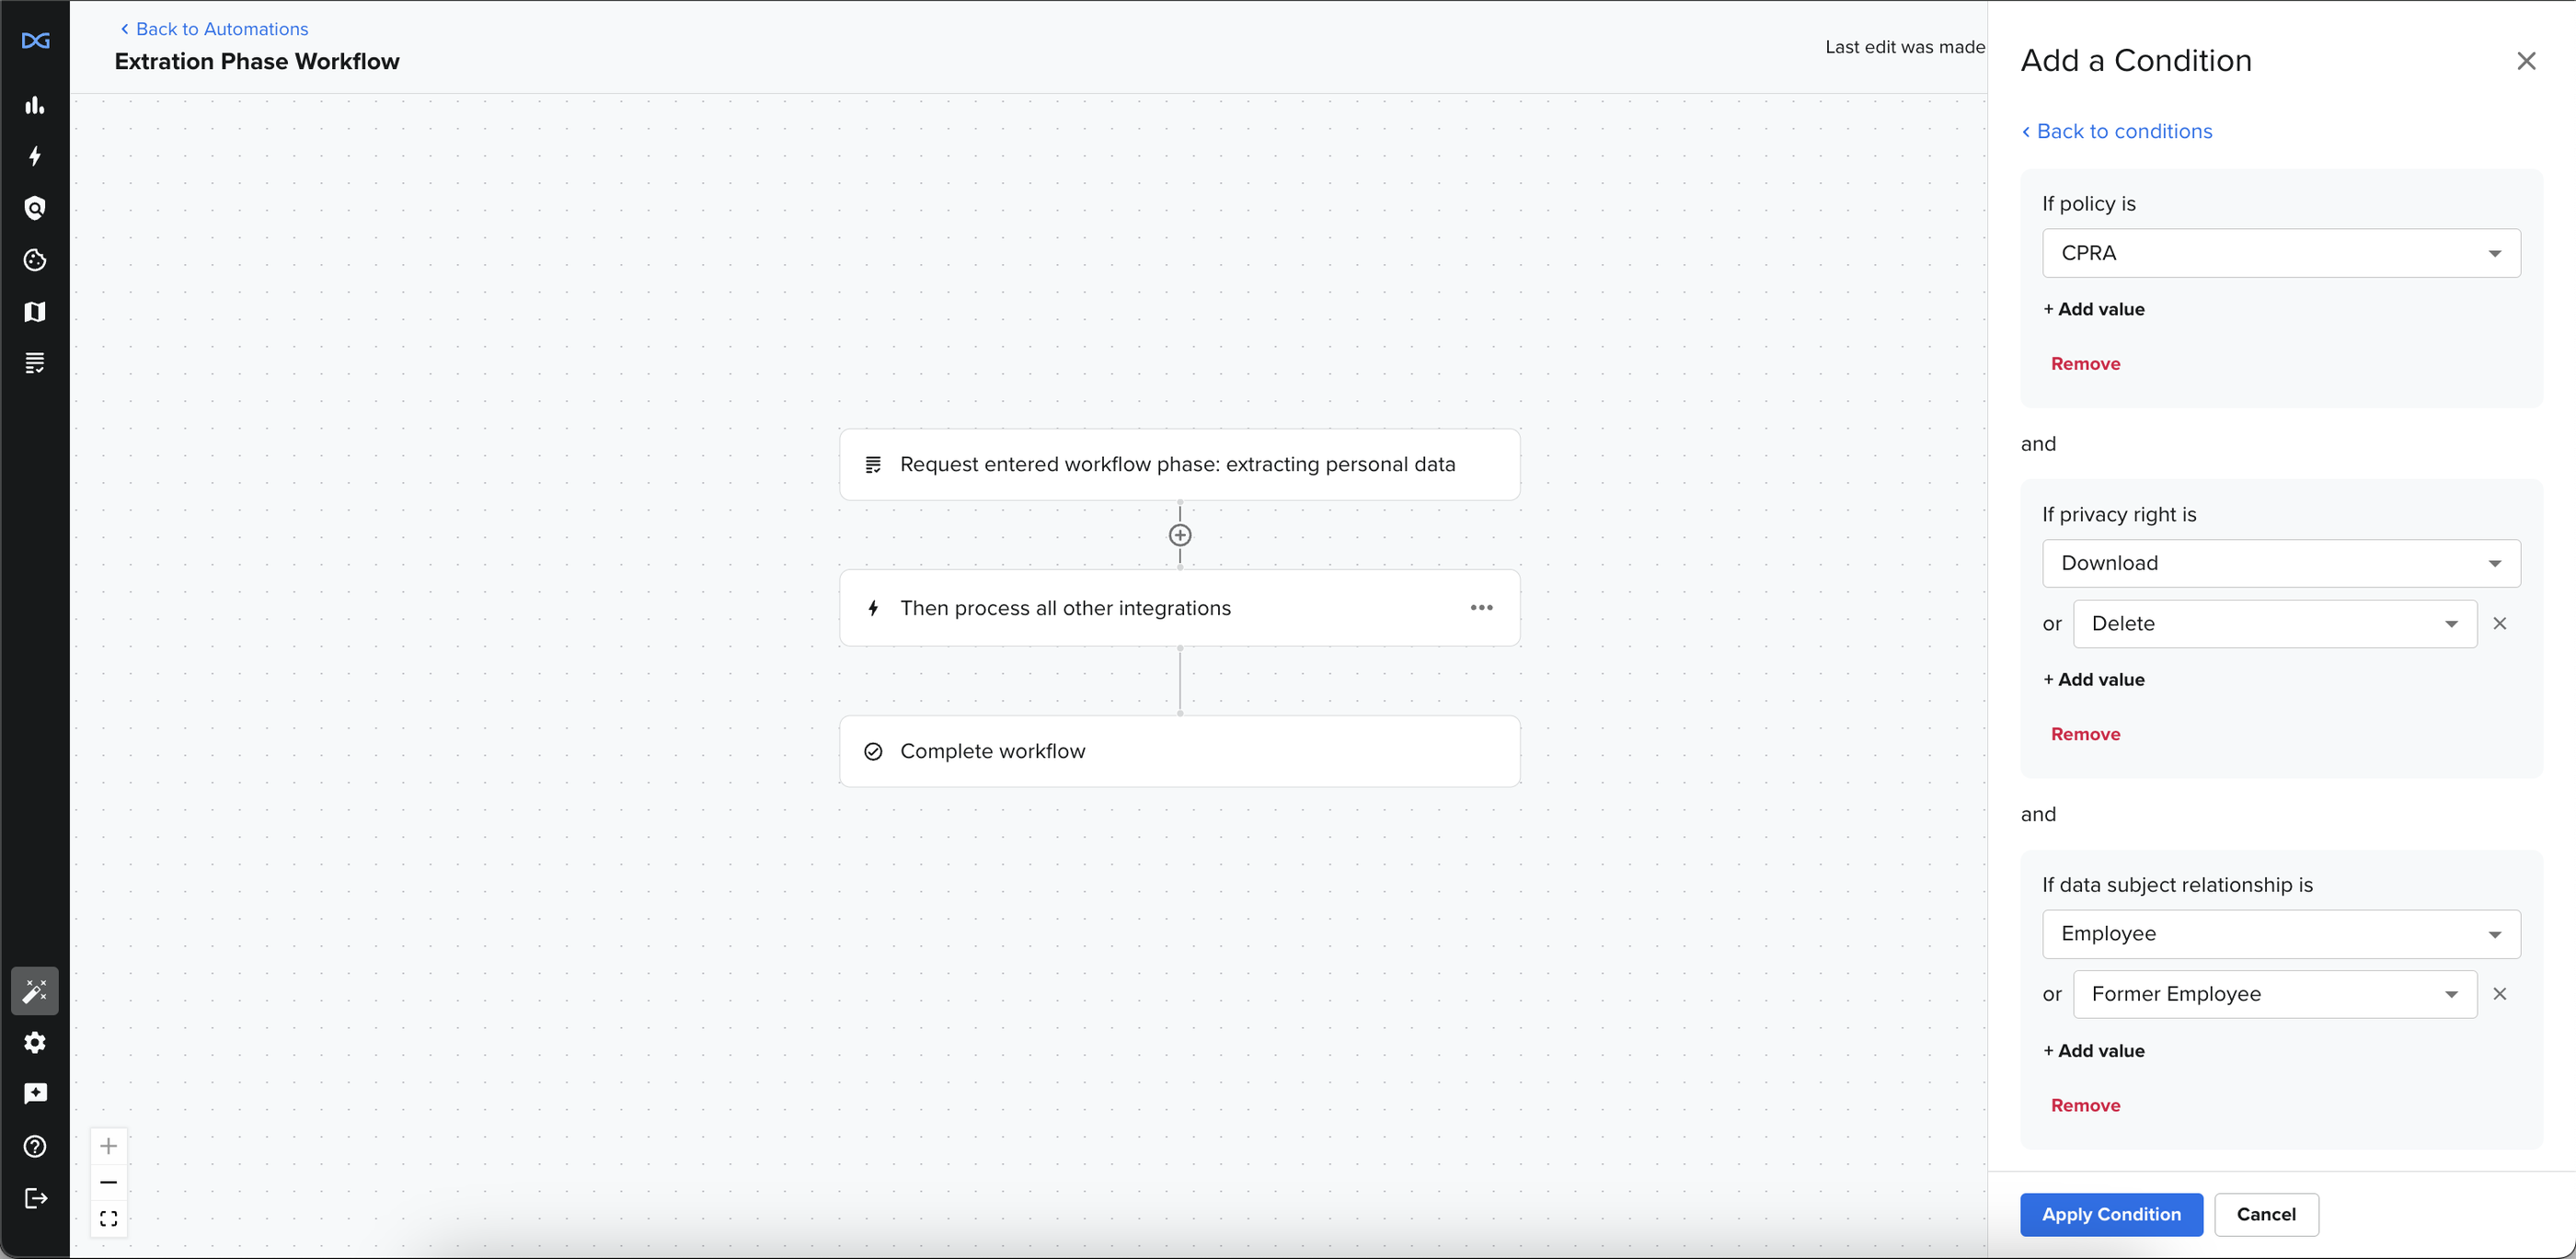
Evaluating Multiple Values and Properties
When available, use the Add Value button to allow multiple potential values using OR logic. If any of these values is true, the entire condition will also return true.
Additionally, multiple properties can be evaluated in the same condition node by selecting any of the options listed under Add Another Condition. Multiple properties will be evaluated using AND logic. If all of these values are true, the entire condition will also return true.
Branching
Once a condition node has been applied, the workflow will split into two branches: a true branch and a false branch. Branches can be layered to create complex logic.

All new branches generated in the Extracting Personal Data phase will automatically have the "Then process all other integrations" and "Complete workflow" nodes.
See the Process Integrations Action for more information on the "Then process all other integrations" node.
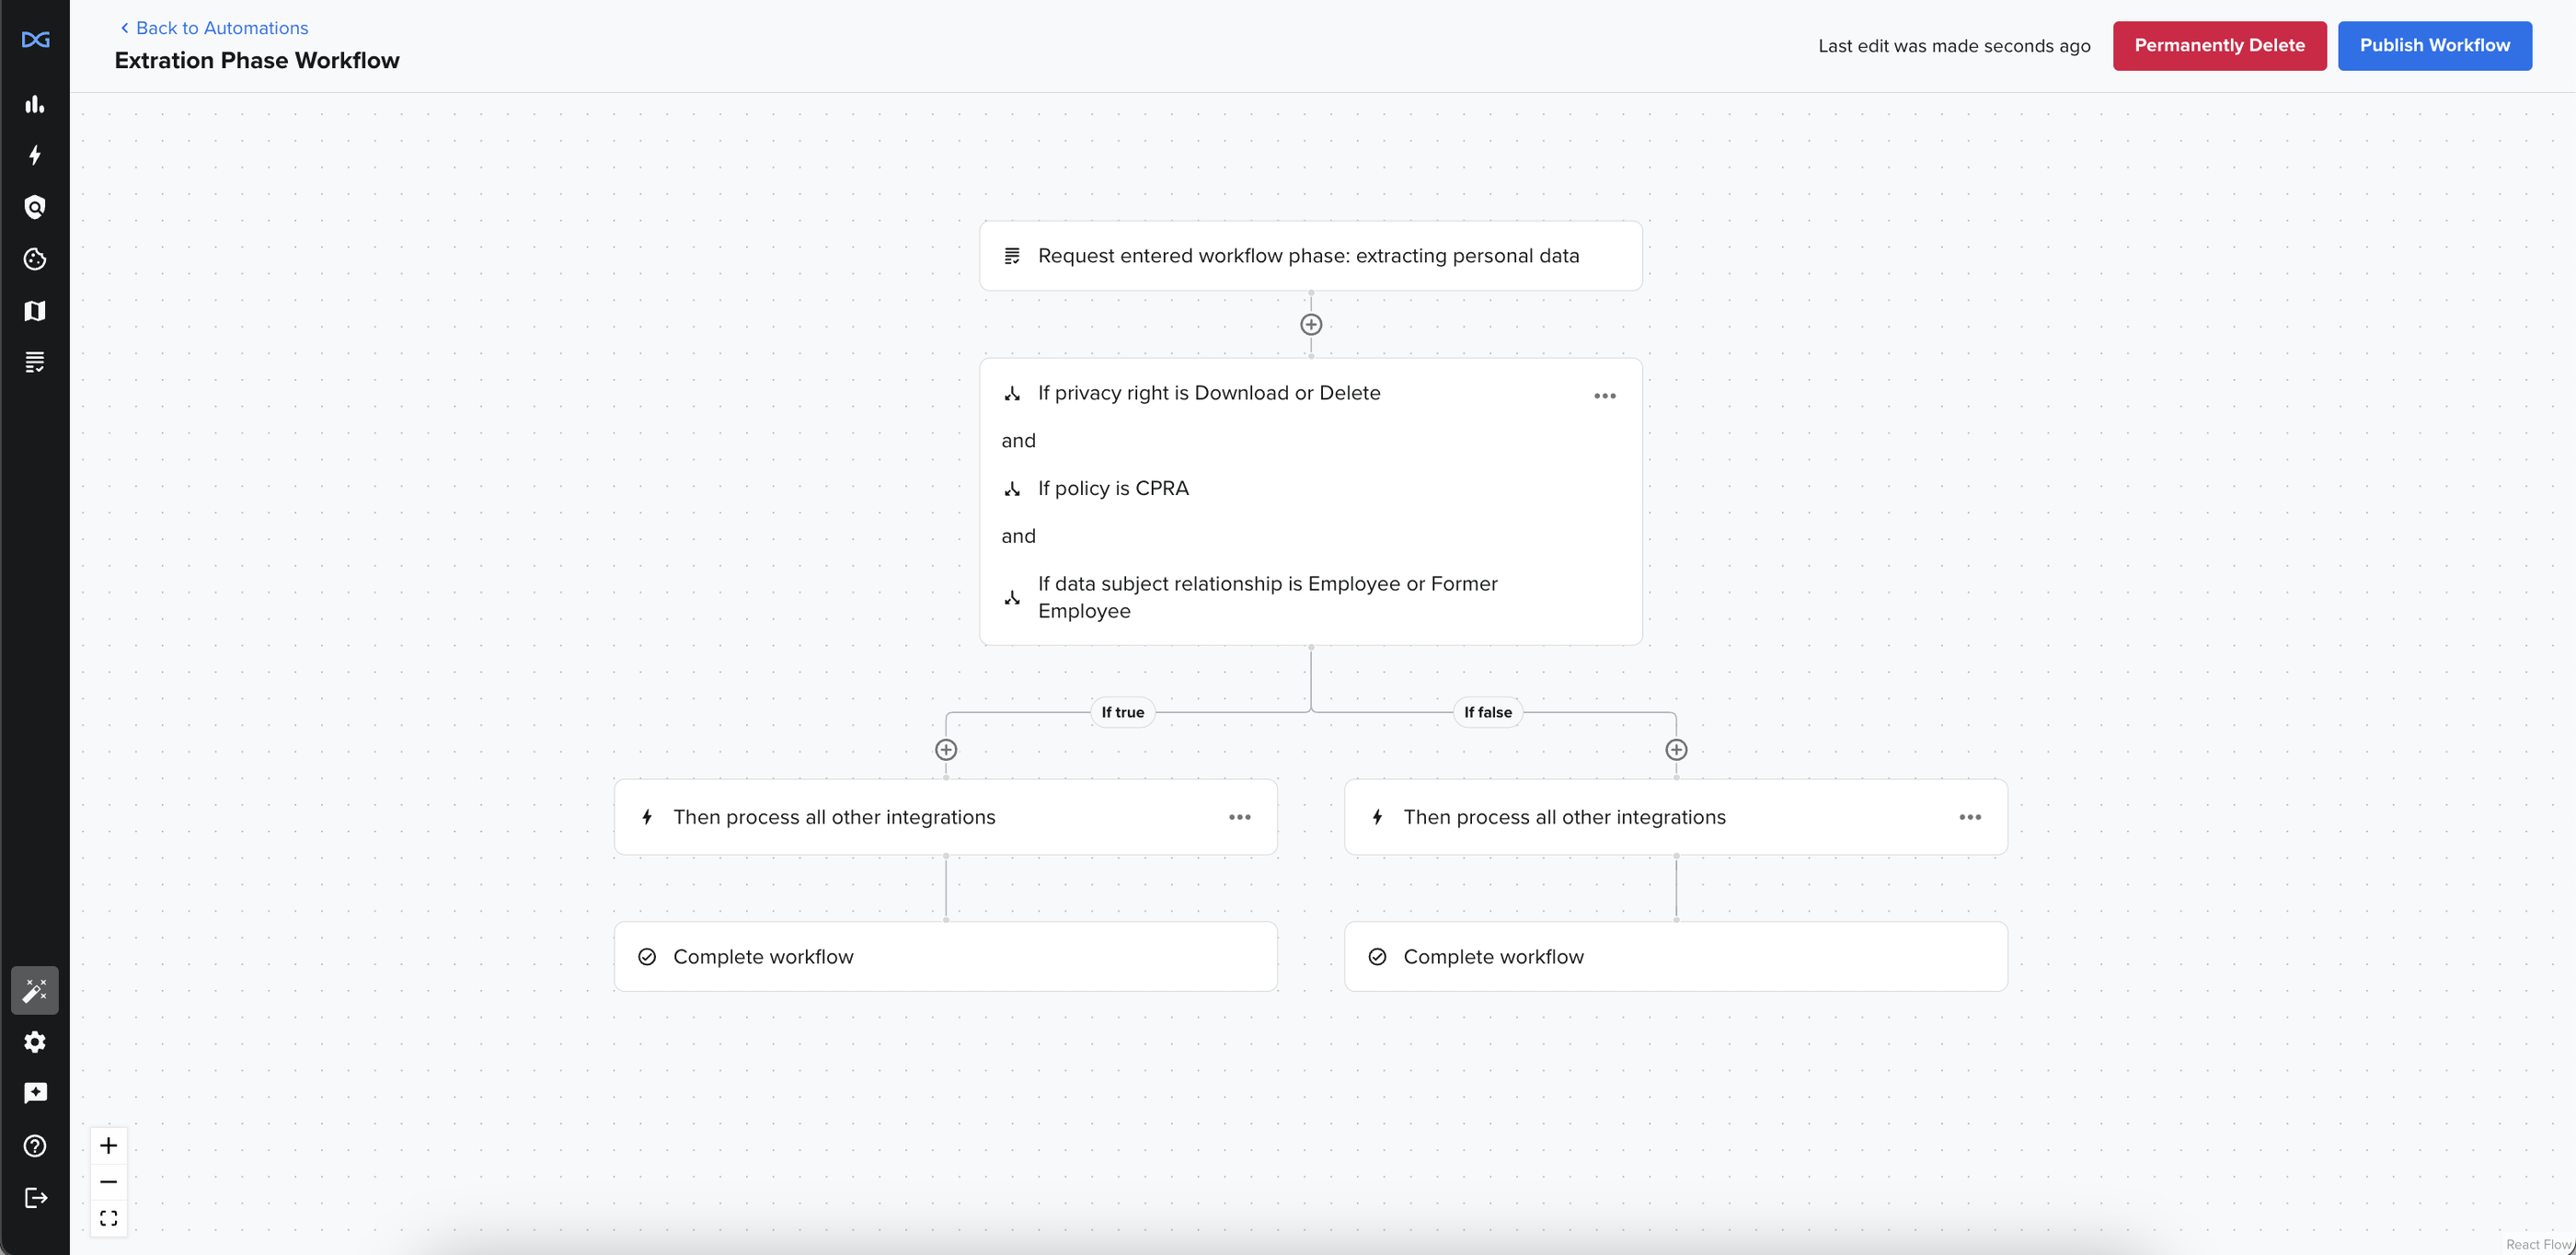
Example
In this example, the condition set reads: The Policy is CPRA AND (Privacy Right is Access OR Deletion) AND (Data Subject Relationship is Employee OR Former Employee)
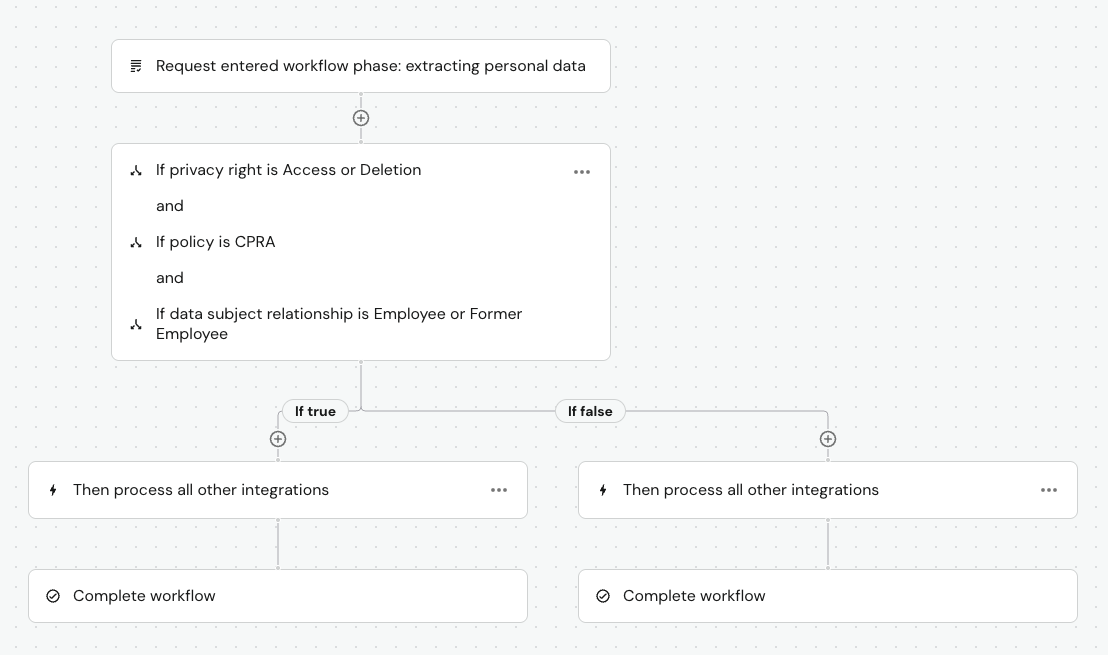
All three outermost conditions must evaluate to TRUE for the workflow to take the If true branch, otherwise it will always take the If false branch.
Supported Conditions
Request Policy
Allows logic based on the Privacy Request Policy associated with a Privacy Request. All available Privacy Request Policies in your account are able to be evaluated.
Use Cases:
- Denying a request based on a particular Data Subject location.
- Processing a different set of integrations for certain countries/states.
Privacy Right
Allows logic based on the Privacy Right being exercised. All DataGrail Privacy Rights are available for evaluation, except Opt Outs:
- Access
- Deletion
- Object to Processing
- Access Categories
- Rectification
- Data Portability
- Third Party Disclosure`
Use Cases:
- Processing a different set of integrations for different request types.
Custom Question Responses
If you have Custom Questions configured in the Privacy Request Center, the responses can be used to build logic in workflow automations.
Each custom question you have configured will appear as a separate condition option in the Add a Condition menu. If you have policy-specific questions, the name of the policy will be listed next to the question.
Important Notes:
- Only dropdown questions (single or multi select) are supported in Conditions.
- Select Add Value to consider multiple dropdown answers in the same condition with OR logic. To utilize AND logic, create an additional condition for the same question.
- If a Custom Question Option or Custom Question is removed from the Privacy Request Center, your workflow will not be impacted. However, any conditions utilizing these options or questions will evaluate to FALSE.
Use Cases:
- Using questions specific to your organization (e.g. products utilized, role, etc.) to determine how Privacy Requests are processed in DataGrail.
Data Subject Relationship
Allows logic based on the Data Subject Relationship entered for the request.
Use Cases:
- Processing a different set of integrations for customers vs. employees.
If Data is Found
Only available in the Extracting Personal Data and Pending Delete phases after a Process Integrations action.
This condition evaluates to TRUE if any of the selected integrations identify data in the preceding Process Integrations action.
Important Notes:
- On a Deletion or Pause Processing request, Direct Contact and Whole-Record Deletion Integrations do not retrieve data. If these integration types are used in an If Data is Found condition on a Extracting Personal Data workflow, they will never retrieve data.
Use Cases:
- Using a primary system of record to determine what integrations should be processed for deletion.
Time Bound Trigger
Only available in the Extracting Personal Data and Pending Delete phases after a Process Integrations action.
To add a Time Bound Trigger select the ellipses (...) on the preceding Process Integrations node and select Add Time Rule.
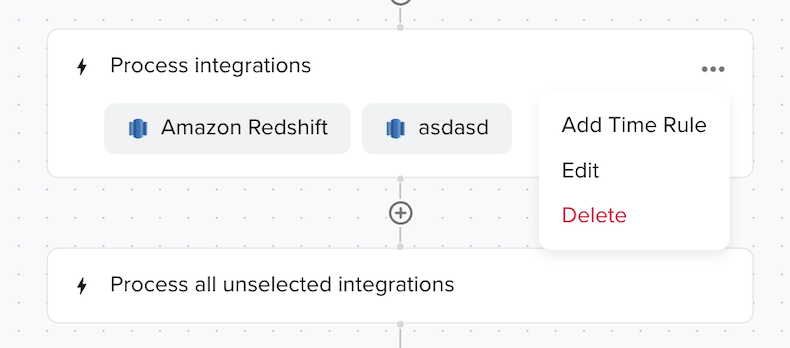
This condition allows you to skip any unfinished integrations in the preceding Process Integrations node, if they do not complete within a defined amount of days from their initial execution. If the integrations complete before then, the workflow will move past this condition.
Use Cases:
- Skipping a Direct Contact Integration if the processor does not reply quickly.
- Automatically skipping integrations that consistently encounter an error with a third-party API.
Actions
Actions allow your workflow to execute a task after a condition. Some actions are only available in specific phases, after certain conditions or other actions, or immediately before the terminating point in the workflow phase.
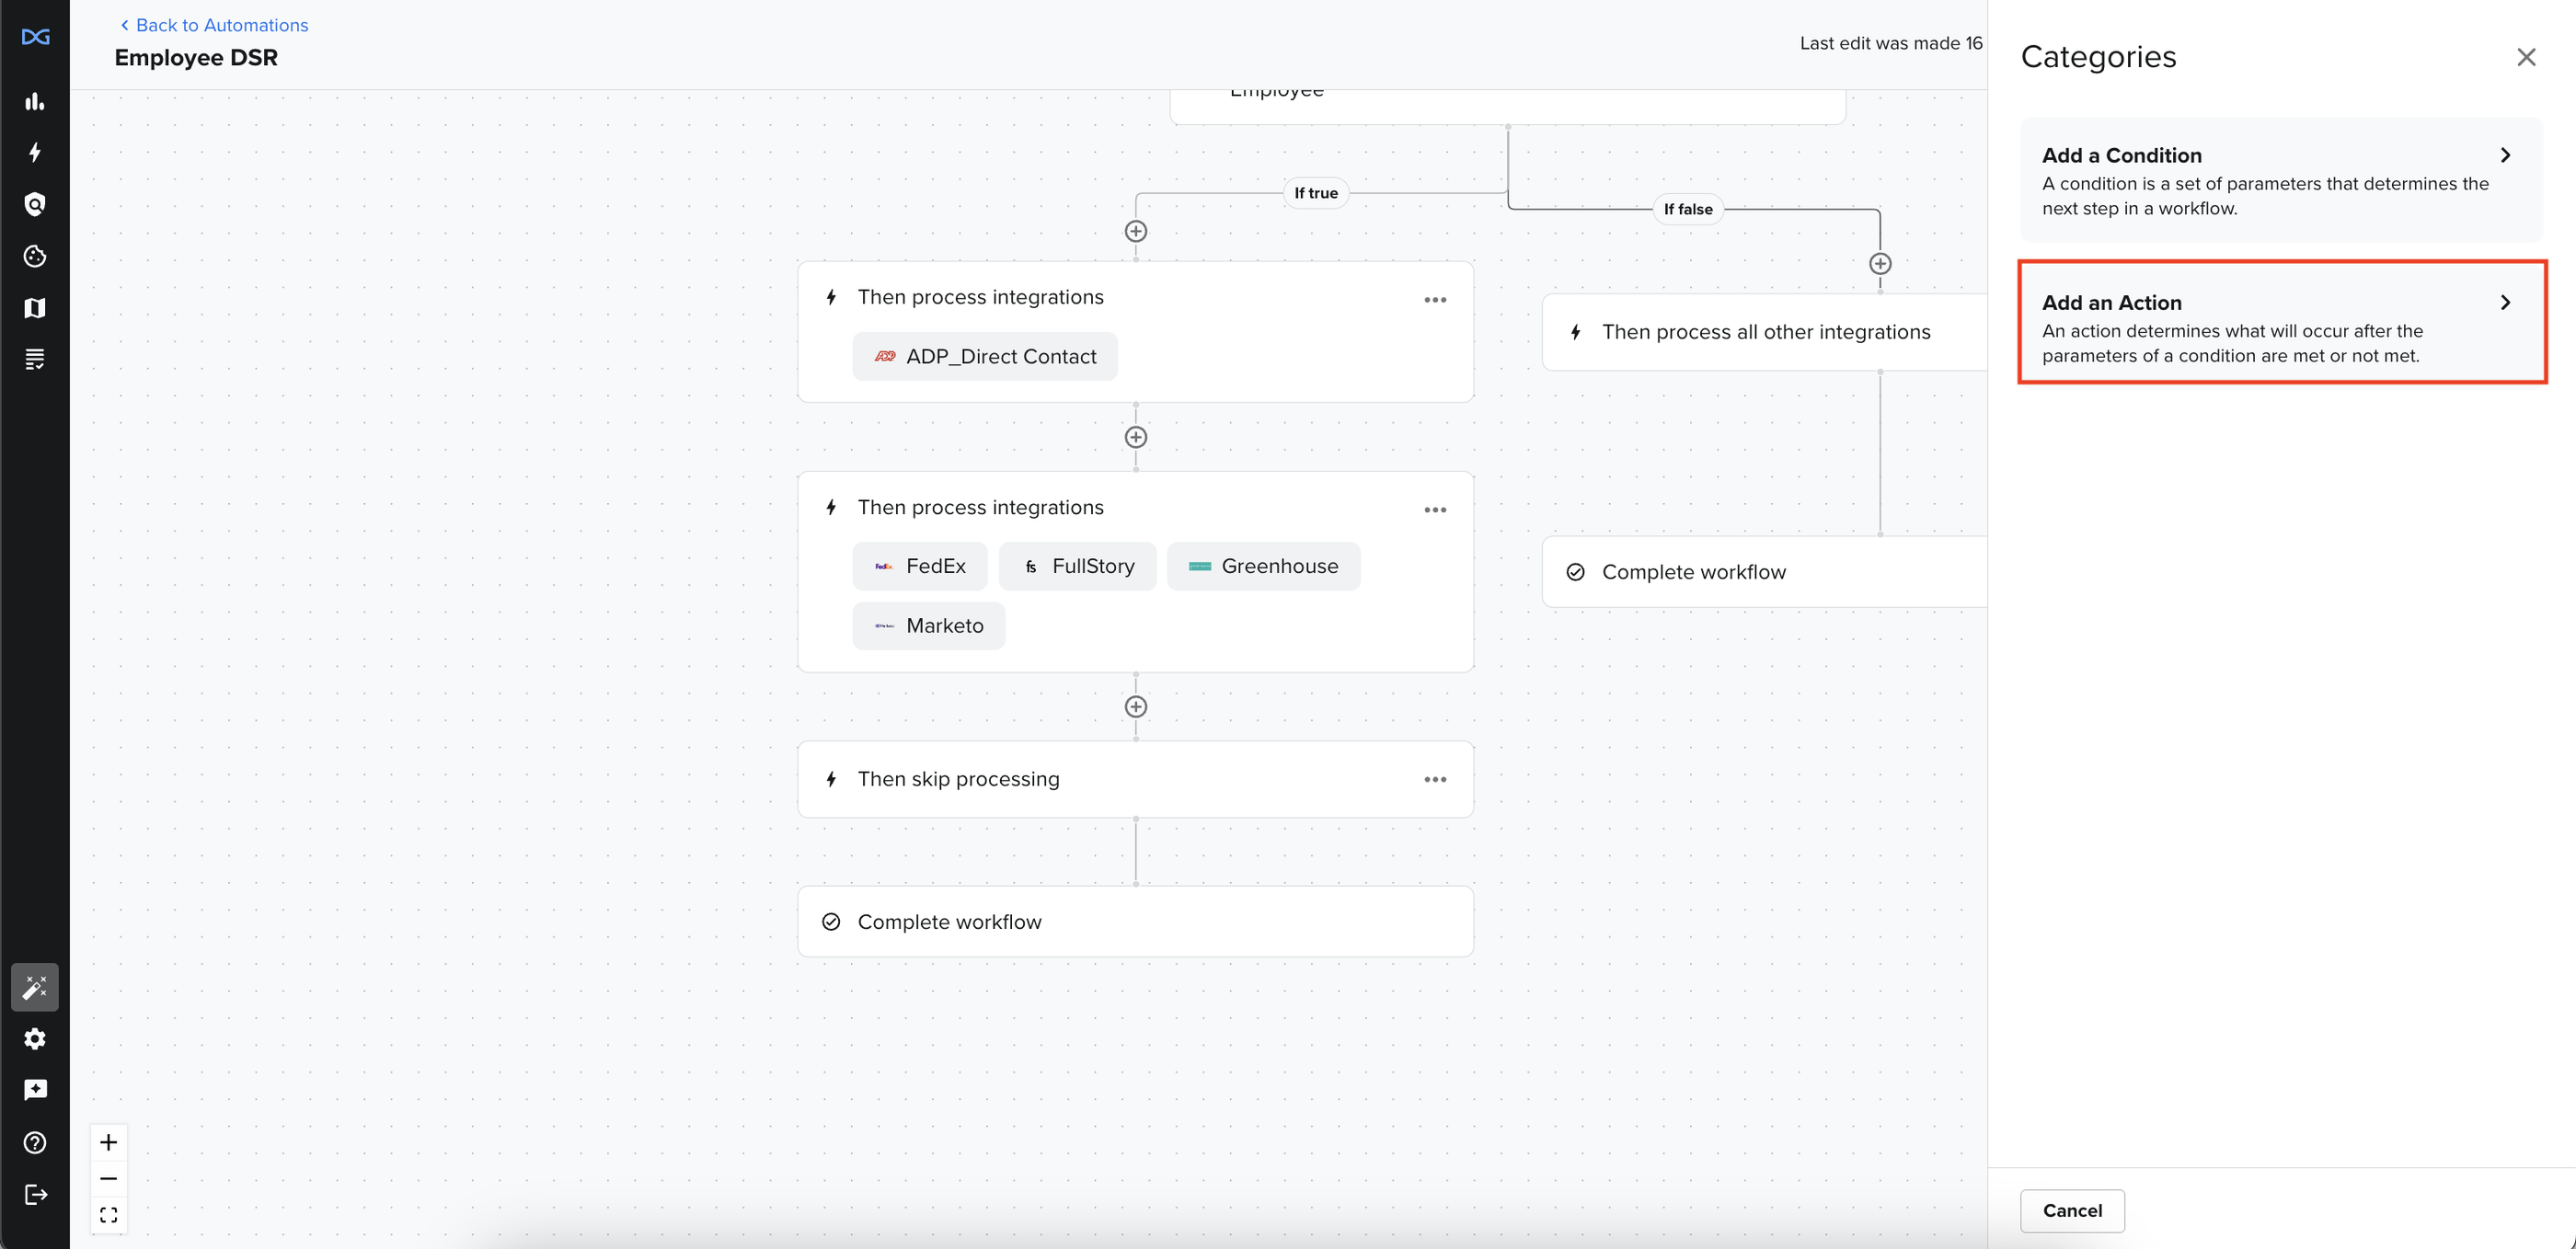
Creating an Action
To create an action node, select Add an Action and choose the desired action.
Supported Actions
Process Integrations
This action allows you to execute one or many integrations for the given workflow phase. This action can be used multiple times in a workflow, in conjunction with other conditions and actions.
This node is always followed by the default "Then process all other integrations" node.
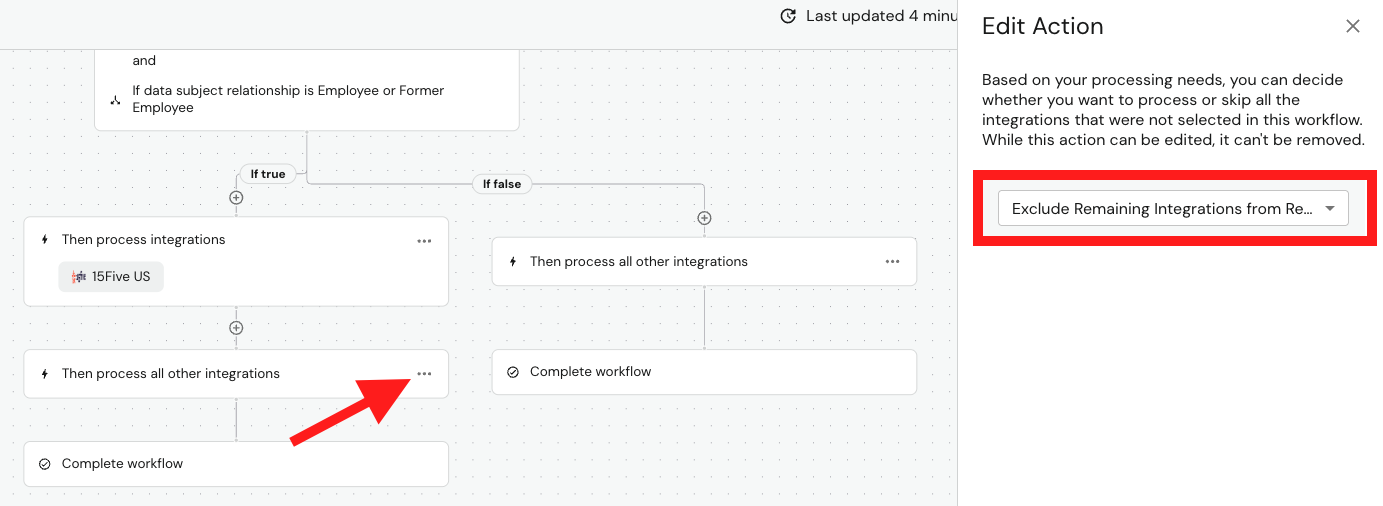
Selecting the ellipses (...) on this node provides the option to change this to "Exclude remaining integrations from request", which will prevent any further integrations from processing on the request.
Important Notes:
- If an integration is excluded from processing in the Extracting Personal Data state, it will also be excluded from processing in the Pending Delete state.
- On Deletion and Pause Processing requests, Direct Contact emails only send in the Pending Delete state. This integration type will not perform any action in a Process Integrations node in an Extracting Personal Data workflow.
Deny Request
Only available as the termination action in a workflow.
This action is equivalent to denying a request manually and will immediately move a request to Closed by Customer.
The Data Subject will receive the Privacy Request Denied Email Template as well.
Process Request
Only available in the Pending Action state as a terminating action.
This action is equivalent to selecting Process Request, moving the request forward to its next workflow phase and preventing any manual action from being needed.
Assign a Privacy Request to a User
This action allows you to assign a Privacy Request a DataGrail user.
Then Exclude Integrations From Processing
Only available in the Pending Action phase.
This action allows you to deselect integrations from returning data to the requester or executing deletion in the Pending Delete phase.
This action is equivalent to unchecking an integration manually on a request in Pending Action.
Publishing
When you have completed your workflow, select Publish Workflow to make it live on your account. If an existing workflow is already published in that workflow phase, it will be unpublished in favor of the new one. Published workflows cannot be edited.
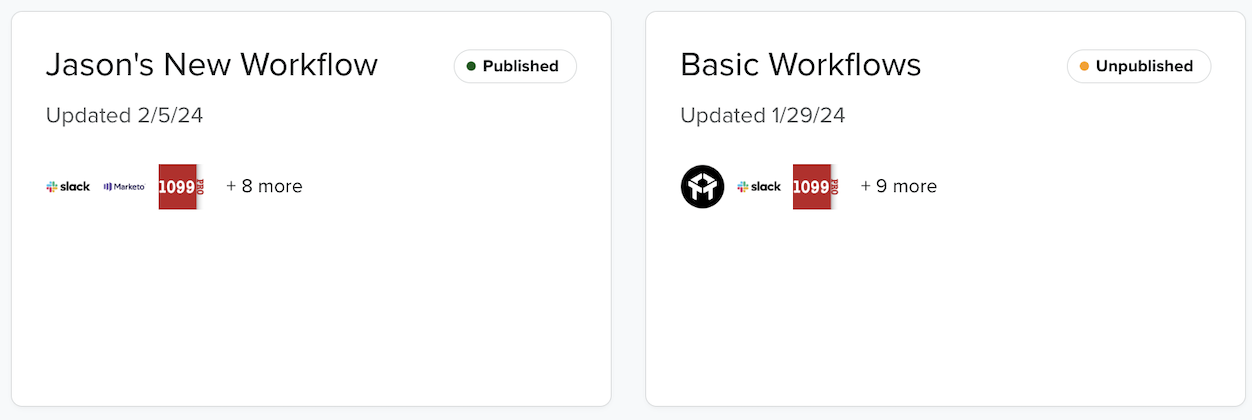
If you would like to continue editing later, exit the workflow builder at any time, and it will be saved as an unpublished draft that will not impact your live requests.
Once a workflow is published, both new and existing Privacy Requests that hit this workflow phase will be processed against it.
Request Processing
All Privacy Requests that enter the phase of a published workflow will be evaluated using it.
To view the status of a workflow, you will need to review the integrations list on the Privacy Request Details page. The Integration Statuses will indicate where the Privacy Request is the workflow.
Not Started - Will Process in a Workflow
This Integration Status indicates that there is a another workflow node being evaluated before this integration is triggered.

Processing
This status indicates that integration is running in your workflow, either through a "Process Integrations" or "Then process all other integrations" node.

Frequently Asked Questions
How do workflows handle integration errors?
If an integration used in a workflow encounters an error it will be retried daily by DataGrail. An integration error will always block a Privacy Request, unless a Time Bound Trigger is configured to skip it after a certain number of days.
Disclaimer: The information contained in this message does not constitute as legal advice. We would advise seeking professional counsel before acting on or interpreting any material.