JumpCloud
Note: if you do not have admin rights in JumpCloud you will not be able to complete this integration. Please contact your JumpCloud Admin for assistance.
DataGrail JumpCloud SSO Setup
Step 1. Login as an Administrator here. Then, follow the steps below:
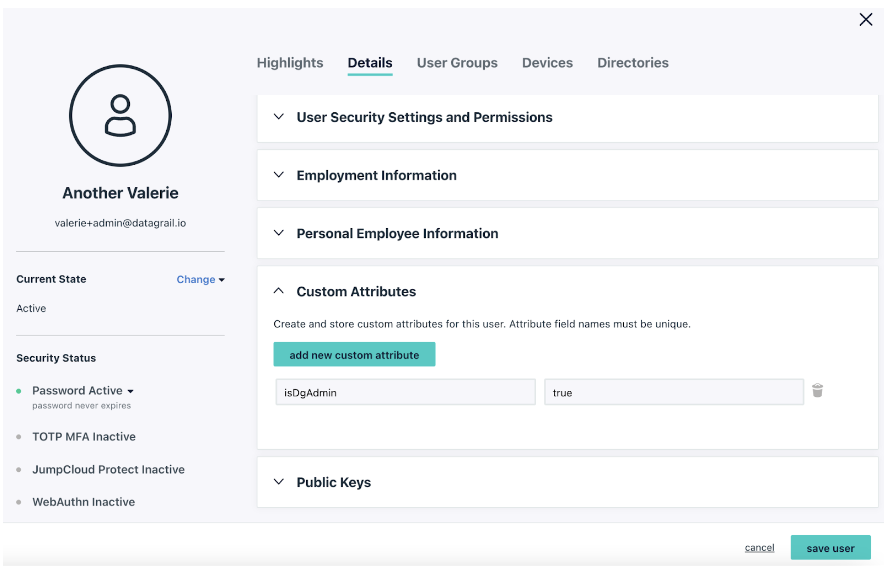
- Create a Custom Attribute
- Navigate to USER MANAGEMENT > USERS
- Select the user that will be a DataGrail Admin
- Navigate to DETAILS > CUSTOM ATTRIBUTES
- Select “Add New Custom Attribute”
- Create the Attribute
- Attribute Name : isDgAdmin
- Attribute Value : True | False (“True” if the user will be an Admin in Datagrail)
- Save User
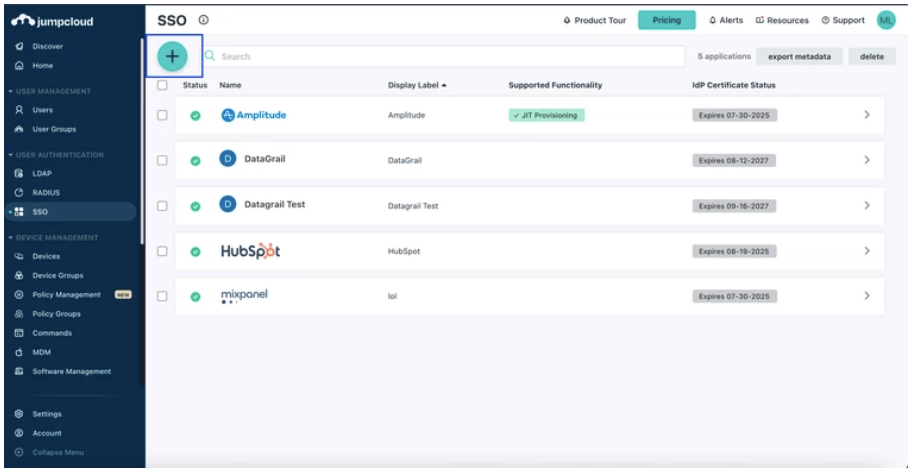
- Navigate back to JumpCloud SSO
Your result should look like the image below
Step 2. Navigate to the configured applications via USER AUTHENTICATION > SSO and add a new application by clicking on the ��“+” on the top left
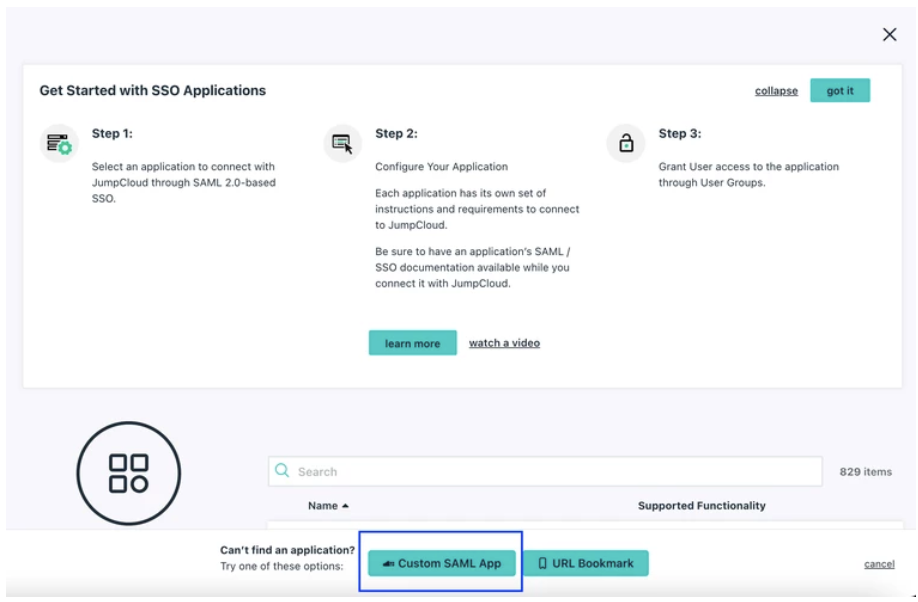
Step 3. Click “CUSTOM SAML APP” to create a new SAML application
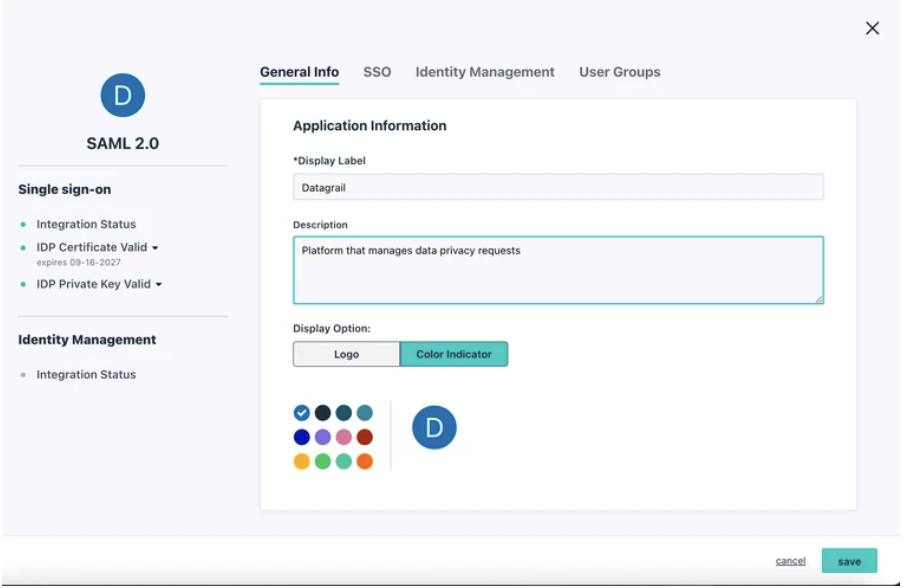
Step 4. Add the Application information and click “Save”
- Display Label = Datagrail
- Optional : Upload Logo (Datagrail will provide if requested)
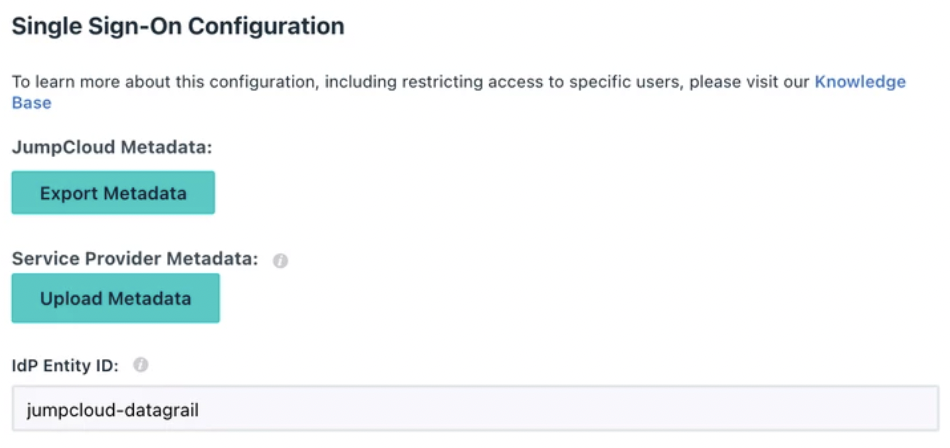
Step 5. Configure Single Sign-On Configuration options and insert the following information
- IdP Entity ID = jumpcloud-datagrail
- SP Entity ID = https://[customer_name].datagrail.io/saml/metadata
- ACS URL = https://[customer_name].datagrail.io/saml/auth
- SAMLSubject Name ID = email
- SAMLSubject NameID Format = urn:oasis:names:tc:SAML:1.1:nameid-format:emailAddress
- Signature Algorithm = RSA-SHA256
- Default RelayState = N/A
- Login URL = https://[customer_name].datagrail.io/saml/login
- IdP URL = https://sso.jumpcloud.com/saml2/datagrail
- Attributes (User Attributes)
| Service Provider Attribute Name | JumpCloud Attribute Name |
|---|---|
| first_name | firstname |
| last_name | lastname |
| is_dg_admin | isDgAdmin (this is a custom attribute created on the user- leave out if not created) |
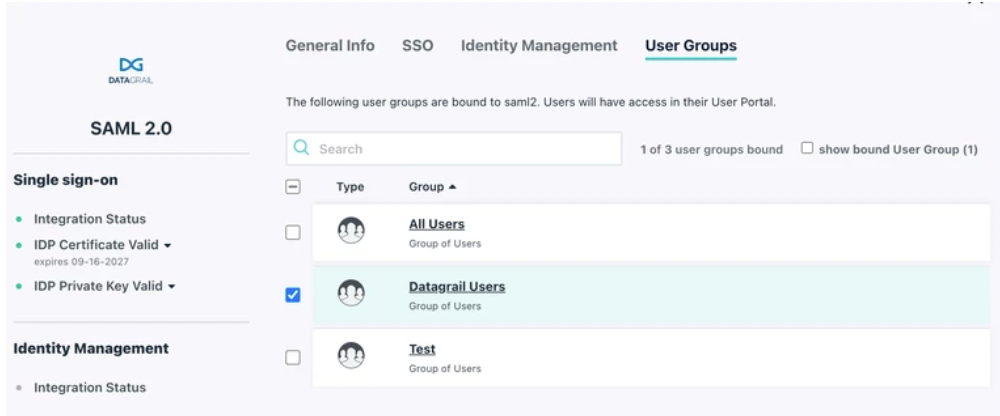
Step 6. Provision User Groups
- Click on the User Groups tab and select the group of users your want to provide access to DataGrail
Step 7. Click “Save” and provide XML Formatted Metadata to DataGrail by sending it to support@datagrail.io
- Click “Export Metadata” under “JumpCloud Metadata” to download the XML formatted metadata
- Send email to support@datagrail.io with subject line “[Company Name] Metadata URL”
Please email us at DataGrail atsupport@datagrail.iowith any issues or questions regarding your integrations!
Disclaimer: The information contained in this message does not constitute as legal advice. We would advise seeking professional counsel before acting on or interpreting any material.